Page 3 of 3 FirstFirst 123
Results 21 to 25 of 25
  1. #21
    New Member
    Join Date
    Oct 2014
    Location
    Peoria, IL
    Posts
    6
    First Question Answer: That is correct. Sew the baffles to your preferred first side, then do the head end treatment, then sew the baffles to the remaining side. I left the sides of the quilt unfinished prior to attaching the footbox.

    (1) Answer: For this reference the bottom drawing that shows 4 baffles around a 10x10 liner cap. It was difficult to show fold with my terrible drawing skills. While sewing this component, the baffles would be facing in towards the middle of the liner fabric. The finished piece unfolded would look like an 11x11 box with a 10x10 box of stitched thread inside. You would then "unfold" the baffles to look like the last drawing but with the "folded" seam allowances sticking out away from the flat surface. This side of the fabric will be what your feet will contact on the finished quilt.

    (2) Answer: This divides the foot box to help control down movement and keep it up near your toes. Attach this before sewing the baffles to the shell because you will be closing the footbox to sewing machine access at that point.

    (3) Answer: See answer for (1). You want to keep the perimeter of the liner connected to the shell with baffles so it doesn't collapse when stuffed with down. The isometric view shows what this will look like for this step.

    I'm very new to posting, so please bear with me on formatting my answers. This was this most difficult part of the quilt and I really wished I planned it out before I cut my fabric and sewed my baffles. The finished product prior to connecting to the quilt, looks similar to the isometric view. The green smaller box should have a folded "hem" of fabric that sticks out 1/2" towards the head of the quilt. The 14x14 side facing the viewer in the picture will have a 1/2" seam allowance that sticks out in the same direction as the "hems". These bits of fabric that stick out will be where we join the box to the quilt. A picture or two of the final product may be worth more than my terrible drawings and equally terrible descriptions.

    Added another awful drawing to further confuse.

    Last edited by ronniedobbs42; 01-22-2018 at 13:40.

  2. #22
    Actually, I think I'm starting to get it. That was really helpful! The pictures helped a lot.

    I would love to see pictures of the finished product when you get a chance. I think I'm going to use your method.

    P.S. At what point in the process doo you fill the footbox with down?
    Last edited by Nedh84; 01-22-2018 at 18:37.

  3. #23
    New Member
    Join Date
    Oct 2014
    Location
    Peoria, IL
    Posts
    6
    Quote Originally Posted by Nedh84 View Post
    Actually, I think I'm starting to get it. That was really helpful! The pictures helped a lot.

    I would love to see pictures of the finished product when you get a chance. I think I'm going to use your method.
    I made an imgur album to show the extra pictures and not hijack the thread too much.

    Karo Top Quilt With 3D Baffled Footbox https://imgur.com/gallery/PR0G7

    Let me know if that link works for you. This is my first time doing this stuff, so no idea if I'm doing things right. I'm just trying to help as much as I can because I really struggled with this part of the build.
    Last edited by ronniedobbs42; 01-22-2018 at 18:22.

  4. #24
    Senior Member Levi Tate's Avatar
    Join Date
    Jan 2015
    Location
    North East, USA
    Posts
    495
    Link works fine. Good job.

  5. #25
    New Member effensmurfy's Avatar
    Join Date
    Oct 2014
    Location
    Woodbury, NJ
    Hammock
    HH Deluxe
    Tarp
    WB Superfly
    Insulation
    Potomac UQ
    Posts
    30
    Quote Originally Posted by Shug View Post
    Go for the footbox! Can't tell you how to though as mine was done by HammockGear.
    Shug

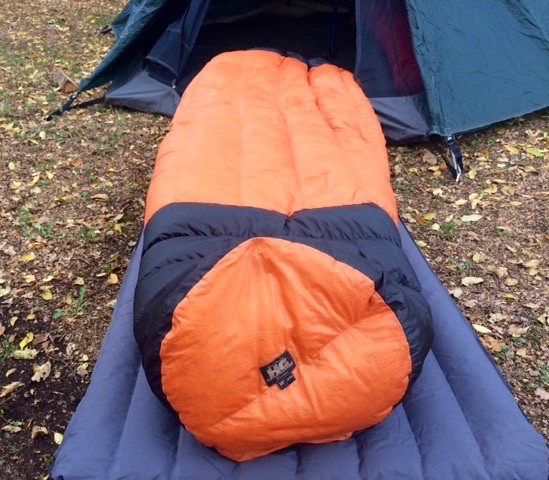
    Is that a tent I see? Maybe my eyes are playing tricks on me.

    Sent from my SM-G935T using Tapatalk

  • + New Posts
  • Page 3 of 3 FirstFirst 123

    Similar Threads

    1. Sewn Footbox vs. Open Footbox
      By NightHawk! in forum Top Insulation
      Replies: 45
      Last Post: 10-27-2017, 15:54
    2. WTT: My HG Burrow 20 long snap footbox for A HG burrow 20 long sewn footbox
      By trent562 in forum [TRADED] Items no longer available
      Replies: 2
      Last Post: 02-22-2016, 21:00
    3. HUG with footbox?
      By clutch146 in forum Do-It-Yourself (DIY)
      Replies: 3
      Last Post: 07-10-2014, 09:02
    4. Replies: 5
      Last Post: 03-31-2013, 22:28
    5. Footbox on a HH
      By tanker0707 in forum Do-It-Yourself (DIY)
      Replies: 0
      Last Post: 02-13-2012, 19:58

    Bookmarks

    Posting Permissions

    • You may not post new threads
    • You may not post replies
    • You may not post attachments
    • You may not edit your posts
    •