


Draft Stoppers
The hardest accessory to make is the draft stopper. The draft stoppers fit on the ends of the Bridge Hammock to block any drafts.
When I started making my Bridge Hammock, I debated about making the draft stoppers permanent or removable, i.e., temporary. I decided on temporary as being the most versatile.
Describing how to make a draft stopper is actually harder than making one.
To make the draft stoppers you will first have to obtain the following dimensions from the Bridge Hammock.
- The width of the fabric at both the head and foot ends. It is
easiest to simply lay the hammock on the floor, flat and measure the fabric across the ends.- The spreader bar lengths, from bar ring to bar ring. Needed for
both the head and foot ends if they differ- The distance from the spreader bar to the outside loop of the
overcover. Do this with the hammock occupied and the clothes line pu lled tigt in order to get a true measurement. This is needed for both the head and the foot ends if they differ. They will if the spreader bars are of unequal lengths.- Also, the following dimensions are needed if the spreader bar
compression forces are to be computed by the program:
- the length of one side of the suspension triangle, i.e., the
length of the suspension triangle from the bar ring to the apex ring. This distance should be the same for both the head and foot suspension triangles, but if they differ, you will need both.- The distance down the webbing at which the webbing separation is
measured. Need this for both the head and foot ends if the compression forces are computed for both end spreader bars.- The webbing separation at the distance down the webbing specified
above. This measurement is made when the hammock is occupied.
The above measurements are all that is needed to compute the dimensions of the draft stopper end panels.
The draft stoppers are made in two pieces:
- the end panel. The end is triangular on the top and extends from
the accessory rings to the outside attachment loop of the overcover. The bottom of the end panel is a parabola. The end panel is illustrated below:
In designing the end panel, I first hand fitted the draft stopper to the end of the hammock. That worked, but was frustrating and I refused to repeat on the other end of the hammock. I then tried an ellipse, but an ellipse didn't fit too well. At this point Grizz suggested a parabola in an email - good choice. The program detailed at the end of this article will print out the parabola needed for the end panel.
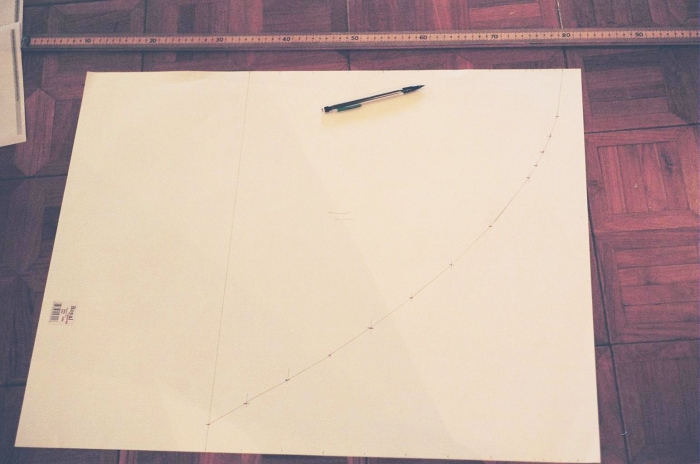
To make an end panel, obtain the above measurements and dimensions computed by the computer program. It is best to lay the dimensions out on a paper pattern and then transfer to the fabric. I have found poster paper, 22" x 28", good for this purpose. It is pretty cheap. Only half of the parabolic arc need be made on the paper pattern.
I suggest drawing the parabola on poster paper. No fancy drawing instruments needed. A yard stick or a meter stick and a pencil suffice. I suggest marking the data points printed by the computer and then connecting the points with straight lines drawn using the meter stick. Then draw parallel lines 1" inch outside those lines. This gives a 1" seam allowance. Cut out the resultant pattern.
The full parabola is not needed. Half of the parabola only will do. You can trace the pattern on the fabric and then flip the pattern and trace the other half.
Also, note that the triangular top portion of the end panel need not be put on the poster paper pattern, but can be drawn directly on the fabric.
Once the poster paper pattern has been made, lay out the fabric, draw a line for the middle of the draft stopper, lay the parabola pattern on the fabric lined up with the line and trace half of the parabola, flip the pattern and trace the second half. Also, mark the top of the parabola on the center line.
To complete drawing the end panel on the fabric, measure up the center line from the mark for the top of the parabola an amount equal to the distance from the spreader bar to the overcover loop and mark. Then draw lines from the inside edge of the seam allowance at the ends of the parabola to this mark.
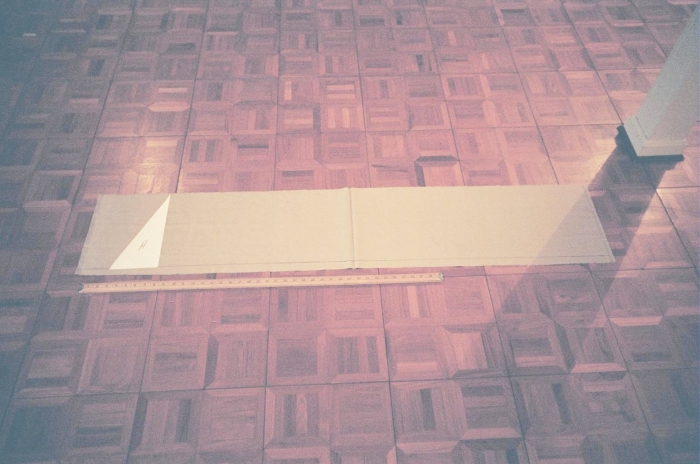
prototype end panel drawn on cheap material:
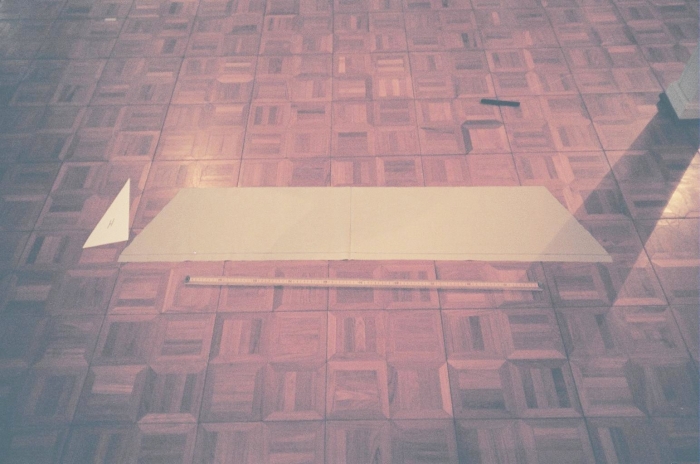
prototype end panel cut out from cheap material:
If you are making the draft stoppers permanent, i.e., connecting them to the end of the hammock fabric you can skip the next portion on the belly bands. You can sew the end panel to the fabric or use a zipper or Velcro using the seam allowance.
Next we have to make the belly band for the draft stopper.- the belly band has a trapezoidal shape to fit from webbing to
webbing and under the hammock. The belly band is sewn to the end panel made above along the bottom of the parabolic arc.
To make the belly band, two more measurements are needed. Before making these measurements, 8 tie off bars should be added to the hammock webbing. These tie off bars are used to secure the head and foot end belly bands to the hammock. The tie off bars should be added to the outside side of the webbing, 12" and 22" from the accessory rings.
Once the tie off bars have been added to the webbing, at the head end, measure the length from the tie off bar 12" from the accessory ring to the corresponding tie off bar on the other side of the hammock. The length needed is from tie off bar to the corresponding tie off bar at the same end of the hammock, down under the hammock. To measure this length, use a length of string with overhand stopper knots at both ends. Insert one end of the string under one tie off bar and pull a stopper knot snug to the tie off bar. Run the string under the hammock to the corresponding tie off bar on the opposite side of the hammock and thread through the tie off bar. Pull the string snug against the hammock fabric. Get in the hammock and make sure that the string is snug. You can pull the string tight until you can feel it against the underside of the hammock, then let it loosen until you can just barely feel it and it is still snug against the hammock fabric. Mark the string or clip to the webbing at this point. Measure the length of the string from tie off bar to tie off bar. This will be the length B of the trapezoid below.
Do the above for both the head and foot ends of the hammock.
These measured lengths will be one side of the belly band trapezoids.
The trapezoids have the following shape:
The length of L is equal to the end fabric width. The length of B is the length measured above with the string. The length of the two sides W is the distance from the accessory ring to the first tie off bar less 0.25".
We only need a paper pattern for the small triangle. The base, b, of this triangle is obtained by subtracting B from L and taking half of the result:
b = (L - B)/2
Take a corner piece of the poster paper left over from cutting out the parabola shape. On one side measure and mark the length b. Now lay your ruler or meter stick or yard stick diagonally across the paper so that the end is at the mark and the distance W on the ruler intersects the other side of the poster paper. Draw a line for this and cut out the triangle.
To make the belly band, lay out the fabric and square off the end. Draw a line 1" from the end. This will be the seam allowance for attaching the belly band to the parabolic arc on the end panel. Lay the triangle cut above with the base, b, on the seam allowance line and near the selvage. The hypotenuse of the triangle should be towards the edge of the fabric. Draw a line along the hypotenuse and mark the top of the triangle.
NOTE: I have used the cheap material for the following pictures since I can draw black lines which are visible in the pictures.
Now measure from the end of the marked triangle, along the seam allowance line a length equal to the fabric width. Flip the triangle and lay the base b on the seam allowance line again with the end on the fabric width mark. Draw the hypotenuse again and mark the top of the triangle.
Now draw a line between the two top marks. The belly band is now laid out on the fabric.
Cut out the belly band, being careful not to cut on the seam allowance line.
Sew the belly band to the parabolic arc of the end panel. Sew the outside sides of the fabric together.
REMEMBER: the LONG side of the belly band is sewn to the parabolic arc.
Sew on the seam allowance line. It is easier to get things lined up if you start sewing at the middle of the belly band and sew out to the ends. Sewing from one end to the other end will magnify any slight misalignment when you get to the other end.
There are 2 "tricks" needed to get the belly band to line up along the arc and get the lengths to match.
- Snip the seam allowance on the belly band approximately every 2".
Snip only 3/4" of the allowance and NOT the whole 1" allowance. See the first Belly band illustration above.- starting at the mid-point, sew only 4 or 5 temporary stitches.
Then cut the threads leaving 6" to 8" free and move along the seam allowance line approximately 3" and stitch another 4 or 5 stitches.As you move along, make sure the edges match and the fabrics are tight against each other. Continue this until you reach the end, making sure that the end of the belly band meets the arc end. It will be easier and give more control to turn the sewing machine flywheel by hand rather than use the foot or knee switch.
Once you have reached the end and the belly band end matches the arc end, then go back to the middle and start sewing along the seam allowance line. Pull the previously sewn temporary stitches as you reach them by grabbing one of the long free ends and pulling it free. Stitch to the end.
Repeat on the other half of the parabolic arc.
When the belly band has been sewn to the end panel, fold the seam allowance fabric in half towards the belly band and sew it flat. Then sew the folded fabric to the belly band so that the raw fabric edges are hidden. This is easier than trying to fold and sew in one step due to the curvature at the bottom of the parabola.
If you are binding the edges with bias tape, do so at this time. If you are hemming the edges do so now.
Now attach 4 single cord tie offs to the four corners of the belly band and a double cord tie off to the top of the triangle of the end panel. The cord tie offs on the corners next to the end panel should be placed on the inside of the belly band. The other 2 tie offs are placed on the outside of the belly band.
Next get one of the ITWNexus pack clips listed in the materials list and about 2" of 7/8" wide grosgrain and find the middle of the belly band on the shorter long side, the side that goes from webbing to webbing under the hammock. The pack clip is sewed to this spot with the opening of the pack clip facing up towards the hammock. Fold the grosgrain in half and sew it together. Then thread the grosgrain through the pack clip and fold in half. Sandwich the belly band between the two halves of grosgrain with the pack clip opening facing up towards the bottom of the hammock and sew in place.
The draft stopper is almost finished.
Get 2 of the ITWNexus end clips listed in the materials list. Tie a double overhand knot over the stopper knots at the free ends of the 2 tie off cords at the corners of the belly band where it connects to the end panel and slide the end clips on the cord with the cord under the clip end of the clip.
Get a length of the 3/32" diameter shock cord. The shock cord will be strung between the tie off bars 22" from the accessory ring. Thread the end through one tie off bar and tie a small loop around the tie off bar using a bowline knot. String the shock cord through a Line Lok and then under the hammock to the tie off bar on the opposite side of the hammock, through the tie off bar and back approximately one-quarter to one-half way across the hammock. Tie off the free end of the shock cord to the Line Lok. This shock cord will be used to secure the middle of the belly band using the pack clip sewn there. Tension the shock cord using the Line Lok so that the shock cord is snug against the underside of the hammock. The shock cord should just barely lift the hammock fabric when the hammock is empty.
Note, when you get in the hammock you should not feel the shock cord through the hammock. If you do, simply adjust the tension in the shock to loosen it, test and continue adjusting until the shock cord is snug to the bottom of the hammock, but you do not feel it.
To attach the draft stopper to the hammock, thread the cord with the end clip through the accessory ring and thread the other tie off cord on the same end of the belly band through the tie off bar at 12" from the accessory ring. Pull the two tie off cords together and tie a loop in the free end of the cord through the tie off bar and hook the end clip in the loop. The loop should be tied so that the cords are pulled tight.
Repeat on the other side of the hammock.
Now reach under the end of the hammock and clip the shock cord into the belly band pack clip. The length of the shock cord can be varied using the Line Lok to vary how tight the belly band is pulled toward the center of the hammock. The shock cord will slide in the pack clip to keep it centered on the belly band.
The draft stopper is now attached to the hammock.
Repeat on the other end of the hammock.
the following illustrations shows how the shock cords appear from above the hammock:
Note that if your head and foot end spreader bars are of unequal length, the draft stoppers will fit on only one end. You may want to mark them in some manner to identify which is which.
Mating Overcover and draft stoppers
Next we want to mate the overcover and the draft stoppers together so that they can be used as a system to enclose the hammock during cold, windy weather.
After experimenting with various methods for mating the overcover to the draft stoppers and sealing the gaps, I finally went back to the K.I.S.S. Design principle. Thus, I use tie off cords to join the edges of the the overcover to the tops of the draft stoppers. Simple to design, make, use and field repair if necessary.
Add double tie off cords to the apex of the triangle of both draft stoppers. The double tie off cords should be sewn on the outside of the draft stopper and as close to the apex corner as possible.
Before proceeding, check your draft stoppers. Hang the overcover and have someone get in the hammock and pull the clothes line tight and tie the double tie off cords at the apex of the draft stoppers to the overcover attachment loops. The sides of the upper triangle should not have droopy sides. If the sides droop, you will need to tighten them up using darts. Pull one side of the draft stopper up to the overcover attachment loop until the side is fairly tight, but not pulling the draft stopper away from the bottom of the hammock. Mark the excess for a dart. Repeat on the other side. Remove the draft stopper and sew the darts. Repeat on the other draft stopper.
To mate the draft stopper and the overcover, add 6 single tie off cords to each end of the overcover. 6 single tie off cords will be added to matching positions on the draft stoppers.
You will notice that the overcover extends past the draft stopper. This extension is folded down over the draft stopper top and tied off. The tie off cords on the overcover will be installed on the outside side and sewn first to grosgrain and the grosgrain will then be sewn to the overcover.
Use 6 4" lengths of 7/8" grosgrain. Bar tack single 6" tie off cords to the middle of each length. The first tie off cord is installed next to the pack clip and approximately 1" towards the attachment loop in the middle. Sandwich the edge of the overcover between the grosgrain with the tie off cord on the outside and on the top edge. Sew the perimeter and then sew an 'X' in the middle. It is easier to first sew the inside half and then the outside half.
The next two tie off cords are sewn to the overcover edge in the same manner. They are placed equidistant between the first tie off cord and the attachment loop dividing that portion of the end of the overcover into thirds.
Repeat on the other side of the overcover end.
Now hang the overcover with the draft stoppers installed and the double tie off cords at the top of the draft stopper tied to the overcover attachment loop. With somebody in the hammock and the overcover clothes line pulled tight, mark the positions of the overcover tie off cords on the draft stopper. NOTE: it is important that the hammock is occupied when marking the draft stoppers to get true positions for the tie off cords on the draft stoppers. The overcover should drape down over the draft stopper so that the draft stopper tie off cords are down from the top edge. The draft stopper tie off cords will get progressively closer to the edge as they get closer to the attachment loop.
To sew the tie off cords to the draft stopper, use 6 2" lengths of 7/8" grosgrain. Bar tack the 6" tie off cords to one end of the grosgrain. Then sew the grosgrain to the draft stopper with the tie off cord at the positions marked. Again sew the perimeter and then an 'X' in the middle.
Done.
Install the draft stopper on the hammock and tie the overcover and draft stopper tie off cords together. The end flap on the overcover laps the draft stopper and seals the join between the two.
Repeat on the other end of the hammock.
The overcover and draft stoppers are now mated and enclose the Bridge Hammock.
The following pictures show overcover and draft stopper mated and with draft stopper fully loosened and partially open:
inside with poncho liner as under quilt and draft stopper and overcover mated:
With all tie off cords secured, the ventilation of the inside of the hammock will be minimized. To increase the ventilation, you may untie the top of the draftstopper from the attachment loop and let it drop. To increase the ventilation, untie successive tie off cords until sufficient ventilation is achieved. A portion or the entire top of the draftstopper may be opened for ventilation in this manner. If all tie off cords are untied, the draft stopper top may be simply draped over the spreader bar.
Note: the draft stoppers can be either temporary as described above and used with the overcover or permanently sewn to the overcover along the top edges of the draft stopper or permanently sewn to the end of the hammock along the parabolic arc.
Temporary has the advantage that the draft stoppers can be used with or without the overcover and vice versa. Also, the ventilation may be adjusted simply and easily.
If the draftstoppers are sewn to the overcover, another means must be devised for ventilating the hammock with the overcover installed. If sewn to the hammock, the above method may be used for adjusting the ventilation.
When I first decided that I would use no zippers or Velcro on my Bridge Hammocks, I thought it might be difficult to achieve this. However, as I fully accepted this decision, I found it to be very liberating. Instead of limiting myself to two options and trying to figure out the best way to position and use a zipper or Velcro and which would be the best one to use, I found myself imagining all kinds of different ways to achieve the same ends. All kinds of ideas started popping into my head. More than I could ever try, test and use. My new problem became one of sorting the ideas into those which were bad (and discarded) from those which were good and those which were really good, and then deciding which were practical to implement. Some of the ideas turned out to be not only good, but too good.
Mating the overcover and the draft stoppers illustrated this new problem of ideas which were too good. I had decided that I didn't want to sew the overcover and draft stoppers together since I could no longer use either separately. So how to seal the join between the two to stop drafts. One idea which I tried was to add 1" wide flaps on the sides of the triangle with a channel on the edge for shock cord. The flaps had a 'V' notch at the apex of the triangle and the shock cord ran up the channel on one side, across the gap, over the clothes line, and down the channel on the other side. The flaps then rested on top of the overcover and the shock cord pulled them tight against the overcover. Turned out this idea was too good because the flaps sealed too well. I might as well have sewn the draft stoppers to the overcover, the seal was so good. Condensation became a real issue. Adding ventilation by means of openings in the overcover and/or draft stoppers now added complexity to the design. Complexity in designing, making and using. Any openings needed to be either fully closed, partially open or fully open. Well you can see where this was headed. A good idea that was simply too good at achieving the end wanted.
So I went back to the K.I.S.S. Design principle and simply added the matching tie off cords to the overcover and draft stoppers. Simple to design, make and use. It doesn't seal up the hammock so tightly that condensation is an issue and if it does arise, I can easily partially or fully open the draft stoppers to compensate.
Bug Netting
The bug netting is essentially made by combining the overcover and the draft stoppers into a single accessory using nanoseeum instead of 1.1 oz ripstop.
NOTE: You will have to mark the nanoseeum for cutting and sewing. White tailors chalk is very good for this. It can be obtained at any fabric store if you don't already have some. Just be careful not handle the netting excessively as the chalk tends to "disappear" with much handling.
I would advise making the overcover and draft stoppers first to gain experience since the ripstop used there is less expensive than the nanoseeum used for the bug netting.
The following diagram shows the dimensions of the bug netting on my Bridge Hammocks:
The main body of the bug netting is made the same as the overcover with some small differences.
- I did not trust the nanoseeum to withstand the forces exerted on
the tie off bars and the pack clips. So I sew ripstop patches on the netting at those points and then sew the pack clips and the tie off bars to the ripstop patches.- The bug netting draft stoppers are not really draft stoppers, but
bug stoppers and are permanently sewn to the main body of the bug netting which corresponds to the overcover. To this end, a seam allowance is made on the end of the main body of the bug netting and the top, triangular portion of the end panels. The loop attachments on the ends of the main body of the bug netting are thus set back from the edge 1" instead of set on the edge as for the overcover.- The end panels for the bug netting add a 1" seam allowance on the
sides of the upper triangle as shown here:
Part 5


 Reply With Quote


Bookmarks