Results 1 to 7 of 7
  1. #1
    New Member
    Join Date
    May 2011
    Location
    Northern Virginia
    Hammock
    Nano 7 w/BugSock
    Tarp
    OES MacCat Std
    Insulation
    IX UQ, XP TQ.
    Suspension
    Whoopie Slings
    Posts
    33

    First Major DIY: DIY Synthetic Quilt

    I have read everything I can find and acquired some materials. I plan to work on this over this coming weekend.

    I have gathered most of my inspiration from the following instructions:
    http://www.lytw8.com/uploads/LytW8_S...structions.pdf

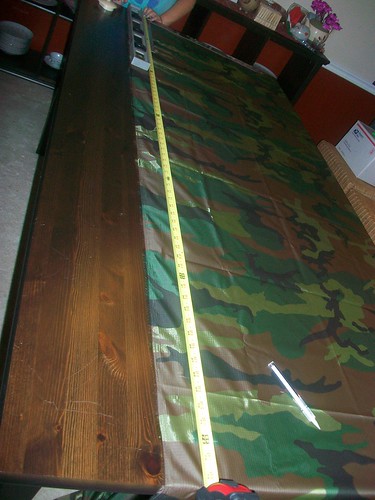
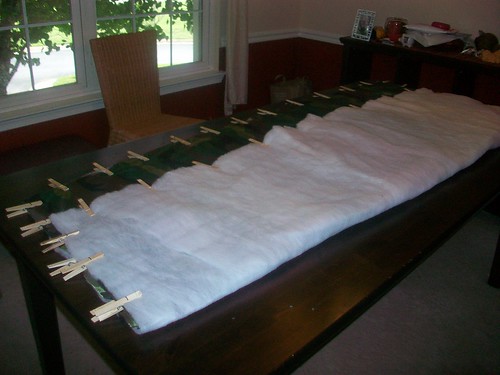
    I am of course doing synthetic instead of down, so I will have to make some adjustments. Here is my materials list, with project costs and initial quilt measurements:
    https://spreadsheets.google.com/spre...=0&output=html

    I have never sewn before, but I am going to get a crash course tonight from my Mom when I pick up her sewing machine.

    I have a few questions:
    1) Hem...what type? I have read about simple rolled hems, french hems, etc. I want the cleanest look I can achieve. My plan is to hem all but the top or bottom, insert the Climashield, and hem the last edge. What should my strategy be here?

    2) Creating channels for shock cord at top/bottom. What is the best way to go about this?

    3) I am 5'6", 160lbs. Side sleeper on the ground, but making the transition to a hammock. My brief testing of laying in a hammock, I was less married to laying on my side and was equally as comfortable laying somewhat straight, or crooked. Is the length of 70", and shoulder width of 48" and footbox width of 38" seem reasonable?

    Any other advice, guidance, etc?

    Thanks so much, love this forum. My addiction to camping, to UL backpacking, to DIY, to hammock camping is continuing to grow. I may need to seek help.

  2. #2
    Senior Member hiker_DC's Avatar
    Join Date
    Nov 2009
    Location
    Wenatchee, WA
    Hammock
    Double layer DIY
    Tarp
    11 x 10 Sil DIY
    Insulation
    DIY Climashield
    Suspension
    webbing and rings
    Posts
    319
    For the "cleanest" look, I would use the sew-it-then-turn-it-inside-out method. Very professional looking and it saves weight by not needing the grosgrain. I used a slightly modified version of these instructions for my underquilt.

    The same method is used for a top quilt as well (only MUCH easier). Put all of your layers together and sew all but 10-12 inches of one side together. Turn inside-out and 'Robert is your mother's brother'.
    I have two doctors, my left leg and my right. ~G.M. Trevelyan

    Everywhere is walking distance if you have the time. ~Steven Wright

  3. #3
    New Member
    Join Date
    May 2011
    Location
    Northern Virginia
    Hammock
    Nano 7 w/BugSock
    Tarp
    OES MacCat Std
    Insulation
    IX UQ, XP TQ.
    Suspension
    Whoopie Slings
    Posts
    33
    This is sort of how I have been envisioning. I just need to figure out how to neatly incorporate the shock cord channels into the main piece of fabric. I think I have it figured out, I just need to test on some scrap fabric.

    I am hoping to start working on this tonight. So I will update this thread as I make progress.

  4. #4
    Senior Member Redoleary's Avatar
    Join Date
    Feb 2009
    Location
    Pennfield Twp, MI
    Hammock
    DIY gathered end
    Tarp
    Hinterland gear
    Insulation
    down bag
    Suspension
    strap & E.T.'s
    Posts
    3,910
    Images
    70
    If you're doing a full length UQ then I wouldn't imagine there's a great benefit to side channels. Loops in the 4 corners to tie the suspension to will be much easier to build and you can still do the inside out trick for nice hem. I found channels to be a PITA and prefer to hang my UQ a-la JRB style suspension (4 corners).
    Here's a little demo I did while trying to wrap my head around the inside out concept. (Ignore all the IX stuff). Look fwd to a progress report.

    http://www.youtube.com/watch?v=ZJN6SS7-kNs
    Good luck,
    RED

    My Youtube Channel

    Deep peace of the running wave to you.
    Deep peace of the flowing air to you.
    Deep peace of the quiet earth to you.
    Deep peace of the shining stars to you.
    Deep peace without end to you.
    adapted from - ancient gaelic runes

  5. #5
    New Member
    Join Date
    May 2011
    Location
    Northern Virginia
    Hammock
    Nano 7 w/BugSock
    Tarp
    OES MacCat Std
    Insulation
    IX UQ, XP TQ.
    Suspension
    Whoopie Slings
    Posts
    33
    It is a top quilt. I am going to incorporate channels in the top/bottom for shock cord closure.

    For sure going with the inside/out method. Thanks for the video!

  6. #6
    New Member
    Join Date
    May 2011
    Location
    Northern Virginia
    Hammock
    Nano 7 w/BugSock
    Tarp
    OES MacCat Std
    Insulation
    IX UQ, XP TQ.
    Suspension
    Whoopie Slings
    Posts
    33
    I worked on this over the weekend, and I am 90% done with the top quilt.

    I gathered all of my materials and tools on Saturday afternoon. I have never sewn before. I played around with some scrap fabric and decided to roll with it. Measuring everything was pretty tricky. I had a yard stick and a right angle straight edge, but I still ended up triple checking all of my measurements. Marking with the grease pencil was not working that great, so I switched to a sharpie...which in the end was a mistake because I have a couple sharpie marks on my fabric. 
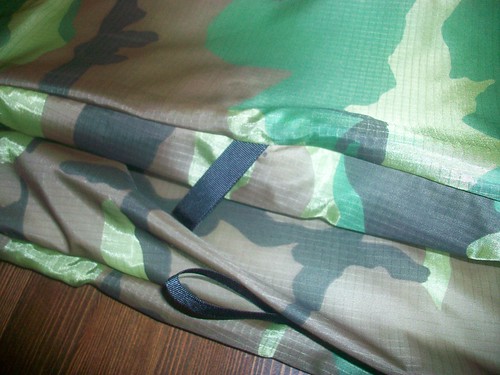
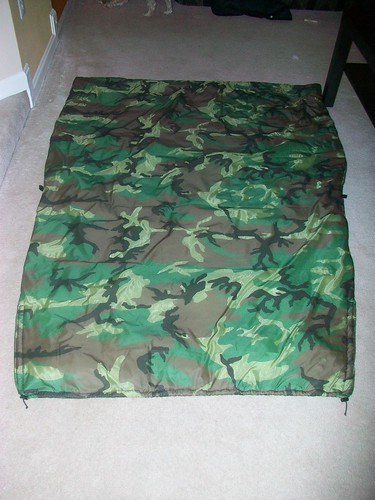
Considering it is a camo print, it is not that noticeable - but still annoying.
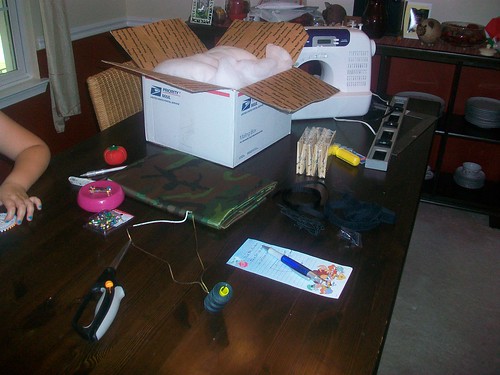


    After getting the basic measurements of 72" long x 52" wide (2" of seam allowance on both sides)...I layed both sides of fabric on top of the Climashield to trim. I cut in the taper and trimmed that as well. I started tapering down 24" from the top down to the footbox of 38" (again, seam allownance. I ended up with 50" wide at top, 36" wide at footbox, and a 70" length.)


    I pinned in the grosgrain loops at the mid section of the quilt, inside the fabric, as I would be inverting the fabric so the insulation would be inside, and the seams would be clean.


    The only seam I hemmed on the outside was the footbox, where I rolled it over 2x and created a channel for the shock cord. I would do this differently the next time around I think. I should have trimmed the Climashield better at the footbox, which would have made sewing the hem much easier. Overall it does not look that bad, just not as good as I would want. I then sewed on the velcro at the footbox. If I were to do this again, I would sew this on the bottom side before joining it all together to create a cleaner look. Black thread on camo looks fine I guess.

    I then layed it out on the floor, with my daughter and I both testing it out. She swims in it, but shes only 10 I am 5'6", 160lbs - and it seems to fit me well.


    I decided against a shock cord channel at the neck. Partly because I was not sure how to do it and make it look good, and partly because I don't think I would like having shock cord dangling around my neck while sleeping. I am either going to sew on a simple grosgrain/velcro attachment, or find a snap of some sort. Also I would consider just doing a couple snaps instead of velcro at the footbox on the next one. I have not weighed it yet, but I am guessing somewhere in the 12-14oz range at most. I rolled it and set it beside a bottle for size representation. It could be compressed quite a bit more I think in a bag.

    Overall I am happy with the project. I spent $85 which included a bunch of stuff I will use over and over again. It took me 5-6 hours, and I learned a lot. Next time I will need to take a little more time, learn to use the sewing machine a little better, and plan an overall better construction. Was a fun and useful first DIY project tho.

    Thanks for all of the ideas and support from this forum!


  7. #7
    Senior Member
    Join Date
    Jul 2010
    Location
    Memphis, TN
    Hammock
    DIY gathered end
    Tarp
    Cheapo HF camo
    Insulation
    SA down throw UQ
    Suspension
    HF straps w/ rings
    Posts
    164
    Looks good! Much better than my $10 wally world sleeping bag

  • + New Posts
  • Similar Threads

    1. WTT: DIY for a synthetic top quilt
      By shef in forum [TRADED] Items no longer available
      Replies: 7
      Last Post: 12-06-2014, 17:41
    2. Help with synthetic vs down top quilt
      By Jlotarsk in forum Top Insulation
      Replies: 30
      Last Post: 09-21-2013, 01:26
    3. WTB synthetic quilt
      By dammfast in forum Archived WTB
      Replies: 0
      Last Post: 05-22-2012, 10:20
    4. synthetic top quilt
      By Crawldaddy in forum Top Insulation
      Replies: 4
      Last Post: 04-15-2009, 13:35

    Tags for this Thread

    Bookmarks

    Posting Permissions

    • You may not post new threads
    • You may not post replies
    • You may not post attachments
    • You may not edit your posts
    •