Page 1 of 5 123 ... LastLast
Results 1 to 10 of 41
  1. #1
    Senior Member rb_daniel's Avatar
    Join Date
    Jun 2011
    Location
    Brevard, NC
    Hammock
    Pisgah Dreamer DIY
    Tarp
    Mamajamba w/doors
    Insulation
    WL UQ, DIY TQ
    Suspension
    Whoopie Slings
    Posts
    104

    The Pisgah Dreamer - DIY Hammock

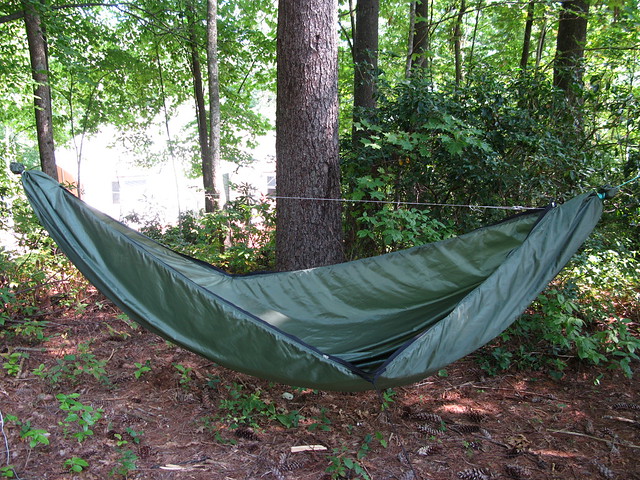
    Well, I'm almost finished with my first DIY project. I could have started with a stuff sack, but I decided to do a double layer hammock with bug net instead

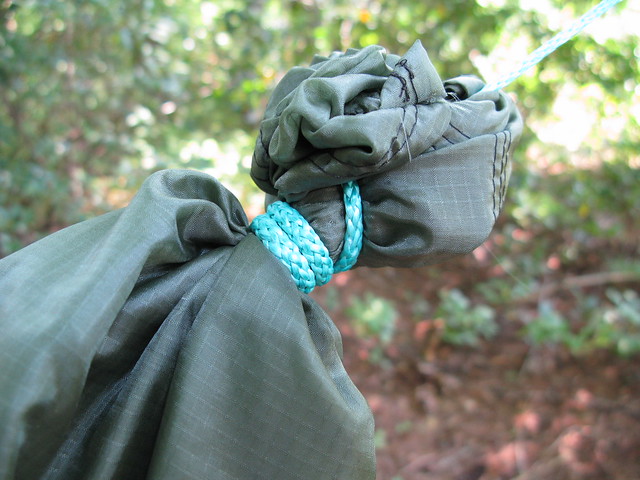
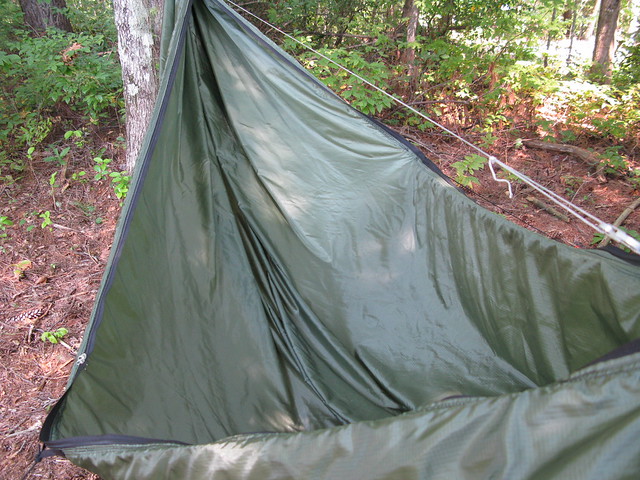
    I started with 11 foot-long pieces of 1.1oz ripstop seconds from DIY Gear Supply, which were cut as parallelograms, with the long sides being offset by 6 inches. The pieces were however wide the fabric came, which was between 60-65 inches. The bug net will zip all the way down from the top, and roll up into a peak bag, like the 2QZQ mod #4, only not nearly as well-executed. Getting that third zipper slider on there was a bit of a pain. The whipping is like the Warbonnet whipping, but only using the whoopie sling. This whipping tightens on itself, and seems to work really well.

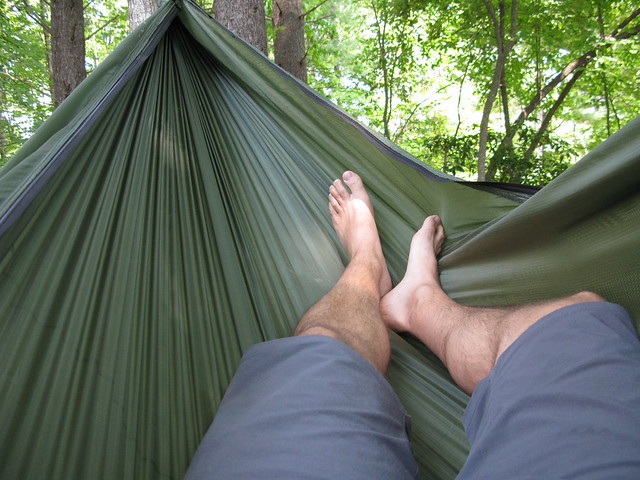
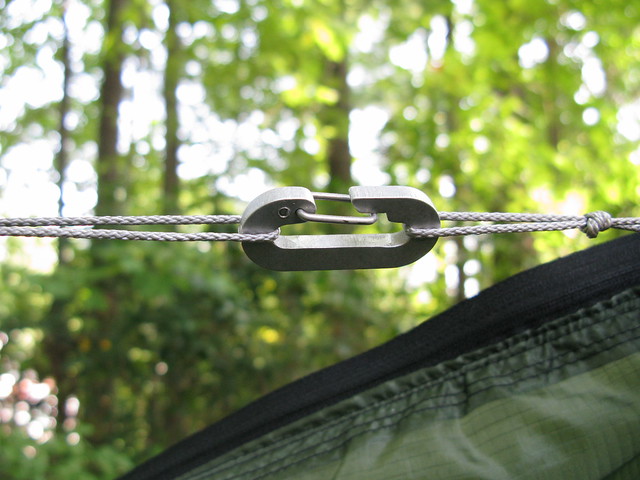
    I gave my HH Exped to my girlfriend (currently on its way back from 2QZQ), because at 6'0", it was a little cramped. The Pisgah Dreamer, however, is really spacious, and super comfy. Like I said, it's a double layer, so I can slip a pad in there until my next DIY project (2 UQs) is done. The ridgeline is also detachable, thanks to the Dutch Ridgeline Biner.

    Anyway, here are some pics. I'll post more when it's finished.


  2. #2
    Senior Member dragon360's Avatar
    Join Date
    Nov 2010
    Location
    Toronto, ON
    Hammock
    WBBB/TR, DIY, HH, SB DL, GT UL
    Tarp
    ID/OES/WB/WL
    Insulation
    HG/WB/Go-Lite/WB
    Suspension
    Whoopie/Straps/DW
    Posts
    4,704
    Images
    1
    Very nicely done!!
    The key to immortality is first living a life worth remembering. - St. Augustine

    Some people feel the rain. Others just get wet.
    - Bob Marley

  3. #3
    Senior Member Hangin' Burrito's Avatar
    Join Date
    Jun 2009
    Location
    In the North Carolina mountains!
    Hammock
    Black DIY dual zipper
    Tarp
    Black DIY 10'X12'
    Insulation
    DIY down UQ & TQ
    Suspension
    Whoopie sling
    Posts
    1,535
    Wow! That's a sweet looking hammock. Great job on your 1st DIY project.
    Good idea about the double layer until you get the UQ's done.
    Definitely keep us posted as you go along on it.
    "Is this the best you've got?!!" (Shortoff Mtn., Linville Gorge 2010)

    "Life is tough.....it's even tougher if you're stupid!".....(John Wayne)

  4. #4
    Senior Member raiffnuke's Avatar
    Join Date
    May 2011
    Location
    Pittsfield, MA
    Hammock
    WBBB,WBRR,DIY
    Tarp
    HG WP,WB Superfly
    Insulation
    Hammock Gear
    Suspension
    Whoopies&DutchGear
    Posts
    3,779
    Images
    44
    Great work! Thanks for sharing.

  5. #5
    Member hang loose's Avatar
    Join Date
    May 2011
    Location
    Springdale AR
    Hammock
    Knotty Gathered DIY
    Tarp
    Hilleberg
    Insulation
    Pad
    Suspension
    whoopies
    Posts
    52
    Looks great RB. How was the zipper work? A hammock is my next project, which thanks to all the great posts here seems like it will manageable. The thought of zippers has got me a little squeamish though.

  6. #6
    Senior Member bdbart's Avatar
    Join Date
    Aug 2010
    Location
    Gulfport, MS
    Posts
    181
    Let's see some pics with the bugnet
    My memory's not as sharp as it used to be. Also, my memory's not as sharp as it used to be.

  7. #7
    Senior Member rb_daniel's Avatar
    Join Date
    Jun 2011
    Location
    Brevard, NC
    Hammock
    Pisgah Dreamer DIY
    Tarp
    Mamajamba w/doors
    Insulation
    WL UQ, DIY TQ
    Suspension
    Whoopie Slings
    Posts
    104
    Getting one or two sliders on a zipper is really easy. Getting that third one on was a struggle. Not sure how exactly I finally got it on, but it finally went after quite a bit of tugging. I'm sure there's an easier way. Also, my sides are sewn together near the ends to form a bit of a tube, like HC4U's DIY HH instructions. If you're going that route, I would recommend sewing the zippers to the ripstop before sewing the "tube" together. It's a little difficult getting in the corners where the zippers come together.

  8. #8
    Senior Member rb_daniel's Avatar
    Join Date
    Jun 2011
    Location
    Brevard, NC
    Hammock
    Pisgah Dreamer DIY
    Tarp
    Mamajamba w/doors
    Insulation
    WL UQ, DIY TQ
    Suspension
    Whoopie Slings
    Posts
    104
    Quote Originally Posted by bdbart View Post
    Let's see some pics with the bugnet
    I have to cut it out and sew it to the zipper first. Hopefully doing that tonight. I'll post more pics as it progresses.

  9. #9
    Senior Member Jazilla's Avatar
    Join Date
    Oct 2006
    Location
    Carencro, Louisiana
    Hammock
    Dream Hammock
    Tarp
    Superfly
    Insulation
    20* zepplin/DIY TQ
    Suspension
    Straps/Buckles
    Posts
    1,990
    Images
    108
    So the bugnet won't be removable if I am understanding right. Why the 3rd zipper pull?
    Yosemite Sam: Are you trying to make me look a fool?
    Bugs: You don't need me to make you look like a fool.
    Yosemite Sam: Yer deerrrnnn right I don't!

  10. #10
    Senior Member rb_daniel's Avatar
    Join Date
    Jun 2011
    Location
    Brevard, NC
    Hammock
    Pisgah Dreamer DIY
    Tarp
    Mamajamba w/doors
    Insulation
    WL UQ, DIY TQ
    Suspension
    Whoopie Slings
    Posts
    104
    Not totally removable, because the zipper doesn't separate on the bottom. Didn't feel like searching for sleeping bags with separating zippers that would work. One slider on one side, and three on the other. That way, I can open up the one side, with two of the sliders, and have them in the middle and reachable for easy in and out. Or, I can pull the one slider from the opposite side to the bottom, and all three from the main side all the way down, and then roll the netting up into a small stuff sack connected to the ridgeline at the foot end, so it's practically removed. If you go to the 2QZQ site and look at mod #4, it's the same premise.

  • + New Posts
  • Page 1 of 5 123 ... LastLast

    Similar Threads

    1. NC>Pisgah>mar29 -31
      By Loki in forum Southeast
      Replies: 1
      Last Post: 03-29-2013, 17:50
    2. DIY Gear Supply/Backwoods Dreamer Hammock blank
      By alrany187 in forum Other Vendors and Services
      Replies: 14
      Last Post: 06-22-2012, 20:59
    3. Pisgah Day Hike
      By rb_daniel in forum Trip Reports
      Replies: 9
      Last Post: 08-26-2011, 05:58
    4. PN-30 & Pisgah NC
      By TriMOPER in forum Hangouts, Campouts, and Trip Planning
      Replies: 7
      Last Post: 04-11-2010, 22:39
    5. Backwoods Dreamer Winter Dream Tarp V.3 Prototype Report
      By turtlelady in forum Weather Protection
      Replies: 21
      Last Post: 03-18-2010, 09:46

    Tags for this Thread

    Bookmarks

    Posting Permissions

    • You may not post new threads
    • You may not post replies
    • You may not post attachments
    • You may not edit your posts
    •