Not long ago, while lying in my hammock, I had an idea for a suspension system. It's a kind of hodge podge of features from different systems with a new twist: the ability to adjust the ridge line length/ hammock sag on the fly. I'm calling it the Single Line Suspension (SLS).
The reason that I'm referring to it as the SLS is because the suspension lines and the ridge line are all one long piece of cord. The system is very similar to the Trucker's Hitch suspension, in that it uses tree huggers and a pair of the SMC descending rings. It's also a very light system at 4.8 oz for 50' total of Amsteel Blue and 2 descending rings. The tree huggers I am using for this writeup add an additional 2.8oz but I plan on making a lighter set in the near future.
Materials needed for this project:
~50' of a single braid rope (45' for the main line and 5' for the hammock lines). Amsteel 12 or Amsteel Blue recommended, available here.
2 X SMC descending rings
2 X Tree huggers
For this suspension I am again using the 3mm Amsteel Blue for the main line (2500 breaking strength, .08 oz per ft). The total length on the main line is 45'. I came up with 45' by assuming that I would need about 15' of suspension line on each end of the hammock, and I also took into account the normal length of my ridge lines (approx 101"). I then added a few extra feet of line 'just in case'. You can always trim off extra line but it's hard to add needed length.
I HIGHLY recommend using a single braid line for this project, something like Amsteel Blue of the Amsteel 12. The reason I am calling for the use of single braid line is because of the use of clove hitches in the suspension system. I have found that a clove hitch will tend to lock when using a double braid and it very hard to get undone. I have found that single braid lines with the Samthane coating like the Amsteel allow the clove hitch to release, even after sleeping in the hammock overnight.
I installed this system on my ATHH hammock and used it on an overnight excursion and it worked very well. You could use this suspension on almost any type of non-spreader bar hammock but it works very well on hammocks with the channel sewn into each end, which would include HAAB style hammocks like ENO, TTTM, Trek Lite, Travel Hammock, etc and also hammocks like the Claytors. It even works on my Warbonnet El Dorado, although it moves the ridge line to the outside of the hammock instead of the internal ridge line I am currently using.
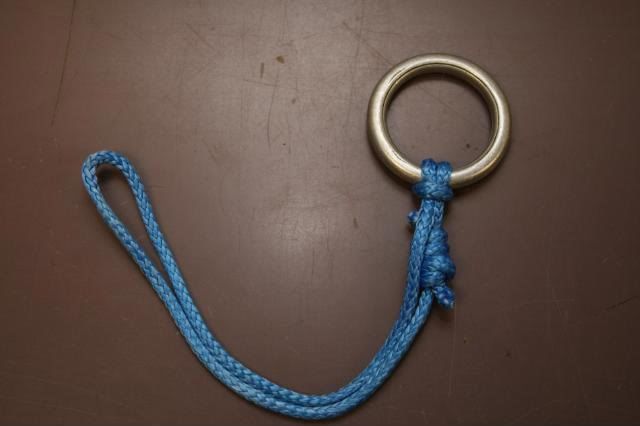
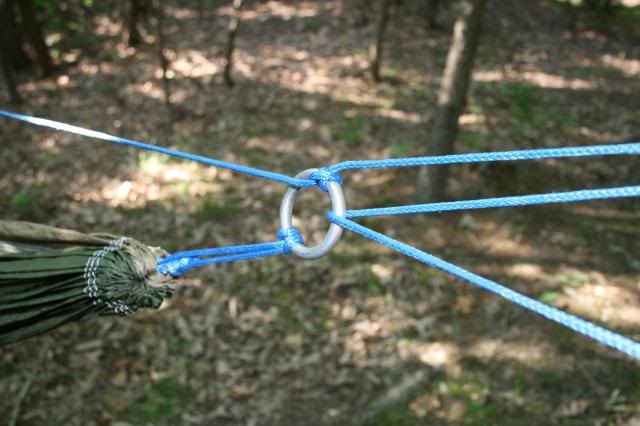
The first step is to make a pair of hammock lines (HL). The HL consists of a 28" piece of rope that uses a Double Fisherman's Bend to form a loop. Once you have formed a loop, attach the line to the descending ring with a Lark's Head. I went with 28" because the stock line that I removed from the ATHH hammock was 32" but the diameter was much larger than the line I was using. I subtracted 4" to compensate for the smaller line. When you are finished you should have something that looks like this:
Besides the descending rings being the point that ties the main line and the HL together, I think it's gonna offer a couple more benefits. The rings will create a break in the path of any water that might be running down the suspension lines, helping to keep the hammock dry (in theory). I also think the rings will make great attachment points for things like hammock socks, bug netting, under quilts, weather shields, etc.
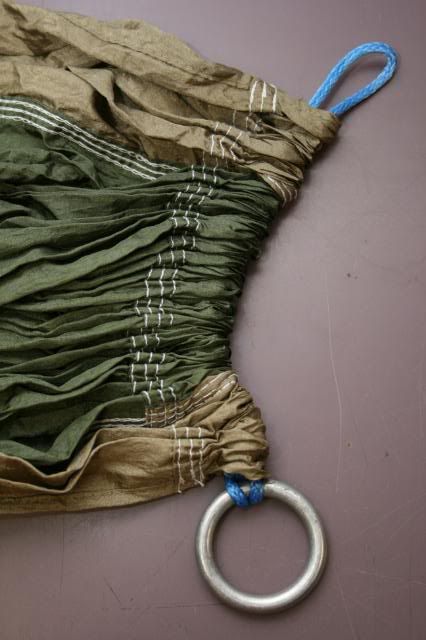
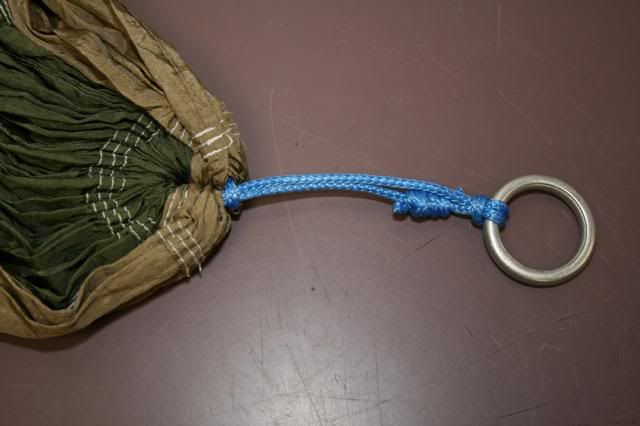
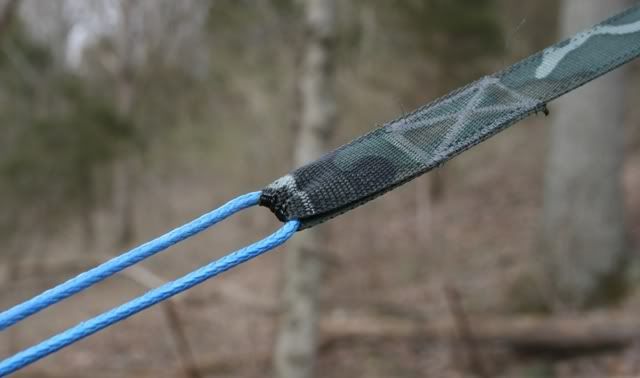
After you have made a pair of HLs, it's time to install them on the hammock. It's pretty easy to do. If you have a hammock that has the channel sewn into the end, simply passed the HL through the end of the hammock, pass the ring through the loop, and cinch it down tight:
If you are using a hammock that has whipped ends, like a DIY Speer-style hammock, just form a Lark's Head and cinch it right behind the whipping:
<pics coming>
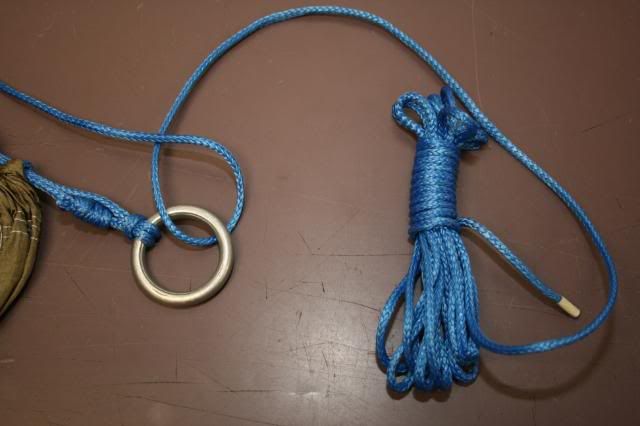
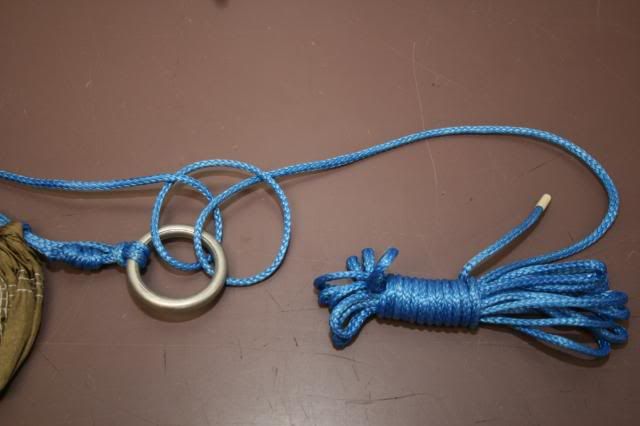
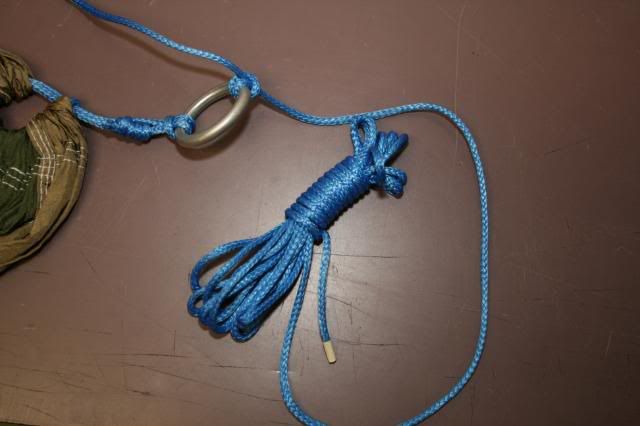
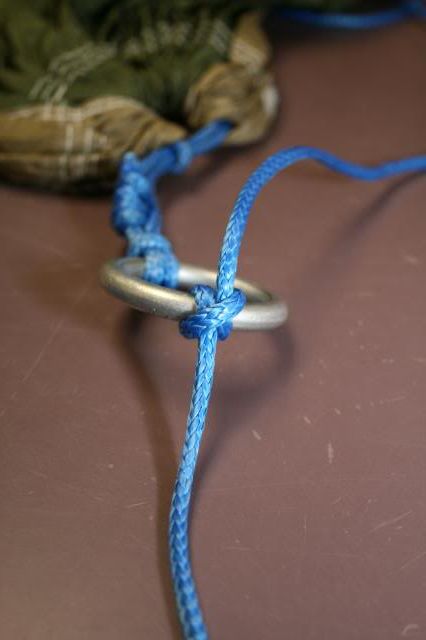
Now that you have the HL attached to the hammock you are ready to add your Main Line (ML) that serves as both the ridge line and your suspension lines.The ML is attached to the rings with the clove hitch. The clove hitch is what makes the system adjustable. You can see how to tie the clove hitch to the rings in these pics:
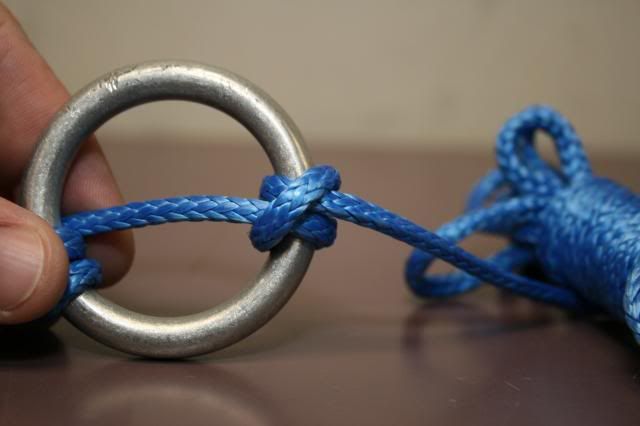
Here's a detail of the Clove hitch once it tightened down on the ring:
Although it's not shown in the pics, I used a Sharpie to mark the center of the ML. I also made marks 50.5" on each side of the center mark that gave me a guide to set the rings at 101", which is my normal ridge line length. You could make marks for different, pre-measured ridge line lengths if you wanted to experiment. Here's an example of how I positioned the ring right a one of the marks.
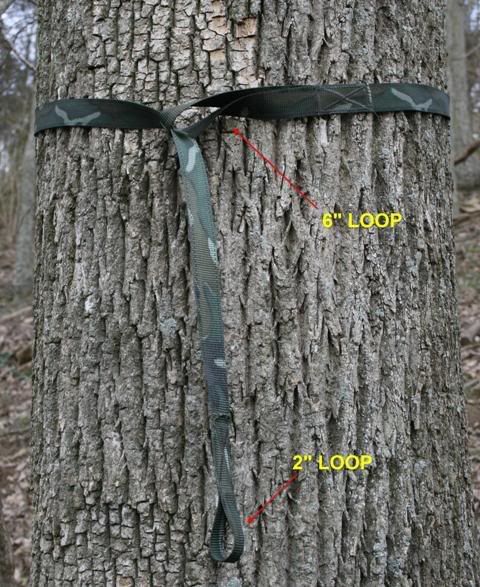
You are now ready to hang the hammock. Step 1 is to put the tree huggers on the tree. I am using the same trees huggers that I used for the Trucker's Hitch system:
Next take the line coming from the hammock and pass it through the tree hugger and then take it back down and pass it through the descending ring. This allows you to tighten the suspension just like the Trucker's Hitch, giving the 3:1 mechanical advantage:
After passing the line through the ring take back up and pass it through the tree hugger again. In the past of would tie the knot at the ring, but I now tie it at the tree hugger for a couple of reasons. The first is because if you tie the knot at the tree hugger, it acts as a drip string and it also requires less rope because you don't have to take the line back down to the ring.
I first tie a slip knot then a half hitch to secure things:
The coolest part about this suspension system is that it allows you adjust the sag of the hammock pretty quickly. It's kinda fun to play around with the sag in very small increments. You can adjust this thing an inch at a time to really dial in the comfort of the hammock. To adjust the the ridge line you first loosen the suspension. Once you have some slack in the suspension lines you can loosen the clove hitch and move the ring's position on the ML to lengthen or shorten the ridge line section, giving you more or less sag as needed.
In this first pic of me in the hammock the ridge line is set to my standard 101":
Here is a pic of the ridge line set to about 80", giving the hammock a really deep sag. The sag was so much that I would have had to raise the tree huggers above my head to get in the hammock without my butt hitting the ground:
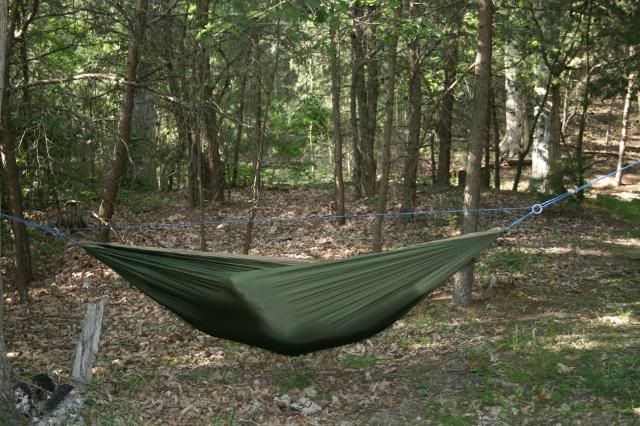
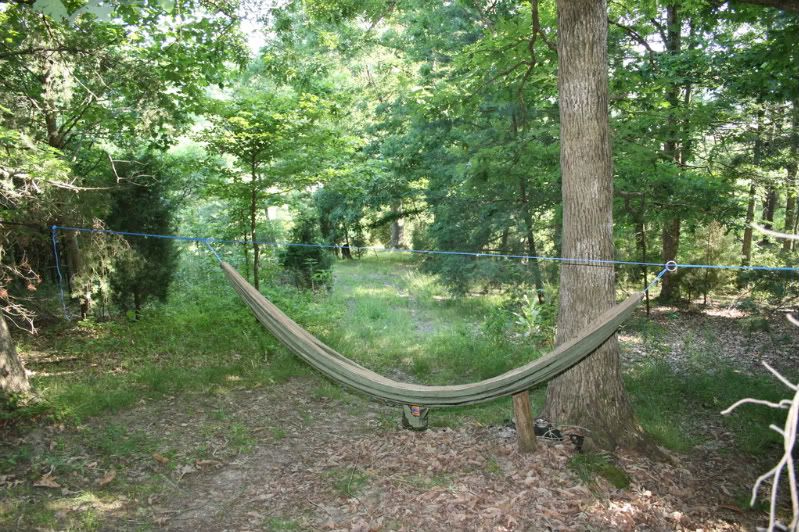
Here's a shot with the ridge line at it's maximum length, with almost no sag in the unoccupied hammock.I went from a 80" ridge line length to a setup that has almost no sag at all and it took less than three minutes to adjust between the two.






 Reply With Quote

Bookmarks