

Very nice. I'll have to keep this in mind next time I need to make some new straps.


Very nice. I'll have to keep this in mind next time I need to make some new straps.

I'm doing straps this week. I would like to do something like that. Do you have instructions?
![[o]TTeR's Avatar](image.php?s=7115bf566142bc288567d1c788bcaeef&u=4999&dateline=1449164468 "[o]TTeR's Avatar")
I couldn’t help myself Mate, every once and a....most of the time, my ego goes on an unmediated “Walkabout” and bar tacks start looking like [o]’sOriginally Posted by Bubba

I have a cheap/low-end sewing machine (I keep destroying them) it doesn’t have specific stitch details but I’m using the tight zig-zag for making button holes and doing 2 passes. I will do my best to post a step-by-step tonight since I’m making another set after work.
My version. Don't laugh at the stitching. It's only the second thing I have ever sewed. Plus I did not have the solid stitch setting. It was a funny looking solid small solid.
I photographed the best stitching. Lol
I did not read this first. Crap. I had the tight zigzag setting. Lol
No worries Bamaboy, I can assure you, the straps I photographed were not my first attempt...it took a few to get it right, yours look fine anyway, remember function before fashion, carefull testing to make sure they'll holda.k.a....Mind your tail-bone.
I didnt get a chance to make another pair (and shoot the process); my kid had a soccer practice. I did a few sketches on my iPad sitting in the bleachers (It wasnt a game so I was killing time), hope these help for now??
That will do just fine. I think I'm going to go back over my straps with the zig zag pattern

That's as good as taking photo's while you're making it. Thanks, and pretty slick looking drawings, too!
i totally take back all those times i didn't want to nap when i was a kid
Thanks, the sketches were done in "Paper" by Fifty Three Inc. for iPad, if I told you where I work, you'd know how much it pains me to say "Its an awesome app" makes any drawing look cool!
Note: When getting supplies, check the safe working load of the webbing you choose and get some good thread! We used Country Brook Designs 1” Polyester Webbing and Gutermann Extra Strong 100% Polyester thread for this project.
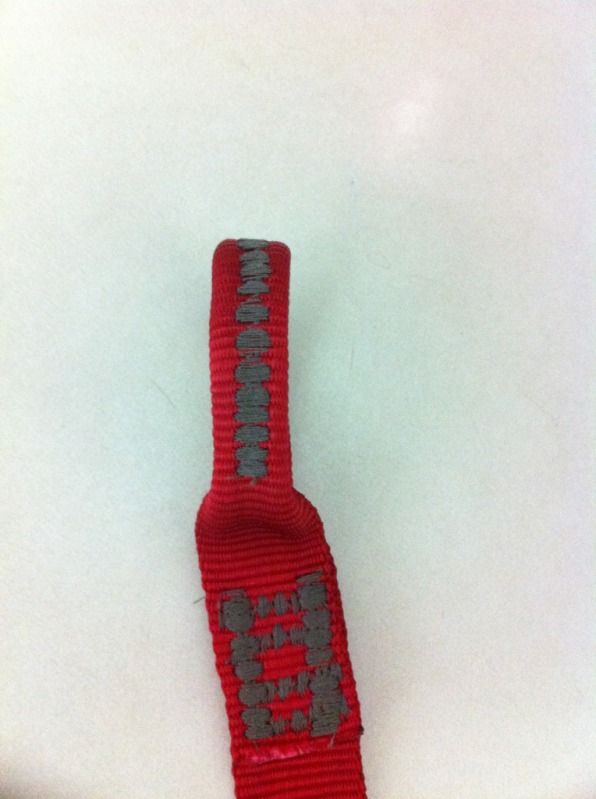
Step 1: Curl the edges of the webbing to form a “Tube” and pinch it flat 3” from the end. By hand, tack-stitch it to pin both edges to the center of the webbing, repeat the process at 4” & 5” inches. I used red thread to make it easier to see them during step 2.
Step 2: Set your sewing machine for a wide, tight Zigzag stitch, I advise testing things out on scrap webbing until you get it dialed in. Running lengthwise with the webbing edges facing up and centered under the Presser Foot, sew from the first to the last red tack-stitch. Let the Feed Dog do as much of the work as possible, a little coaxing may be required from time to time, especially on the back stitch. I did two passes; more may be needed depending on how the machine is setup.

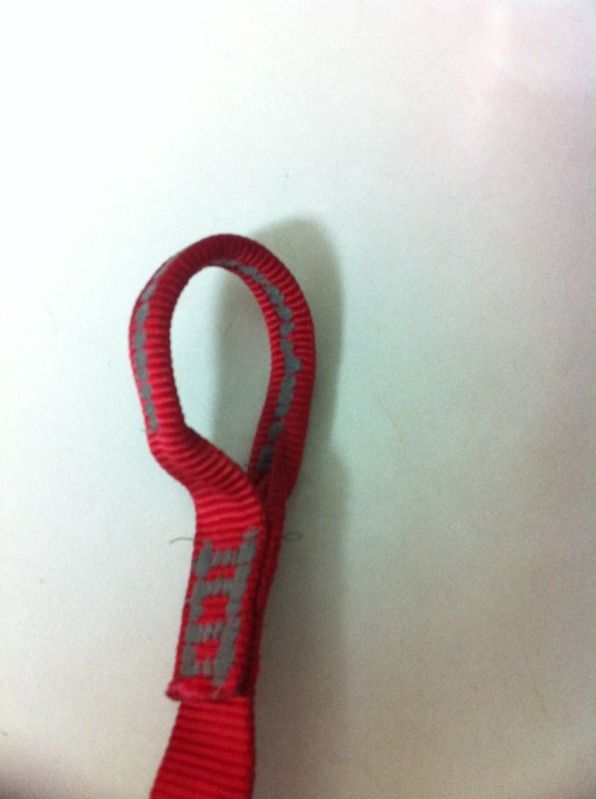
Step 3: Fold the “Zigzag stitched section” at the halfway point to form the loop and put it under the sewing machine Presser with the end edge facing up and aligned with the side of the foot, complete at least two passes (again, depending on how your machine is setup) to form the first bar tack. Working toward the loop, continue making bar tacks until you’ve run out of flat webbing or you've reached a warm fuzzy feeling that the loop will hold your weight (then some, better yet, lots).
One more note and that, which DIY’r know all too well (or will eventually)…please test your diy gear cautiously, making craters is brutal on your tailbone and dents the ego...Play safe!
This pair is tailored for attaching Whoopie Slings (with Whoopie Hooks) via Larks Head. The opposite end loop was left unfolded (flat) to accommodate a 1” Dutch Clip. These straps are 1” wide by 4’ and ended up weighing 2oz for the pair. My old huggers are 6oz so I’m happy with the outcome!
 Posting Permissions

 Reply With Quote


Bookmarks