


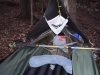
Spousie likes to lounge in a hammock and has slept in my DIY Speers which are 48" wide and 8 long. She wants to sleep flatter than the narrow Speer allows and doesn't like the HH issues.
What can I do to make a DIY Speer more flat-sleeper friendly?
60" wide.
Longer.
When folded like in Ed's book the sides are high like a canoe which doesn't facilitate sleeping flat, IMHO. Has to be a better way to fold?
Pitched with extra slack.
To be used exclusively for light weight backpacking and would like to avoid a major purchase.

 Reply With Quote
 On the plus side, Inigo Montoya no longer hunts me.


Bookmarks