Results 1 to 6 of 6
  1. #1
    Senior Member XTrekker's Avatar
    Join Date
    Jun 2012
    Location
    Hampton Roads, Virginia
    Hammock
    DIY - Canoe Hammock
    Tarp
    DIY Hex Tarp
    Insulation
    DIY TQ and UQ
    Suspension
    DIY UCRs
    Posts
    2,133
    Images
    83

    A moment of "Oh! Duhh!" (Pic Heavy)

    Ok so not the best title for this thread ill admit. But it is kind of what happened to be honest. This is more of a diary of events than anything. So please forgive me if you find this post somewhat empty of creative ideas.
    Just sharing my learning experience and how I ended up with something that works for me.

    Hammock: Hennessy Explorer Deluxe Side Zip

    So I am still fairly new to hammocking and I am still finding my way as far as suspensions go. I spent alot of time researching different materials and how they react in different scenarios. I learned alot about the difference between Nylon and Polyester/polypropylene. I then researched alot of different types of marine ropes and their uses as well as digging threw all the forums here and seeing what everybody else has found that works.

    I am a Lightweight Backpacker working my way to becoming an Ultra-Light Backpacker. (Money is tight so it takes saving up for each item.)
    I wanted a Solid User-friendly suspension system that was not too heavy but was FAST to setup and super easy to adjust. Hennessy's suspension is just no good for me.

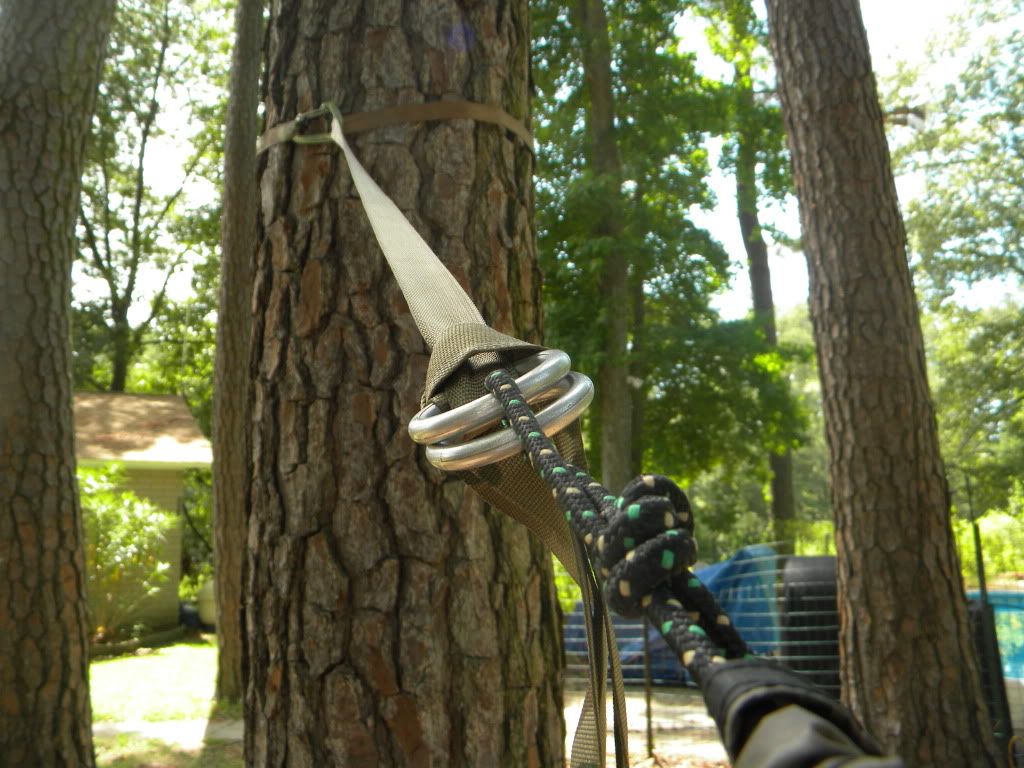
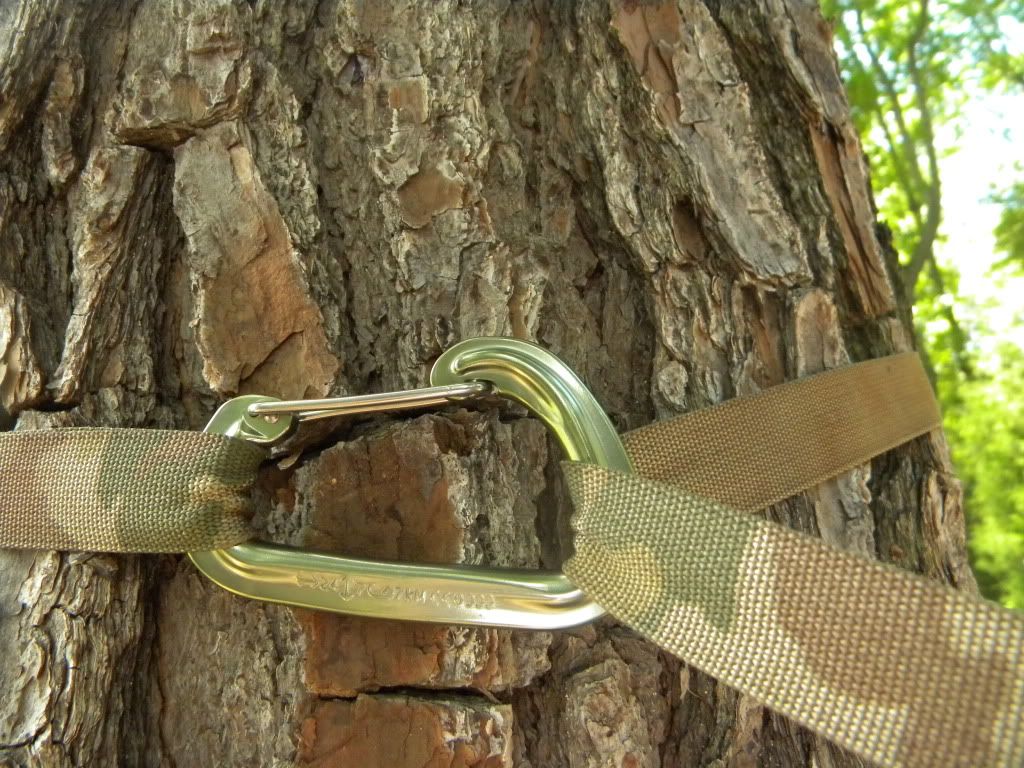
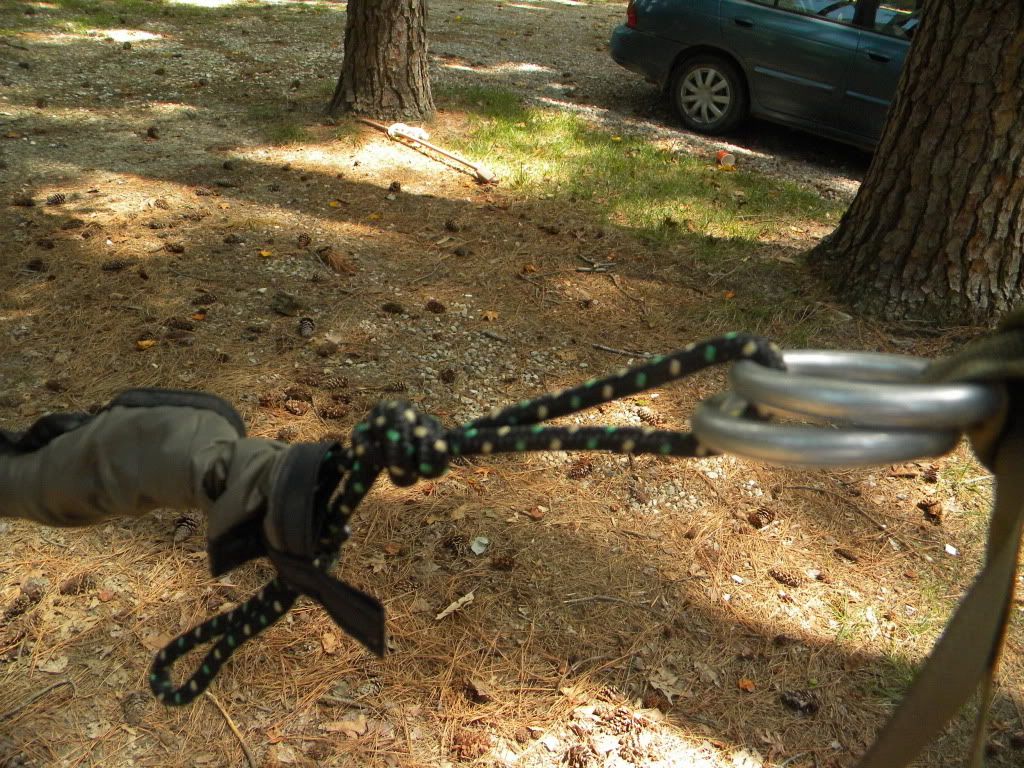
    I settled on 1" Polyester Webbing and bough 30ft of it on amazon for $9(free shipping). Its cammo color which is ok. I busted out the ol sewing machine and made a loop at one end of each strap. Then bought some repelling rings from REI and 2 ultra light biners. I decided to keep using the original suspension rope Hennessy supplied as to avoid taking apart the hammock. I just shortened the rope significantly.

    Bam! suspension solved. Fast, easy setup, and can be adjusted easily. Love it! But its heavy...

    As you can see I am just using Webbing with a biner and the cinch rings.


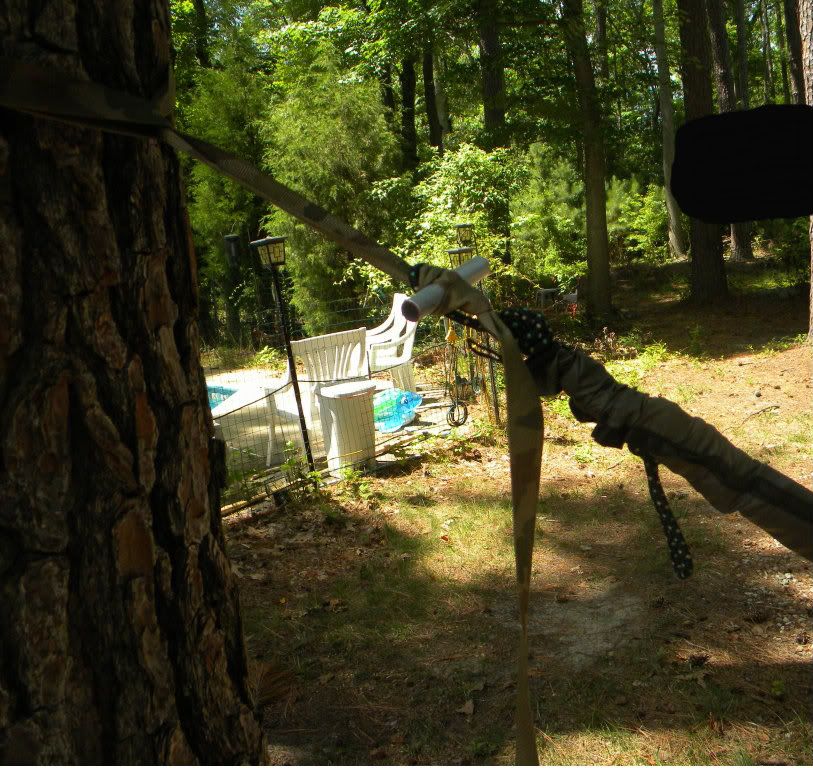
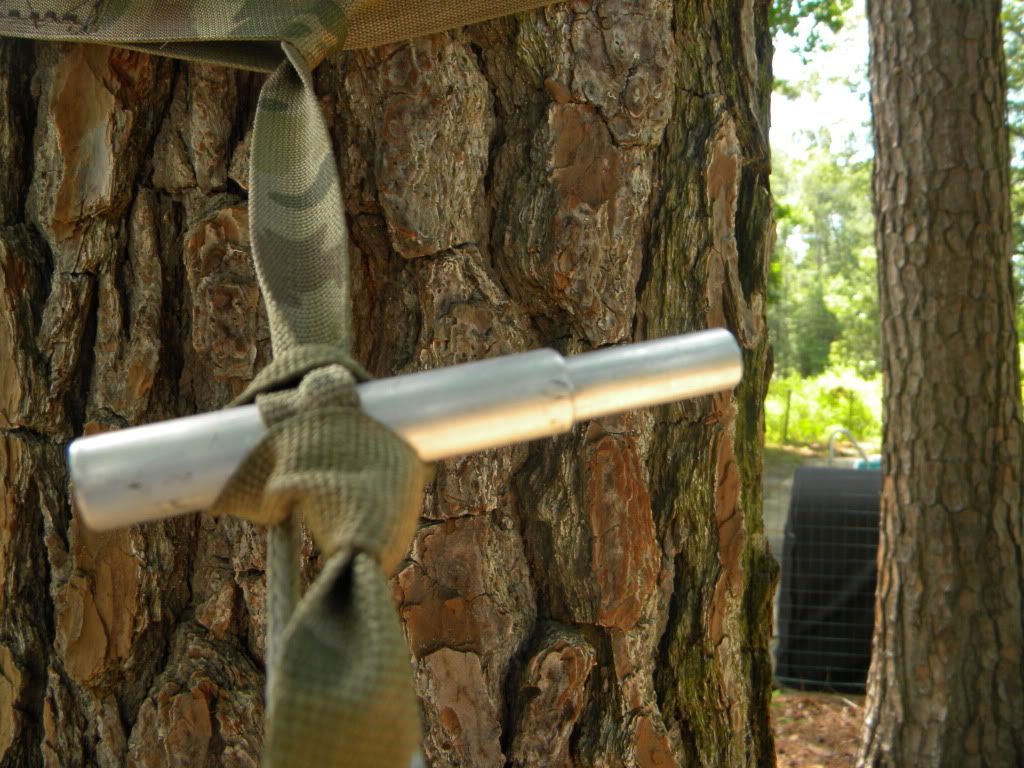
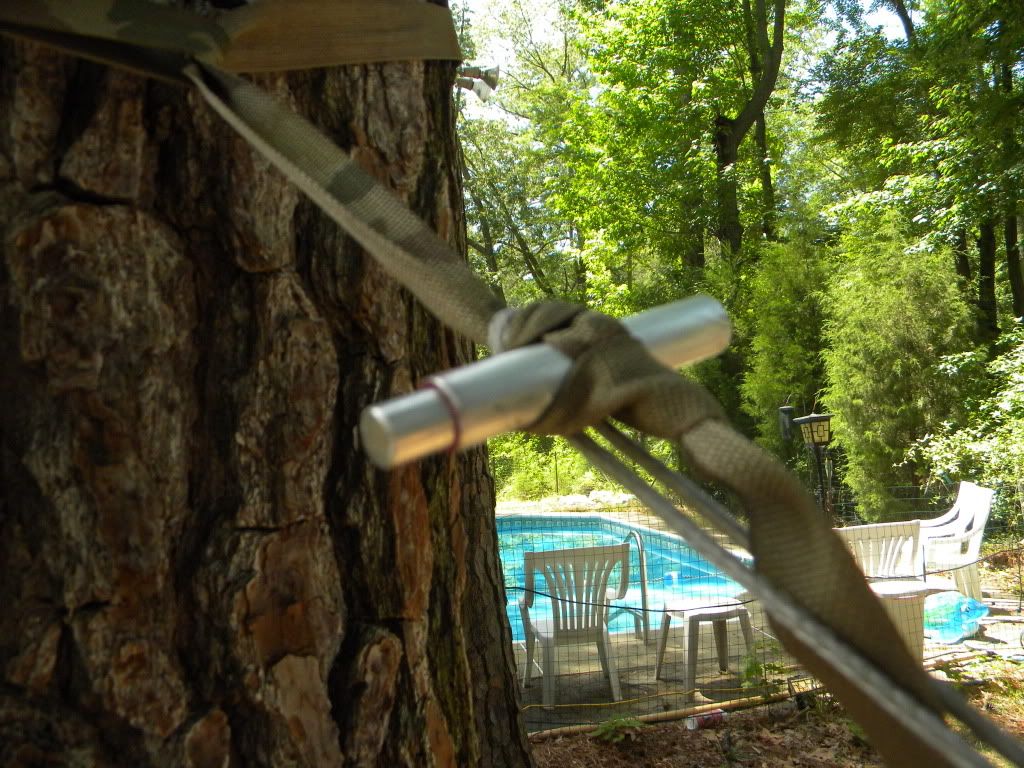
    In comes the whoopie slings and Marlin Spike. So I ran down to the local Marine shop and picked up some 1/8" Amsteel for $0.45 a foot and some 7/64" for $0.26 a foot. Made few whoopie slings and set it up with the Marlin Spike Hitch and got rid of the rings and biners. I made the spike from aluminum pipe and bar I bought from Lowes. The bar fits into the pipe perfectly, the bar will be for the other side. I will drill holes in them later.
    I will shorten the straps later to shave wait but here is the some what finished product for only few bucks.


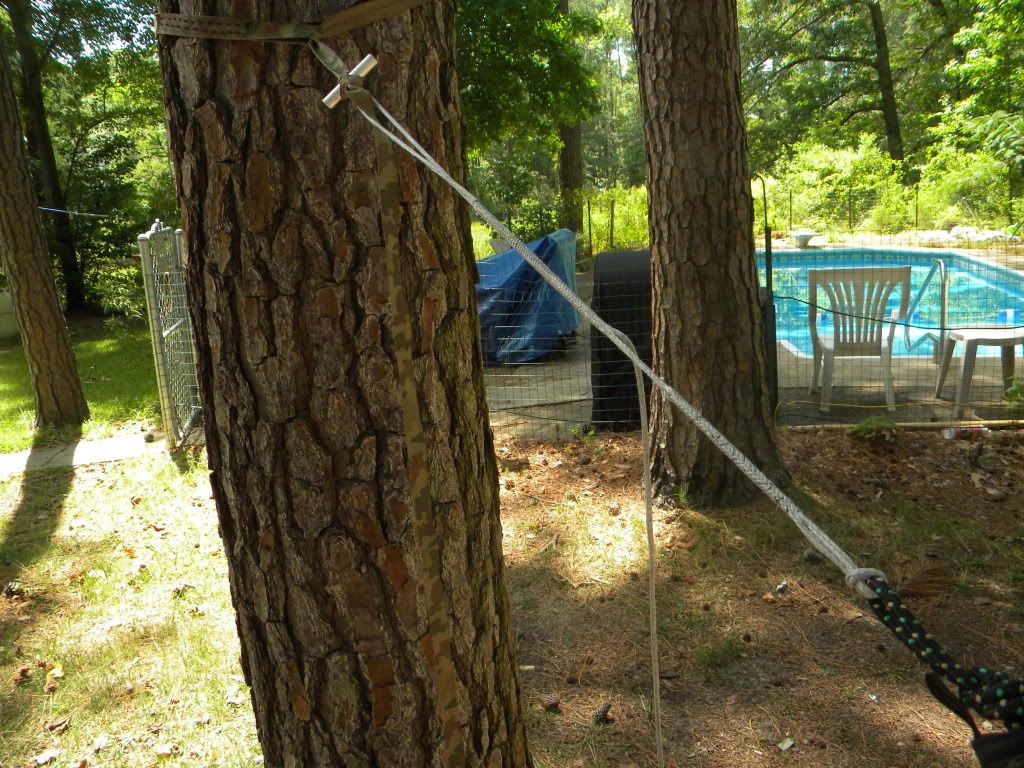
    I then noticed that my Minimum tree span distance is now 14' instead of 11' with the rings because the whoopie slings eat up 18". And I really want to have as many options for hammock locations as possible so this was proving to be a real problem.
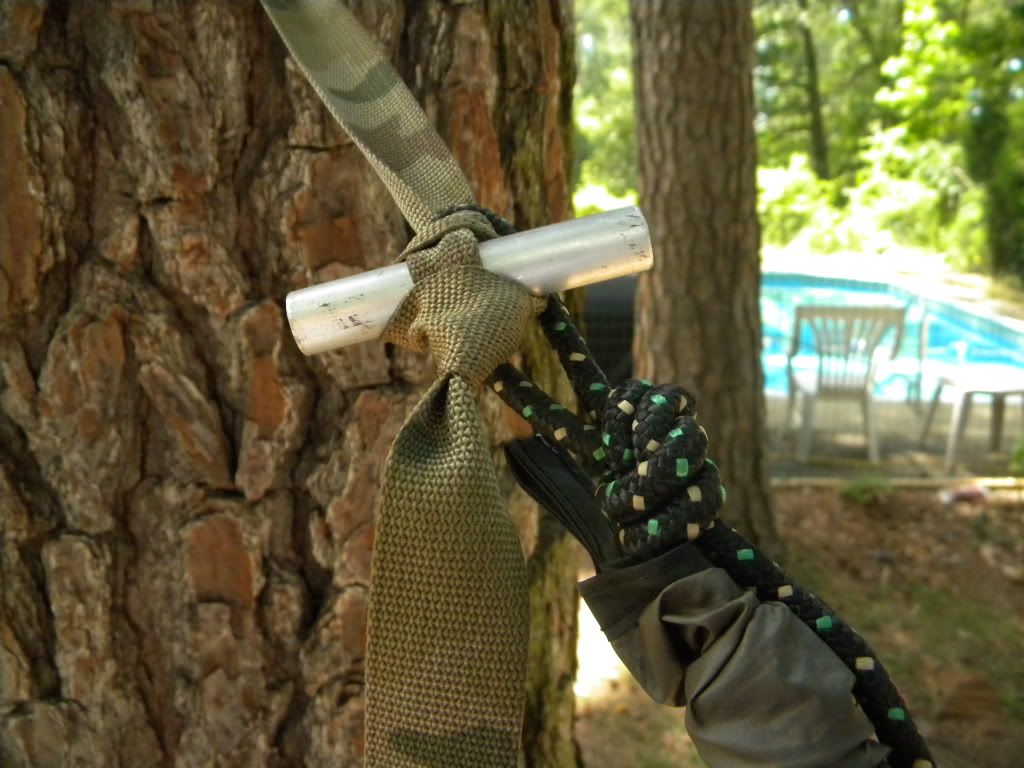
    Then the moment of Duhhh! Hit me. I was forgetting that since I kept the original suspension rope that I could just use it to attach to the Marlin Spike. Problem solved. Now I am back down to 11' tree span option.

    Sounds silly right? Well I almost trashed the whoopie system all together until I realized that I had over-looked such a simple solution.
    Sorry if this thread was kind of pointless but wanted to share my learning experience as well as how I was able to save some money.


  2. #2
    Senior Member dejoha's Avatar
    Join Date
    Jun 2009
    Location
    So. Utah
    Hammock
    Most
    Tarp
    Sea to Summit
    Insulation
    Down
    Suspension
    Becket Hitch
    Posts
    2,184
    Images
    207
    Awesome! Great photos. I think this is very helpful to show people the evolution and solutions.

    What you discovered is what I recommend for a lot of hammocks -- leave a loop close to your hammock. It does offer a lot of options for straps and Whoopie slings in places where you don't need the extra suspension. I usually keep a short 3' Whoopie Lark'd to the loop on the end of my hammock in case I need it and slide it in or out of place. Also, when in use, flip the Lark's Head knot over the loop in the hammock and it turns into a square knot. A lot easier to undo.

    When I tested the Nano 7 hammock, I brought along my standard suspension set up at the time. This was before the advent of Whoopie slings. When I weighed everything I was surprised to find that my suspension weighed more than the hammock! I was using 2" straps, carabiners, and rope. Crazy days.

  3. #3
    Senior Member dragon360's Avatar
    Join Date
    Nov 2010
    Location
    Toronto, ON
    Hammock
    WBBB/TR, DIY, HH, SB DL, GT UL
    Tarp
    ID/OES/WB/WL
    Insulation
    HG/WB/Go-Lite/WB
    Suspension
    Whoopie/Straps/DW
    Posts
    4,704
    Images
    1
    After all this time - its still all learning for me! One of the reasons I love doing this!
    The key to immortality is first living a life worth remembering. - St. Augustine

    Some people feel the rain. Others just get wet.
    - Bob Marley

  4. #4
    Senior Member AdventureMyk's Avatar
    Join Date
    Jul 2012
    Location
    Knoxville, TN
    Hammock
    Snep Hammock, about 12 DIY's, etc.
    Tarp
    OneTigris Tiegman
    Insulation
    HG & HangTight
    Suspension
    Varies
    Posts
    847
    Nice write up from someone about to take the plunge. Anything has a learning curve, the fun part is saying 'whoops' without finding yourself looking up at the bottom of the hammock!

  5. #5
    Senior Member Pipsissewa's Avatar
    Join Date
    Jan 2010
    Location
    Yancey Co., NC - Home of Mt. Mitchell
    Hammock
    Too many to list
    Tarp
    Cuben with doors
    Insulation
    FlThrwr UQ+DIY TQ
    Suspension
    Whoopies + straps
    Posts
    1,741
    Images
    7
    Excellent write-up XT!!! Lots of good ideas there. Sure, easy to see with hind-sight, but every good idea takes time to develop. Thanks for sharing with others who are coming up behind you. That's the spirit of HF! Be sure to update your suspension info under your avatar!
    "Pips"
    Mountains have a dreamy way
    Of folding up a noisy day
    In quiet covers, cool and gray.

    ---Leigh Buckner Hanes

    Surely, God could have made a better way to sleep.

    Surely, God never did.

  6. #6
    Senior Member MAD777's Avatar
    Join Date
    May 2009
    Location
    White Mountains, New Hampshire
    Hammock
    DIY, WBBB & Switchback
    Tarp
    HG cuben,OES Spinn
    Insulation
    DIY 3/4 UQ/TQ, UGQ
    Suspension
    Dynaglide / Dutch
    Posts
    10,950
    Images
    39
    This is why I have a continuous loop on the end of my hammock that the whoopie attaches to. In a short span, I simply attach the continuous loop to a marlin spike on the tree strap.

    Great pictures!
    Mike
    "Life is a Project!"

  • + New Posts
  • Similar Threads

    1. Soft Shackle "Quick release"/"ripcord" problem.
      By callook66 in forum Suspension Systems, Ridgelines, & Bug Nets
      Replies: 15
      Last Post: 01-22-2016, 07:23
    2. "Jerry Chair" and "Just Jeff Gear Hammock" combo - is it possible?
      By Bad Biscuit in forum Do-It-Yourself (DIY)
      Replies: 1
      Last Post: 11-03-2014, 13:09
    3. Replies: 8
      Last Post: 10-28-2014, 16:53
    4. Replies: 2
      Last Post: 10-13-2010, 22:48
    5. New HH "DUH" moment re: center foot ridge pressure
      By BillyBob58 in forum Hennessy Hammocks
      Replies: 10
      Last Post: 03-17-2010, 12:38

    Bookmarks

    Posting Permissions

    • You may not post new threads
    • You may not post replies
    • You may not post attachments
    • You may not edit your posts
    •