


Some years ago, when I started hammocking, I discovered that I didn't like breathing cold air. There were lots of people making socks, but I wanted something simpler. Thanks to Risk and his quarter weight Hammock, I made a couple of covers that were just a piece of rectangular fabric with corner weights. I met with mixed success as a light wind would blow the cover around. Grizz came up with the KISS Over Cover (I think), which solved some of my blowing about problems, and I found a thread by Dutch where he had made a cover for his blackbird. Since I'm the proud owner of a new RidgeRunner from Warbonnet (Brandon Rules!) I thought I would see if I could make my own Ridgerunner cover based on Grizz's and Dutch's designs, similar to the Bear Burrito Oven (made by Paul at Arrowhead for the Warbonnet Blackbird).
If I have forgotten to credit somebody with the creation of covers, please let me know so I can correct this text!
This will be a 2 (or 3) part series as I cobble together a top cover for my ridgerunner. I'm heading out to Big Bear this weekend, where the overnight temps are expected to be in the high-30's. So I figured it was time to break out the Sewing Machine...
The fabric I picked is an uncalendared 1.0 ripstop (Digital Camo) that I bought as part of an earlier group buy... Lightweight ripstop makes great top covers and socks, but calendared is more windproof and will hold in more heat, but also breathe a bit less... (YMMV)
I laid the fabric over the Ridgerunner, and cut it about 2.5 feet longer than the hammock. I pinned it to the net tie-outs, and on each corner to the amsteel suspension. (Safety pins are your friend!).
On one side, I left about 6" hanging. I marked the points where the netting tie outs touch the cover, cut 3" lengths of 7/8" grosgrain, and sewed them on, length-wise with the hammock:
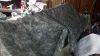
(sorry about the fuzzy pics... didn't have my glasses on)
Using a heated piece of coat hangar, I melted a 2"-ish slot through the fabric and grosgrain, then sewed along both sides of the slot. (Note the stylish - un-straight stitching that characterizes all my gear as mine!) The long slot is to accomodate the cordlock on the net suspension.
I then mounted the cover:

And trimmed the excess on the one side, and hemmed the long lengths, with a wide (3/8" or so) rolled hem, with the roll on the under side.
Lessons learned: You're better off figuring out the maximum desired width, and cutting the fabric in a rectangle. We'll be using super thin (1/16"?) shock cord to tighten the sides up anyway... and hemming a curve sucks...
I then re-mounted the cover...
That's enough for tonight. Tomorrow night I will be cutting the corners in, where the spreader bars meet, and making the cover fit the ends.
More to come . . .
John


 Reply With Quote
Bookmarks