


Canopy Camping
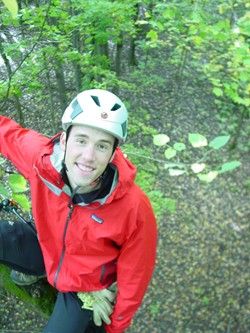
Whenever I post a new thread with pictures of my tree canopy adventures you guys always show great interest. After many questions, requests, and PMs I decided to create a tutorial. My goal with this thread is to help you decide if the money and effort are worth the adventure and beautiful views. If yes, then you will have a rock solid starting point.
BUT WHY!?
I will answer this question with a question. If you are camping alone and find yourself surrounded by blood hungry werewolves or brain eating zombies would you rather be hanging 2 feet above the ground or 50 feet up in a tree? I rest my case.
In reality I got the idea while on a rock climbing trip in Northern Minnesota. I concluded that backpacking was way more exciting when combined with rock climbing. We had our tent set up high on the edge of a cliff overlooking the valley and I realized that I needed a way to do this locally where we have lots of trees but no mountains or cliffs. So how could I climb and sleep in the trees? Well, after a lot of research about tree climbing, portaledges, arborists, and hammocks I realized my goals would require a mashup of skills and DIY projects.
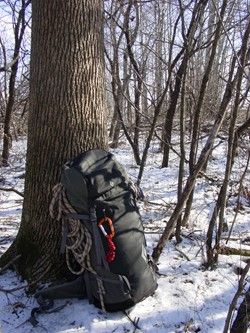
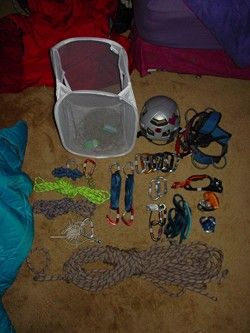
This is a gear layout from a two day winter trip which shows a blend of rockclimbing, arborist, backpacking, and hammock gear.
Frequently Asked Questions
Q: How high?
A: Well I would say the sky is the limit but actually 379 feet is the limit since that is the height of the tallest known tree in the world.
Q: Do you use safety gear?
A: Of course, and yes I sleep in my harness. (I go into the details of climbing later on in the post)
Q: How do you pee at night?
A: You may think that peeing while in a hammock is the hard part but really the hard part is peeing with a harness on. Once you master this skill peeing from a hammock is a peace of cake, just make sure you don't have friends below!
Q: How much extra weight?
A: It largerly depends on rope length and your harness choice. My climbing gear is 13 extra pounds in my pack.
What type of hammock?
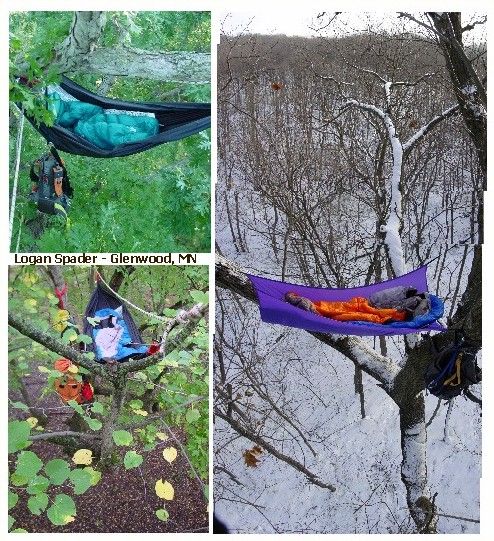
OPTION 1: Well you could buy a factory made hammock but I am too poor for this so I researched cheap and easily built hammocks.
OPTION 2: I started with a traditional gathered end hammock that I built for $12 (link to the tutorial I used). I took a rectangular piece of nylon and tied a short piece of webbing to each end, done. This however required a very long footprint, was unstable to enter into, and hard to move around in.
OPTION 3: I then moved to a portaledge which hangs from one point and made tree selection very easy (link to my portaledge). Prices? I made mine for $17 using craigslist. You can make one with store bought parts for $70. Professionally built is $300-$800. This choice was bulky and heavy which left little room for other essentials in my backpack.
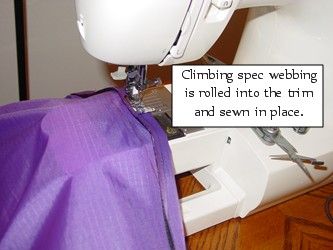
OPTION 4: Next I built a bridge hammock and if you own a sewing machine this is what I recommend to use. Price was $25. It is easy to build and outperforms the other two in almost every manner. Here are the materials I chose and a list of sources:
40 feet of 1/2" climbing spec webbing, $13 (REI, any rock climbing store)
8 feet of uncoated 1.9oz ripstop, $12 (Hancock fabrics, most fabric stores)
100% Polyester yarn
4 hours of measuring, cutting, and sewing
Grizz is a genius and already made a DIY bridge hammock tutorial (link to his tutorial). Do not become overwhelmed!. I used the tutorial as an outline to cut the hammock material and to sew the webbing onto the hammock. An important difference is instead of building the hammock as a two point system with a spreader bar I used 20 feet of continuous webbing on each side. This means that I can tie every corner to the tree which gives the hammock great stability and since all four attachment points are made of webbing specified for climbing I don't have to worry about my suspension failing.
Now you may be asking yourself, "what about a tarp?". Well that is a good question. In the winter I usually don't even bring a tarp since snow is easily brushed off. In the summer I use a square tarp made from probably 87 cents worth of 3mil plastic. When I graduate college I may consider something made of silnylon but for now I will enjoy looking at the stars through my cheapo tarp. Rigging up a tarp is sometimes puzzling but always doable. I start by tying off the two corners at the head and foot. From there I have the choice to tie off the sides of the tarp to other branches, I can tie the sides together underneath the hammock, or I can find two logs and tie one to each side of the tarp letting them hang freely (this will keep the tarp taught, more wind means heavier logs are needed).
Climbing
Safety First
Neither I or this website is responsible for you getting injured or killing yourself in any way. If you attempt to climb a tree without propper training you will likely die. With that said it is pretty darn easy to learn. Before you even attempt to canopy camp in the wilderness alone you must be able to use gear and tie certain knots hanging upside down with your eyes closed in a huricane while being attacked by squirrels. Seriously, one wrong knot and you could be paralyzed for life.
Gear
The first question you must ask yourself is "What do I want to accomplish?" If you just want to climb a short tree, set up a hammock above a mountain
lion's reach (or zombies) and stay there for the night I would feel perfectly safe with having a minimalist harness ($40 link) a locking carabiner ($8 link) and a 30m dynamic rope ($60 link). The technique would be to climb the tree like you did when you were 8 years old, anchor the rope 10 feet above where you plan to put up your hammock then tie into the rope with the locking biner and a clove hitch for easy adjustment. However, if your goal is to summit a giant tree whose lowest branch is 50 feet up and then sleep in the canopy you will have to use ropes and climbing gear. The essentials:
Helmet ($30-150)
Harness ($40-500)
Static Rope ($0.80 a foot ~ avg length is 120')
Throwline and throw-weight ($20-50)
There are many ways to climb a tree "arborist style". You can ascend a rope with prusiks ($5) and descend with a belay device ($12), you could use a double rope system and about $600 worth of gear, and anything in-between. There are many forums filled with many different ways to climb. After sorting through them I chose the "RADS" system based on the fact that it requires less rope, less gear, less arborist skills, and less money! Here is a picture of my climbing gear:
The picture shows all of the gear I bring on a big climb. There is about $350 worth of equipment in the picture. You can do it for a lot less. When I took my wife tree climbing for her first time I gave her all of my expensive equipment and I used some old rock climbing gear laying around. Like I said before, it really depends on your goals.
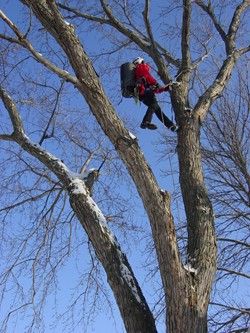
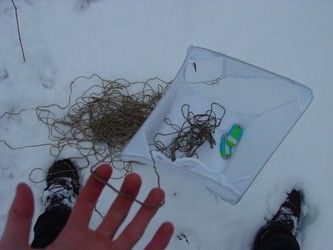
Entering A Tree
Here is a basic rundown: First you have to deal with your throwline (this is the part that I hate). You must always keep your throwline completely untangled. I finally purchased a mesh collapsable box to flake it into and this cured some of my problems.
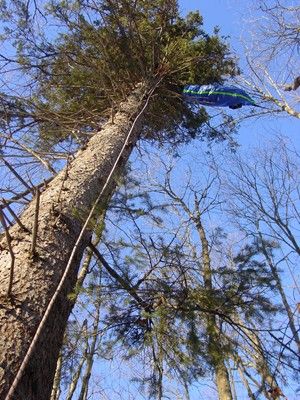
Next choose a crotch in the tree that is strong enough to hold a car (then you know it will hold up you!). Toss the weighted throwline up over the crotch you have chosen using your own arm strength or a giant slingshot (or a bow and arrow if you are climbing Redwoods). After a lot of cussing and swearing and getting it stuck on branches you should have your throwline going from you, up over a branch, and back down to the ground. Now tie your climbing rope to the throwline and pull the rope up over the branch. The hard part is done! You can now either anchor one end of the rope to the ground and ascend the other side or you can make a double figure 8 on one end and run the other end through that loop; you will pull the rope until the knot makes a noose and goes tight around the branch you want. Remember this is very basic. There is an infinite amount of variations and scenarios to overcome but in the end you want a single line leading up into the tree like this:
Once your rope is set you can climb up into the tree. My earliest ascension system looked like this:
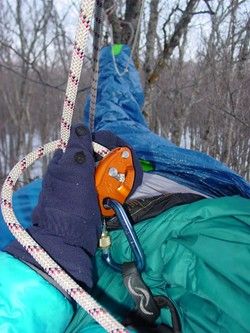
If you replaced the grigri in the above photo with an ATC Guide your whole climbing system would cost under $50. After I became addicted to climbing trees I decided to invest in a much more efficient climbing system:
I am not going to go into details about how each piece of gear works because you need to learn that from a climbing buddy. There are so many different techniques, variations, and tree types that you just have to get out there and see what fits your style.
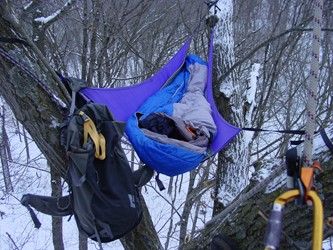
Camping in the Canopy
In camp I usually use the tree to climb instead of the ropes. This means that I am always feeding out slack or taking in slack to keep my rope tight. If you have slack in your rope (a static rope, not dynamic) and you fall you could hurt yourself very bad. Even if the line is tight and you slip off of a limb you will go for a big swing and hit anything in your path. This is why learning to climb from a good mentor is important.
Sleeping is the easy part. Choose your harness as if you are going to sleep in it because, well, you are going to sleep in it. This means that you better be climbing in the pants that you want to sleep in because changing pants while wearing a harness is.
I have never brought a stove into the canopy simply because I never carry a stove. However there are some stoves that can be used while hanging from a rope, just make sure the flame is no where near your harness or safety line. I play it safe with a personal favorite: sundried tomato triscuts with salmon and cheddar cheese
Do It!
It is an adventure like no other. Take pictures and let me know how much you enjoyed it! If you are ever in my region and want to learn the basics without the investment just send me a pm because I have a lot of extra gear.
Canopy Camping Links
Pictures - two trips in Big Woods State Park (gathered end hammock)
Video - 63 feet high winter adventure (bridge hammock)
Pictures - my cheap winter hammock/tarp system (old system)
Epic Story and Pictures - camping in a 100 foot spruce tree (gathered end hammock)
Pictures - Swamp of the Dead (gathered end hammock)
Pictures - chilling in the woods (portaledge)
Pictures - urban camping and climbing (bridge hammock)
I will upload any new links from future trips as they happen. I hope this helped! Please ask questions or give me feedback on any topic that I may have missed.
Refreshing


 Reply With Quote
Bookmarks