Page 34 of 50 FirstFirst ... 24323334353644 ... LastLast
Results 331 to 340 of 499
  1. #331
    Senior Member Captn's Avatar
    Join Date
    Sep 2009
    Location
    San Marcos, Texas
    Hammock
    WBBB
    Tarp
    Edge
    Insulation
    Burrow 40 & yeti
    Suspension
    Straps& dutch clip
    Posts
    506
    Images
    58
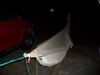
    Well, last night I began the "HH clone on a diet" project using this design. The question is just how light can you get a HH Clone but stay comfortable. I expect this to be a longer term project, in preparation for a thru-hike dream at retirement, so the hammock needs to be durable enough to last 2200 miles.

    So far, I've taken some really nice 1.9 ounce Ripstop I picked up at Joanne Fabrics (really nice feel and drape) and built the Hammock body. The body is 9.5 feet long and 5 feet wide. I then took a piece of 7/64 amsteel blue I had as extra from my Whoopie Sling making project and created a Ridgeline with an buried eye on either end. The Ridgeline is 80% of the hammock body length.

    I roll whipped the ends with zipties.

    The weight of the body and ridgeline is 10.4 ounces at present.

    I'm debating on going back and adding a bottom entry slit, although I think I'd prefer a zipper ...... choices, choices, choices.

    I have some nanoseeum netting laying around from an abandoned bivy project to make the bugnet after I sew on the tieouts.

    I'm targeting 1 pound using fairly conventional materials.

    I can't thank you guys enough for all the hard work you've put into this design ... I'm looking forward to completing the project!
    Many a good hanging prevents a bad marriage
    William Shakespeare


    "Insert witty and intelligent statement here"

  2. #332
    Senior Member JerryW's Avatar
    Join Date
    Jul 2009
    Location
    West Central Illinois
    Hammock
    DIY Bridge
    Tarp
    DIY Hex/Grizz Beak
    Insulation
    DIY UQ and TQ
    Suspension
    Whoopie Slings
    Posts
    1,143
    Images
    101
    Captn - these things are fun to make aren't they? But...we need pictures!

    FYI - Watch those zip-ties closely. I had a couple of them break on mine.


    Jerry
    The "Search" function is your friend!

  3. #333
    Senior Member Captn's Avatar
    Join Date
    Sep 2009
    Location
    San Marcos, Texas
    Hammock
    WBBB
    Tarp
    Edge
    Insulation
    Burrow 40 & yeti
    Suspension
    Straps& dutch clip
    Posts
    506
    Images
    58
    Quote Originally Posted by JerryW View Post
    Captn - these things are fun to make aren't they? But...we need pictures!

    FYI - Watch those zip-ties closely. I had a couple of them break on mine.


    Jerry
    Thanks for the advice Jerry .... I'm not sure how I want to finish the whipping, the Zips are temporary while I check the work so far.


    Last edited by Captn; 12-18-2009 at 11:56. Reason: added pictures
    Many a good hanging prevents a bad marriage
    William Shakespeare


    "Insert witty and intelligent statement here"

  4. #334
    Member job13_5's Avatar
    Join Date
    Sep 2007
    Location
    Redmond, OR
    Posts
    89
    I built my HH with a bottom entry and still like it, but a zipper is really convenient. That being said, a bottom entry is going to be a lot lighter. If you're trying to go ultralight I'd stay with the bottom entry. Bare in mind too that you'll endup having to count your tarp weight into your shelter as well, so any weight you can shave will help.

    Best of luck!

  5. #335
    Senior Member Captn's Avatar
    Join Date
    Sep 2009
    Location
    San Marcos, Texas
    Hammock
    WBBB
    Tarp
    Edge
    Insulation
    Burrow 40 & yeti
    Suspension
    Straps& dutch clip
    Posts
    506
    Images
    58
    Quote Originally Posted by job13_5 View Post
    I built my HH with a bottom entry and still like it, but a zipper is really convenient. That being said, a bottom entry is going to be a lot lighter. If you're trying to go ultralight I'd stay with the bottom entry. Bare in mind too that you'll endup having to count your tarp weight into your shelter as well, so any weight you can shave will help.

    Best of luck!
    Good point!
    Many a good hanging prevents a bad marriage
    William Shakespeare


    "Insert witty and intelligent statement here"

  6. #336
    Senior Member SGT Rock's Avatar
    Join Date
    Nov 2006
    Location
    Maryville, TN
    Hammock
    Argon X90 Experimental hammock
    Tarp
    7'x9' cuben tarp
    Insulation
    Pads and quilts
    Suspension
    Kevlar + dynaglide
    Posts
    2,178
    Images
    92
    Hey, thanks for writing this. I used this information to make my new hammock. I've been putting my pack on a little weight loss program and have made the hammock with whoopie slings at 9.65 ounces. I haven't added a bug net option, but I plan to do one, and plan to come up with some sort of winter top cover as well.

    But thanks VERY much for the instructions. Everything worked like a charm.
    NO SNIVELING!
    www.hikinghq.net - Hiking H.Q.
    www.bmtguide.com - the BMT Thru Hiker's Guide

  7. #337
    Senior Member headchange4u's Avatar
    Join Date
    Oct 2006
    Location
    Kentucky
    Hammock
    Dual Layer WB Blackbird
    Tarp
    OES Cuben
    Insulation
    SnugFit
    Posts
    6,249
    Images
    35
    Quote Originally Posted by SGT Rock View Post
    Hey, thanks for writing this. I used this information to make my new hammock. I've been putting my pack on a little weight loss program and have made the hammock with whoopie slings at 9.65 ounces. I haven't added a bug net option, but I plan to do one, and plan to come up with some sort of winter top cover as well.

    But thanks VERY much for the instructions. Everything worked like a charm.
    You are welcome.

    Hopefully I will be able to post an instructional video on the roll whip. I thought I had lost that video along with a bunch of others due to hard drive crash. Luckily I found a backup of the videos on a removable hard drive a few days ago.

    Thanks god for backups.
    “Light thinks it travels faster than anything but it is wrong. No matter how fast light travels, it finds the darkness has always got there first, and is waiting for it." -Terry Pratchett


    Premium Quality, Fresh Roasted Coffee
    www.meancatcoffee.com

  8. #338
    Senior Member SGT Rock's Avatar
    Join Date
    Nov 2006
    Location
    Maryville, TN
    Hammock
    Argon X90 Experimental hammock
    Tarp
    7'x9' cuben tarp
    Insulation
    Pads and quilts
    Suspension
    Kevlar + dynaglide
    Posts
    2,178
    Images
    92
    Here are some pictures of my Hennessy Copy thanks to your instructions.


    Hammock without a load. The body is 1.1oz ripstop from www.thru-hiker.com. The lines and toggles are from Arrowhead equipment. The ridge line is mason twine and can be removed - it's attached with mitten hooks.

    Summer:
    The hammock...................9.58 ounces (includes whoopie slings from Arrowhead Equipment)
    Toggles...........................0.42 ounces (also from Arrowhead Equipment)
    Hennessy Tree huggers......1.84 ounces
    Warbonnet Edge Spintarp...8.69 ounces (lines from Arrowhead Equipment)
    4 MSR stakes...................1.27 ounces
    Stuff sack for the tarp.......0.42 ounces
    Bug net (not shown)..........5.09 ounces
    Total base weight............27.31 ounces

    For this base I use my JRB No-Sniveler for a top quilt and have my pocket pad on hand.
    JRB No Sniveler................21.45 ounces
    Pocket Pad......................11.20 ounces
    Stuff sack for quilt.............0.99 ounces


    Spring/Fall:
    -Net..............................-5.09 ounces
    2 Edge tarp doors..............3.53 ounces
    JRP cords for under quilt.....1.13 ounces
    Total..............................-0.43 ounces

    For this I throw in my Nunatack Back Country Blanket for the top quilt and move the no-sniveler to bottom duty. 26.82 ounces added.

    Winter:
    JRB Weathershield bottom...7.42 ounces
    2 Edge tarp doors..............3.53 ounces
    Hammock top...................~5.00 ounces est. (under construction)
    Total...............................15.95 ounces


    Whoopie Sling/Toggle/Tree Hugger connection. Tree straps are Hennessy Tree Huggers. The toggles and whoopie lines are from Arrowhead equipment.


    Attaching of the Whoopie line to the body with a prussic knot over the whipping which is done with mason twine.


    Side tie outs are 1/16" shock cord.


    Shown with a Warbonnet Edge Spintarp. Gray and Gray color is why I call it the ghost.


    Shown with some weight in it.


    Another angle.

    Thanks again for the instructions man. When I get the bug net and the winter top done, I'll post some images.
    NO SNIVELING!
    www.hikinghq.net - Hiking H.Q.
    www.bmtguide.com - the BMT Thru Hiker's Guide

  9. #339
    Senior Member SGT Rock's Avatar
    Join Date
    Nov 2006
    Location
    Maryville, TN
    Hammock
    Argon X90 Experimental hammock
    Tarp
    7'x9' cuben tarp
    Insulation
    Pads and quilts
    Suspension
    Kevlar + dynaglide
    Posts
    2,178
    Images
    92
    Another inspiration made from stuff I've seen in your pics Headchange...


    Bug net cover. Add on net for my homemade Ghost Hammock. The net is salvaged from a Hennessy Hammock that got destroyed when I loaned it out. It weighs 4.88 ounces plus about 0.42 ounces for some clips that help seal it.


    Top cover. I already had a JRB Weathershield but never used the top. After looking at your pics I decided I found a use for it. I modified the top cover of a JRB Weathersheild to make the cover for my hammock. Now I have a micro climate inside my hammock for wintertime. 4.84 ounces plus those clips again.
    NO SNIVELING!
    www.hikinghq.net - Hiking H.Q.
    www.bmtguide.com - the BMT Thru Hiker's Guide

  10. #340
    Senior Member GaHammockGuy's Avatar
    Join Date
    Jan 2010
    Location
    Kennesaw, GA
    Posts
    401
    Any thoughts on how to install a bug net onto the hammock.

    I have a video on my finished product of the body, but I need to add a bug net.

    I have thought of either unwrapping the hammock, sewing in the.... um...... I mean attaching the bug net with my thread injector... yeah... that's what I meant.

    and then wrap the hammock ends back up and add my suspension conenctors.

    Or trying to install the bug net to the finished hammock, but that poses an issue.

    I also thought about making my bug net a modular piece to be added aftger I hang the hammock.

    The modular optioin seems to promise a smaller headache as opposed to the other options.

    Any thoughts on bug netting and how to install into the hammock?

  • + New Posts
  • Page 34 of 50 FirstFirst ... 24323334353644 ... LastLast

    Similar Threads

    1. DIY Hammock and Bugnet Guide/Tutorial
      By XTrekker in forum Do-It-Yourself (DIY)
      Replies: 26
      Last Post: 07-26-2017, 10:55
    2. DIY 11' Double Layer Hammock Tutorial
      By XTrekker in forum Do-It-Yourself (DIY)
      Replies: 15
      Last Post: 02-06-2017, 11:33
    3. Hammock Tutorial Videos
      By notchent in forum General Hammock Talk
      Replies: 3
      Last Post: 08-10-2014, 22:24
    4. Hammock Swing tutorial
      By toygun in forum Do-It-Yourself (DIY)
      Replies: 1
      Last Post: 04-25-2013, 15:17
    5. Hammock End Cover Tutorial
      By headchange4u in forum Do-It-Yourself (DIY)
      Replies: 0
      Last Post: 10-21-2008, 17:22

    Tags for this Thread

    Bookmarks

    Posting Permissions

    • You may not post new threads
    • You may not post replies
    • You may not post attachments
    • You may not edit your posts
    •