
Last edited by Aisledog; 04-24-2012 at 18:45. Reason: error

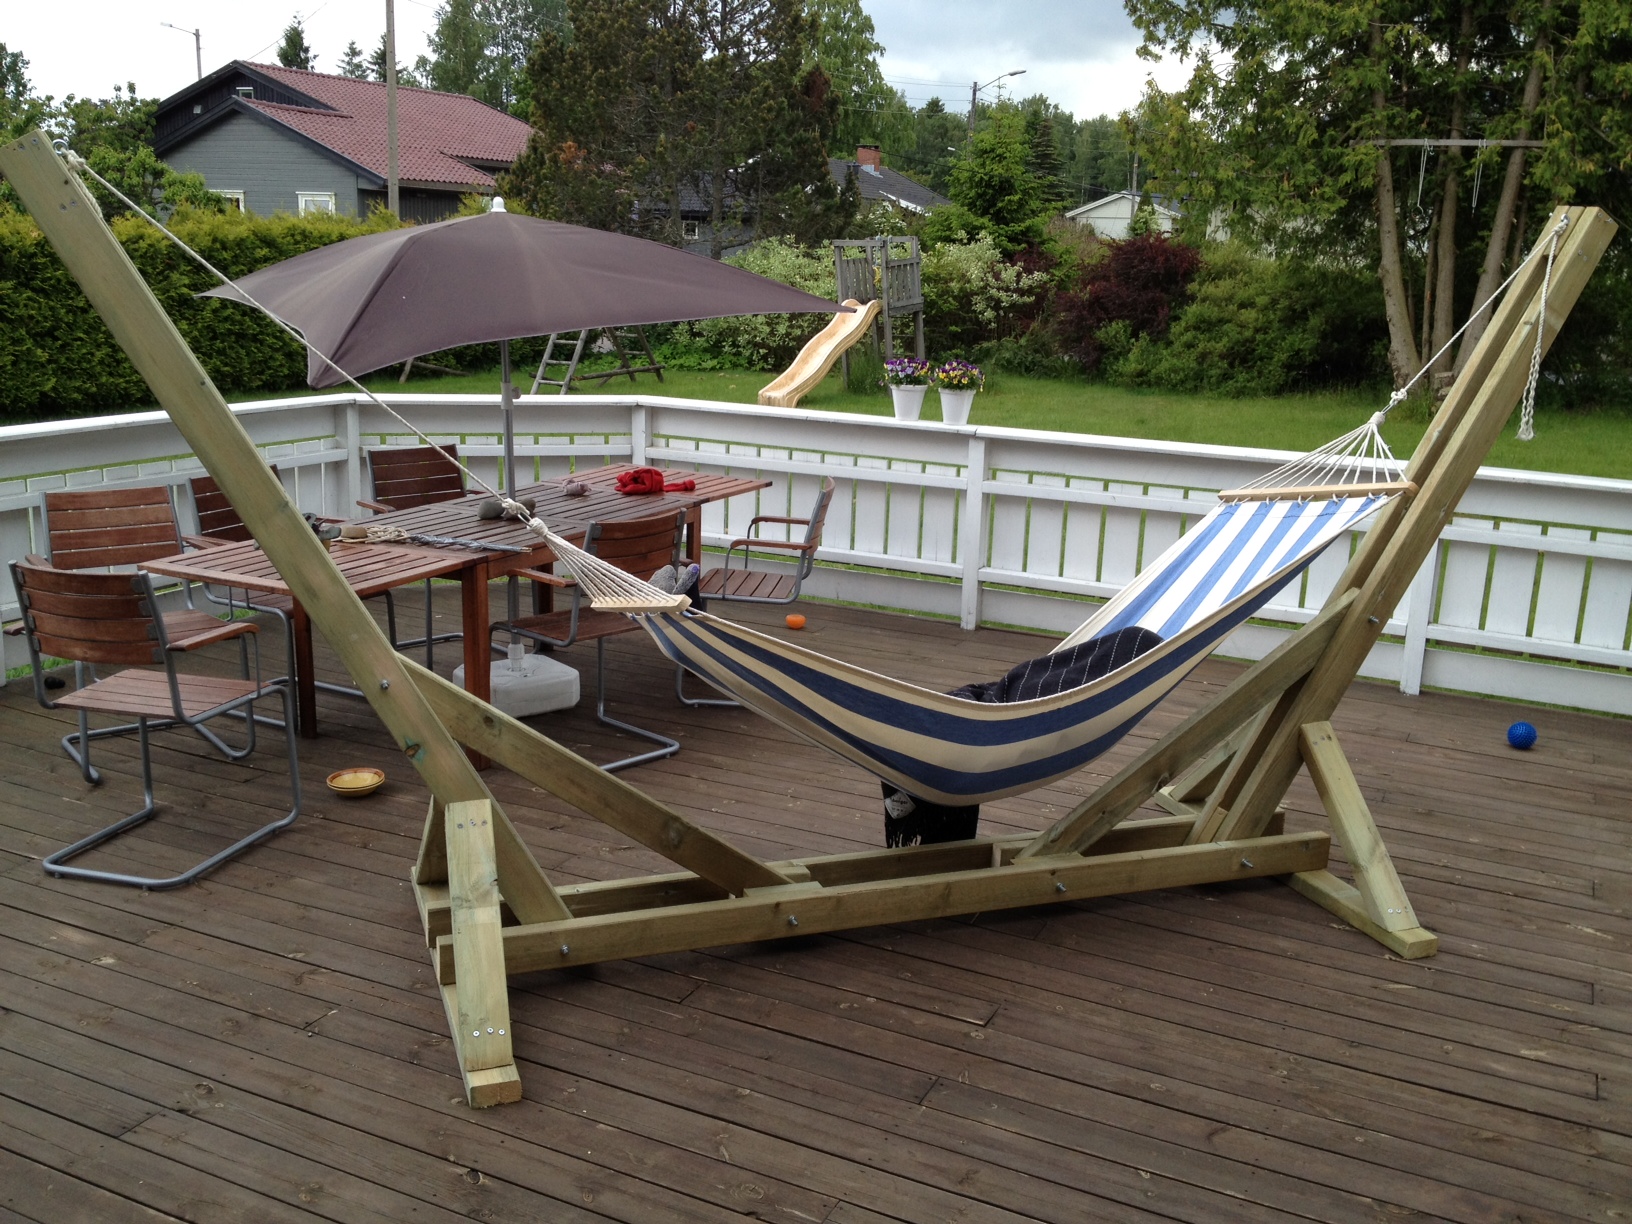
Just thought I would share some pics of my stand. Thanks for the design, i didn't want to spend hundreds of dollars on a pre fabed stand, and this one works great. Thanks.
Now, to stain. I did not use pressure treated lumber in this construction. Didn't think it needed it. Used stainless steel bolts and hardware, and spent five hours sanding smooth. There is a bit of sway in the arms when I am laying in it, but I am not worried. This thing is sturdy enough to hold my hundred sixtey pounds.. Again, thanks to JJ and everyone else who contributed to this thread.
Built my stand on saturday. Took about half a day, including a run to get the necessary parts. Finding long enough bolts was an issue, so all bolts are in fact threaded rod. The instructions could use more detailed measurements for cutting and drilling, although I did manage to mostly work it out by laying it all out on the ground and measuring.
My own twist to this was to add 4 struts to the structure to really stabilise it. This first stand is proving so popular I'll probably have to build another!
Thanks for a great project, Jason!
Nick (Norway)
That's a very nice heavy duty stand. It's nice to see someone doing it right as I feel some styles are getting dangerously under built lately.
I would suggest cutting the threaded rod flush to the nuts...a little easier on the feet that way.
I wanted to add a list of things that will make this project easier. I just built one of these stands today and wanted to give a list of things that will be helpful to make the build go smoothly:
A 16in long, 1/4inch SpeedArbor to drill all bolt holes
Plenty of 3in deck screws to Pre-fab the entire thing before drilling and installing the bolts.
A 1 1/4in Arbor to recess the washers so using the suggested 5in and 8in bolts actually work. I was surprised to find that the bolts are too short unless the washer/nuts are countersunk.
Bolts used:
2 8in eye bolts with washers, Zinc
4 8in bolts, with washers, galvanized
4 5in bolts with washers, galvanized
(all washers, bolts, and nuts are 1/4 and the washers are 1/4 by 1 and 1/4)
1lb box of 3in deck screws
A good quality drill and/or impact driver. Drilling through 8in of wood with a long Arbor can be taxing for a drill without the speed/torque. My old Dewalt I've had for 10+ years wasn't up to the task. Bought a new 20v drill and impact driver and the job was a breeze.
Spray wood stain. Of course optional, but it makes the final product look much better if it has a couple coats of a dark Mahogany stain.
Assembling the entire project first with wood screws, adjusting the angles, spraying stain, and then drilling/bolting it together was a great addition to the process. It allowed me to get everything perfect the first time before drilling big holes.
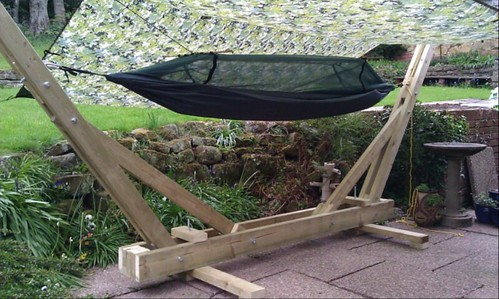
It is a great stand, however you will run into an issue when pitching a tarp. Since the hammock causes the main beams to draw inward because of the strain it will cause slack in your tarp ridge line. Other than that small quibble, a great stand if you don't have trees in the backyard for impromptu hangs.

These are all good points, and there are some great ideas in this thread. I've been meaning to update the plans with some of this stuff, but I just can't seem to find the time. Hopefully I'll get a chance to soon. It's so hot right now I haven't gone outside unless absolutely necessary, much less spent any time in the hammock!
do you have a pdf file i could use for the same design you just posted. I bought some hammocks but i have no place, so i need a easy way but efficient stand to put them.
Thank you
woodchick
Could someone point me to the PDF drawings that I heard mentioned on a YouTube video about this stand?
Thanks
Garry


This is Vetty NIIIICE! I like high five!
16S/3873805/0669292
 Posting Permissions


 [/url][/IMG]

 Reply With Quote

Bookmarks