Articles
The following tutorial was taken from Kick *** Quilts. The original tutorial is courtesy of Patrick McKenna, and is posted here with his permission. This tutorial is also available in PDF format from here or here (thanks gun parker and angrysparrow). Acrobat Reader is required to view files. Now on to the good stuff....

I think making plans available is the right thing to do for a variety of reasons. This section is more for making your own for the pure satisfaction of it or as a starting point for a more personal custom project. I also think it's a useful way of showing you what you're buying from the inside out.
I'm going to give instructions on how to make mine exactly. I highly encourage you to embellish on the design and/or materials to suit your own needs, though. Here are some possible variations:
Ultra-lightYou could use 0.8 oz. ripstop instead of 1.1 oz. You could use less insulation, maybe have it only double-layered in key areas, like around the torso and shoulders. You could leave off the reinforcing patches and side tie-out loops. For the corner loops, you could use 1/4" Grosgrain ribbon instead of 3/4" and leave off the cordlocks and just use knots instead. The 0.8 oz. will save you several ounces and the insulation skimping should save at least that much.
Heavy duty
You could use 1.9 oz. ripstop breathable and 330 denier reinforcing patches. You could use nylon straps instead of the Grosgrain ribbon. You could reinforce all seams with Grosgrain. You could replace the 3/16" attachment shock cord with something thicker.
Temperature variation
I currently use two layers of 3/4"-1" Polarguard 3D. Adding another layer should get you between ten and twenty degrees of extra warmth. Alternatively, you could use only one layer, which would probably be good to around 50 degrees if you know it's not going to be colder than that or if you're using the quilt in addition to something else like a pad.
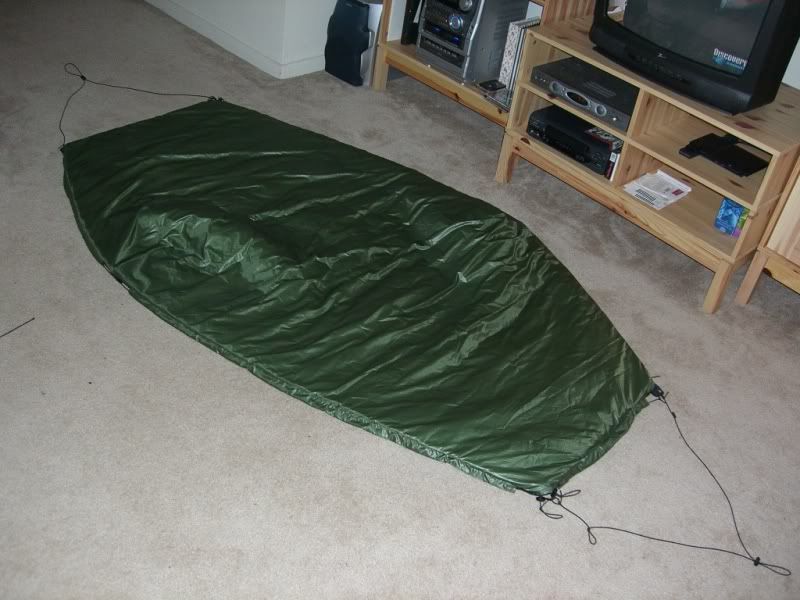
Okay, back to making one by the book. If you've made a synthetic top quilt, you'll be in great shape for this project. The underquilt is basically the same with a few additions. We're pretty much going to make a sandwich with nylon on the outside and Polarguard on the inside. We're going to make it inside out, then turn it right side out at the end. We're also going to add perimeter drawcord housing and attachment loops. They'll be on the inside until the end, too.
Let's check out the materials and supplies you're going to need to make your own Potomac...
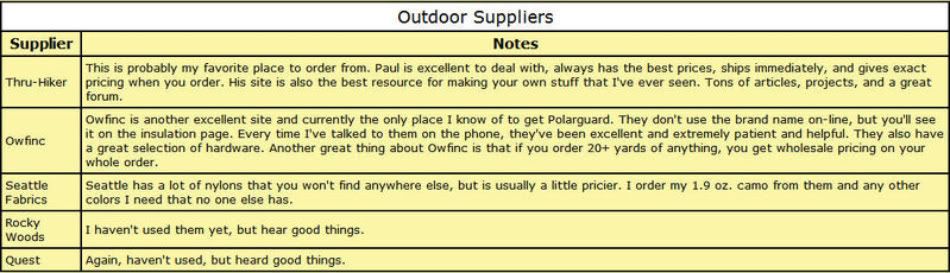
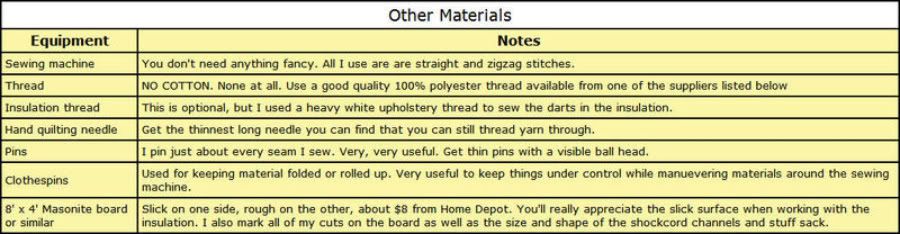
Materials and Supplies
This page lists what you need and where to get it. The first table is a list of some of my favorite suppliers, the second lists the materials for the quilt itself, and the third lists other materials or equipment you'll either need or might find useful.

Part 1: Measuring and Cutting the Nylon
In this section you're going to measure and cut the nylon liner and shell using the pattern below. Cut one, then use it as a template for the other. I started this project after I'd cut out the nylon, so I don't have pictures of the process right now. I'll post them after I make the next quilt.
Approximate time: 2 hours
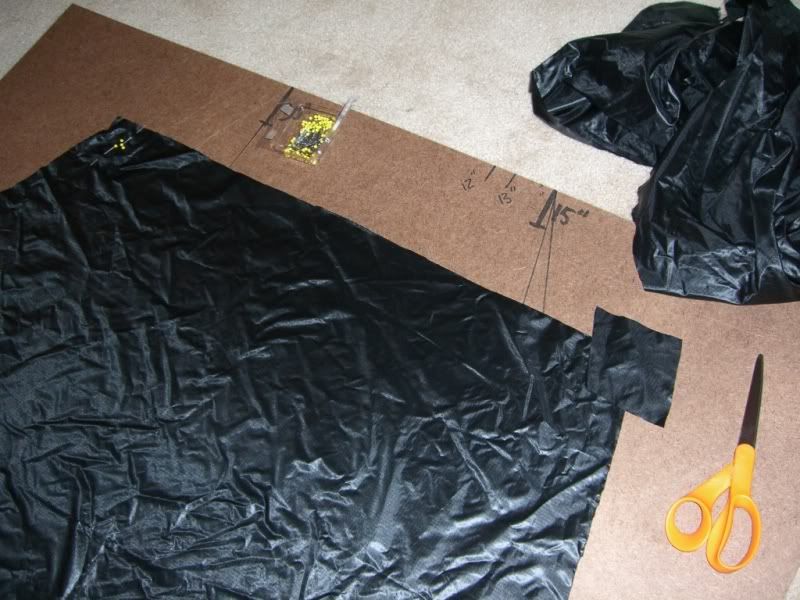
There are a lot of ways to manage measuring and making long cuts. You can use the lines in your kitchen tiles, masking tape, marking chalk, etc. What works best for me is an 8' x 4' composite board called Masonite. Cost for the whole piece was about 8 bucks from Home Depot. I highly recommend buying one or using something similar.
You'll really appreciate the big, slick surface when dealing with the insulation. It's not quite as wide as I need, but I can make do by folding stuff in half. I have it marked for the perimter of the quilt and have other useful patterns on it, like the drawcord channels and stuff sack. I do all of my cutting, pinning, and folding on it.
To cut long seams, I lay the material down, then lay another board on top of it along the length I need cut. I kneel on that top board and press the razor to it for the straight cut. I always make sure the board is on the side of the cut that is finished material. That way if I slip with the razor, I'm just cutting material that's going to be removed anyway.

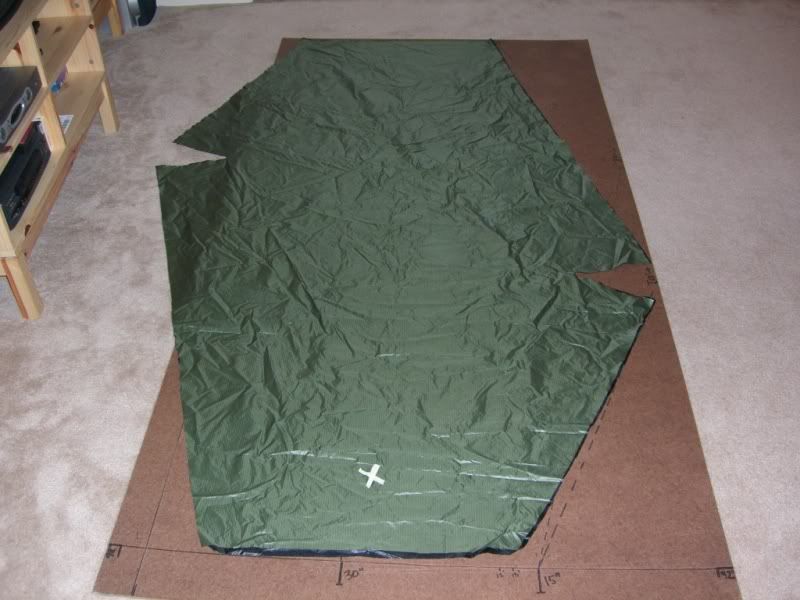
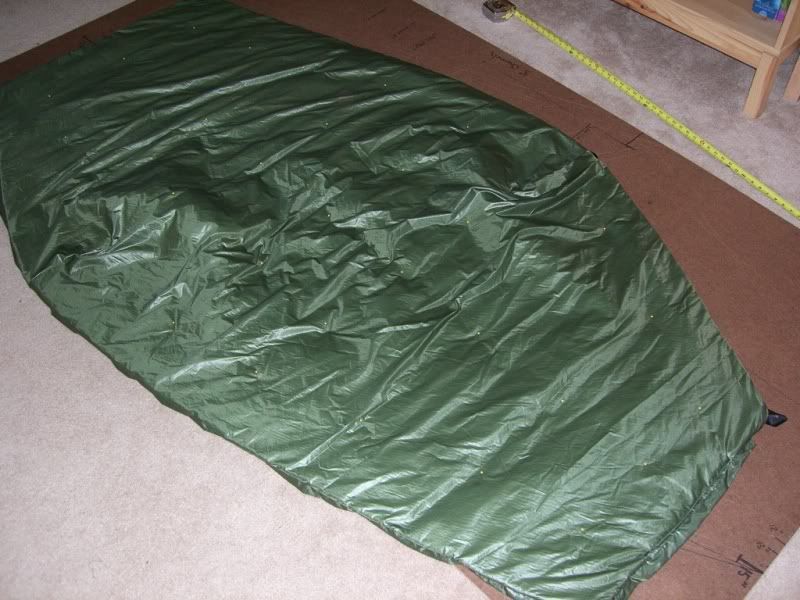
This is the pattern for the liner (against the hammock bottom), shell (facing out), and insulation. The cuts in the side will be sewn together to help the underquilt cup the bottom of the hammock. You'll note that the foot end is slightly narrower than the head.
There is a right and wrong side for each piece of nylon. We'll call the side that faces out to the world the "right" side and the side that faces in to the insulation the "wrong" side. The shiny side of your fabric should be the wrong side.
Looking at the pattern you can see that the long sides are at the top left and bottom right. Imagining laying your nylon on top of this. The liner will be laid right side up and the shell will be laid wrong side up. Be sure you are very clear on this because once you cut, you can't correct it. When the liner is lying on the pattern, the side facing up will be the right side. When the shell is lying on the pattern, the side facing up will be the wrong side. If there's any doubt about this, take your hammock out to help you picture it. When you're sure you have things oriented correctly, cut out the liner and shell.
TIP: When you lay the cut liner on top of the shell material, push it to one side or the other. That leaves a thick piece of shell material that you'll cut off on one side. Cut that off lengthwise so that you'll have long lengths to work with when it's time to cut the shockcord housing.

When you're done with both, cut an inch off the foot end of the liner. We're going to hem the foot of the shell at the very end and this will make them even.
TIP: Cut the liner from the pattern, then use it on top of the shell. Clip it on top and use it as a template so that each piece comes out exactly the same.
TIP: Masking tape a big X to the foot-end right side of each piece so that you can easily keep track of their orientation throughout the project.
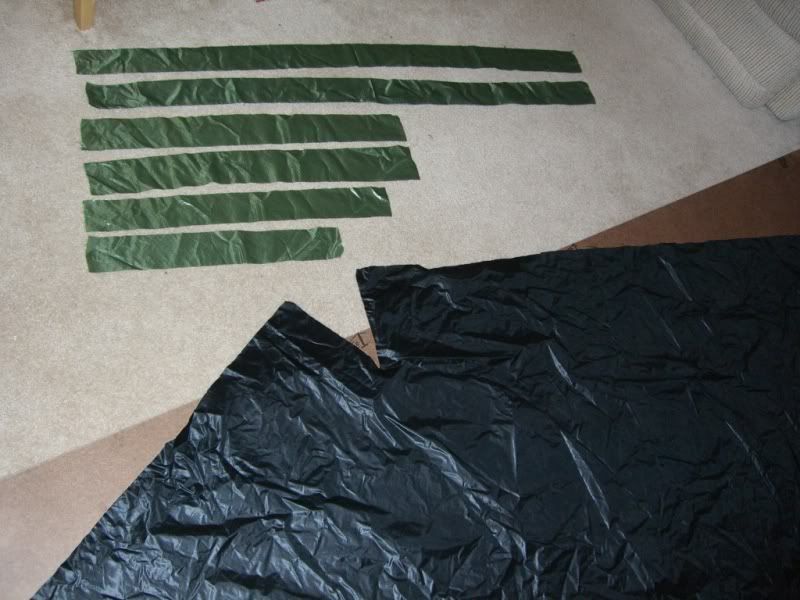
Next, cut the strips for the shockcord housing. I always make them from the shell, not the lining because it looks nicer. I've thought about making them from a third color but haven't yet tried it.
Each strip is 3 inches wide and there are six of them. Each long side is 55 inches, the short sides are 32 inches, the foot end is 24 inches, and the head is 29 inches. If you're making a custom size, just measure them with your cut liner nylon. Leave two to three inches on each end and allow for 3/4" seams on each end.
Next, heat seal all of your nylon edges, including the shockcord housing. To do so, just run a flame along each edge. Hold the fabric so that the edge is sticking up and run a flame along it with the bottom of the flame touching the fabric. You're doing it right if it looks about the same but feels slightly crunchy when you run it between your fingers. Don't do it so much that you're shrinking the edge.
WARNING: Don't overdo the heat. It's very easy to go back later if you find parts that need resealing. It's not easy to fix setting your whole project on fire.
Okay, now put your shell nylon aside. The majority of the work we're going to do is going to be on the liner. Hang on to your scraps, we're going to use them later.

Part 2: Sewing the liner
This section is the most time consuming and has the most steps. Work slowly and carefully. Nothing here is too difficult; it just takes a while. We're going to sew the shockcord channels, attachment loops, and reinforcement patches to the liner, then sew the liner darts.
Approximate time: 6 hours
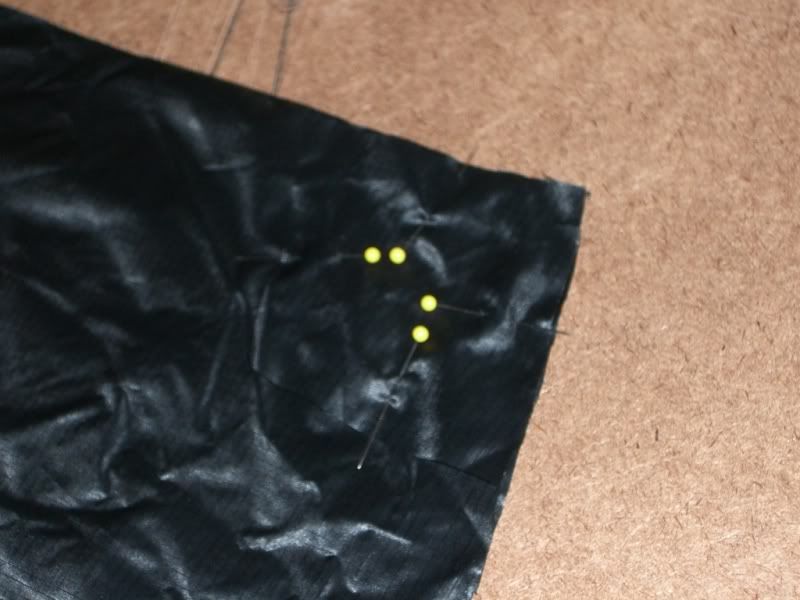
We'll start with the reinforcement patches. They're the only parts that are going to be sewn to the wrong side of the liner, so lay it out with your X facing down. At each corner, make the reinforcing patch out of the scrap material you saved.
Make it extend about four inches down each side and three or four inches deep. I used to use a semi-circle, but have switched to a diamond shape because the finishing comes out a lot nicer. Use a pin on each edge to hold it in place.
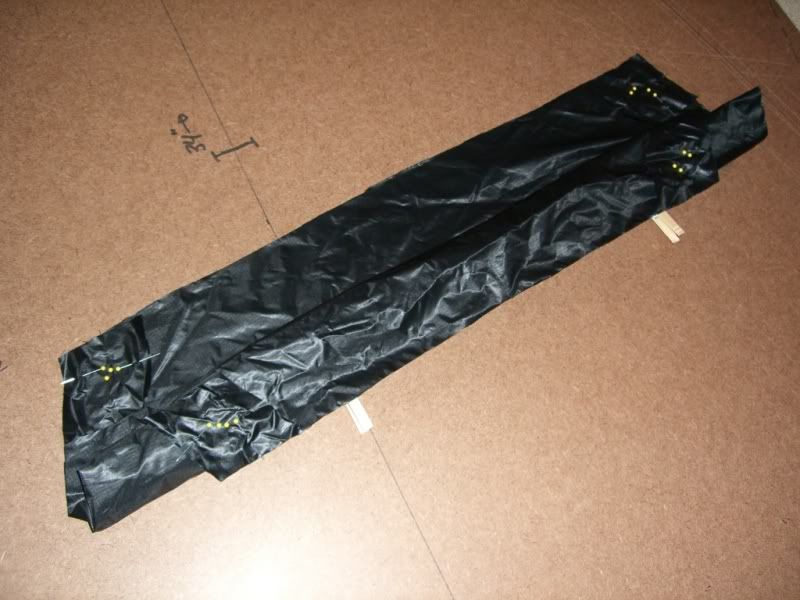
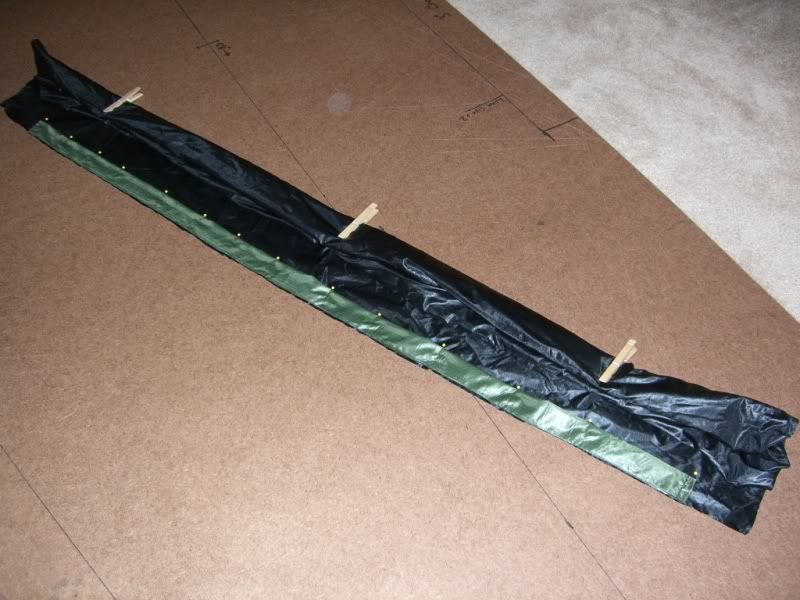
When you've finished pinning all four corners, fold the liner in half from the bottom to the top so that the patches are together. Then roll it up from the bottom and clothespin it in place. That gives you access to all four patches and leaves the whole thing in a compact package so that you can easily maneuver it around your sewing machine.
WARNING: Be careful with the clothespins. When you have the material rolled up, it's a lot for them to handle. Be sure you're opening them all the way before attaching or removing so that you don't tear the fabric.
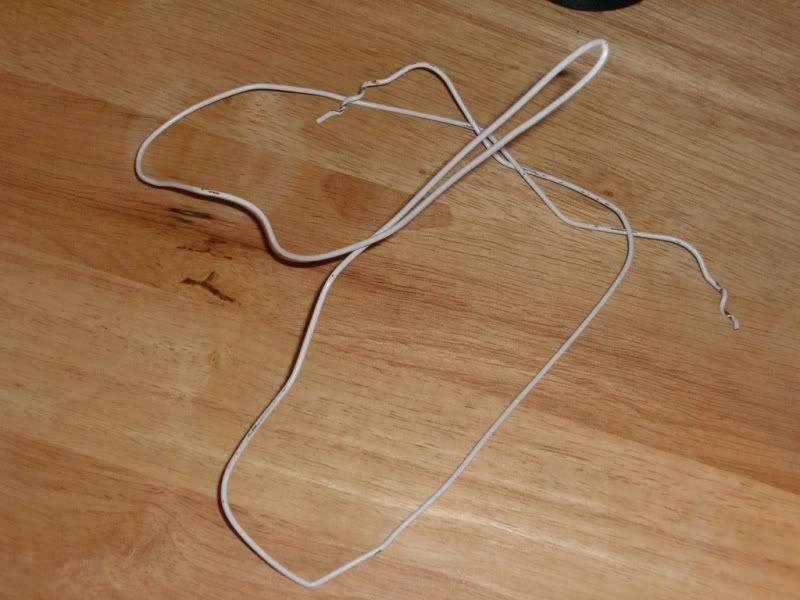
Sewing at last. I use a cone of thread because it's a lot cheaper. You want to use a nice 100% polyester thread. I look for one that's difficult to tear by hand. You can buy a special cone stand for your machine, but I save a few bucks by making one out of a coathanger and using some straws taped to the machine as thread guides. I've been using this setup forever with no problems.
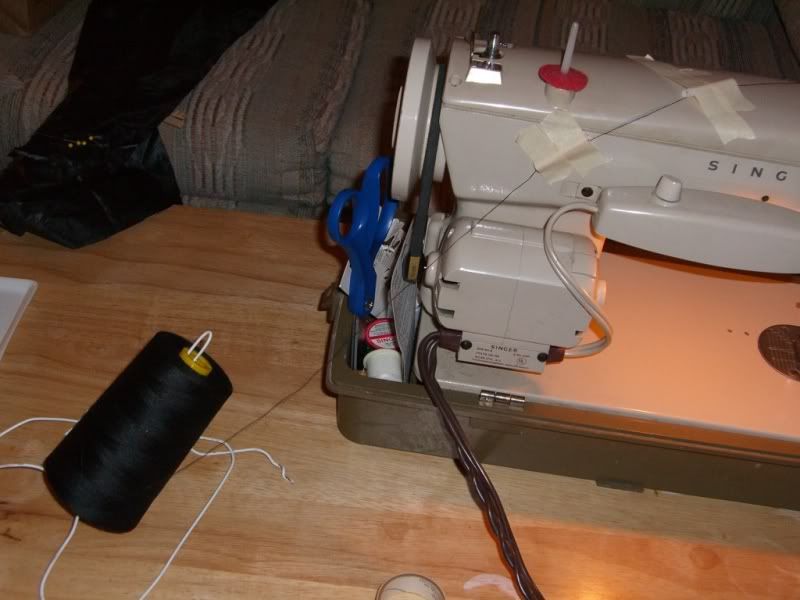
Here's a detail of the cone holder.
I do double stitching on every seam. I usually sew the first with the foot near the edge of the fabric. On the second pass, I leave the foot in the same place, but set the needle farther away from the edge. That leaves two rows of stitching about a half-inch apart. When I start a seam and finish it, I use about a half inch of bartacking to help seal the ends. I usually go up, leave the needle in place, turn the fabric around and then sew back down, again using a section of bartacking at the ends. When you're done, you'll have two threads on each side of the fabric on the end of the seam where you started. I tie these together with triple knots.
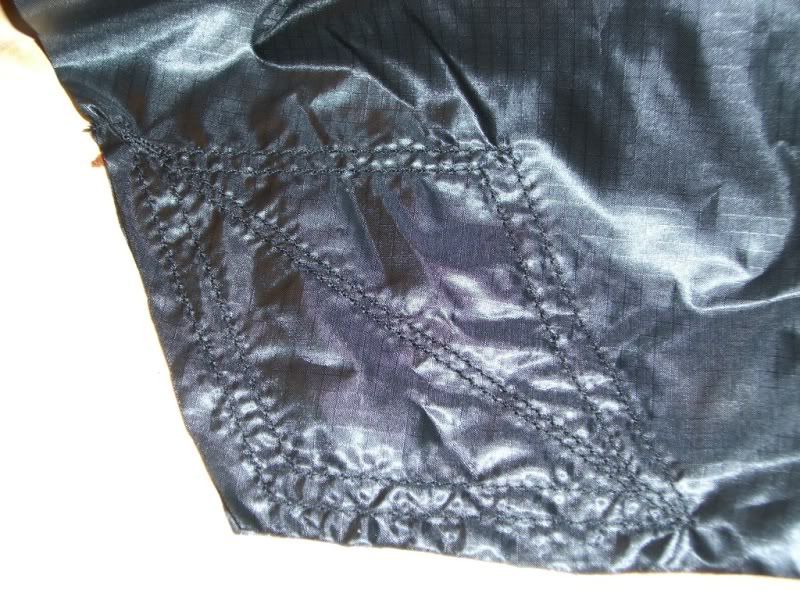
Sew around the perimeter of each patch twice. Start at one side corner and go towards the liner corner. That will leave you at the same side corner when you're done. Sew across the body of the patch and then back to where you started. That leaves you a nice pattern that will help reinforce the corner and look sharp when finished. You're also left with two threads per side to tie off.

Here's the back side of the patch. This is the right side of the fabric (faces out to the world).
Do all four patches and then unfold the liner and lay it right side up. All of the remaining sewing will be on the right side.
Prep the drawcord housing. Put a seam on each short end of each drawcord housing strip. Be sure that you're putting the wrong side of the material on the inside. I make the seam a little wider than the foot of the sewing machine. This is the only seam on the whole thing that I don't bother pinning.
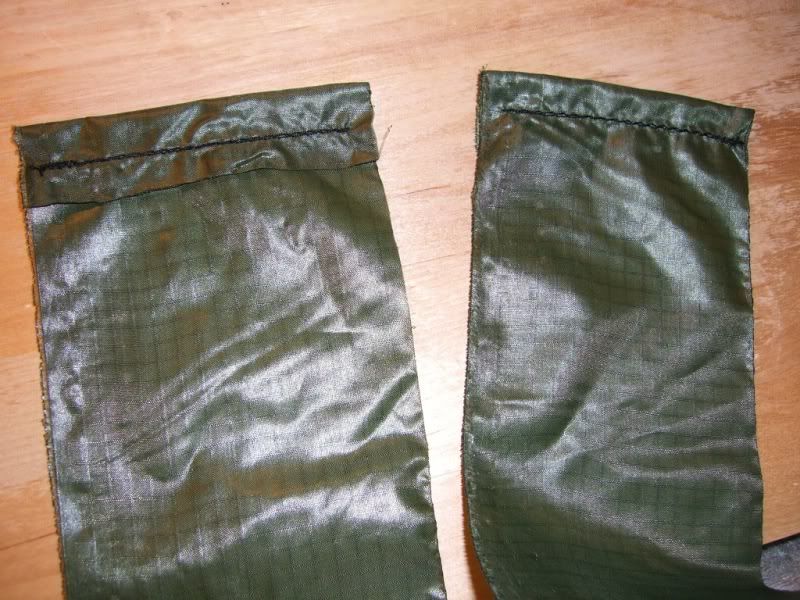
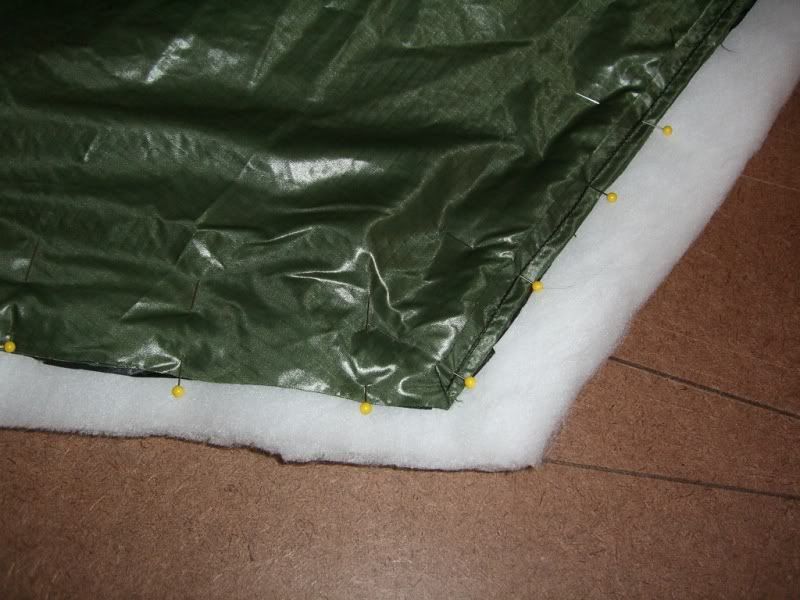
Fold the housing in half lengthwise and pin it to the right side edge of the liner. It's easier to fold it in half as you pin. Put a pin every four inches or so. Position the strip centered on the edge you're working on. Lay it out so that the housing is on top of the liner with the edges of each flush. We're going to turn everything indide out when we're done so that the housing will end up sticking out then.
TIP: I actually leave the lining showing by about 1/8" under the housing. That makes it easier to tell everything is lined up while sewing than if they're flush.

Fold and roll the liner up like you did with the reinforcing patches so that you can easily work with it on the sewing machine.
WARNING: Unfold the liner each time and be sure you're sewing the housing on the correct side of it. Double check yourself. It's a real pain to do it the wrong way and have to undo all of that stitching.
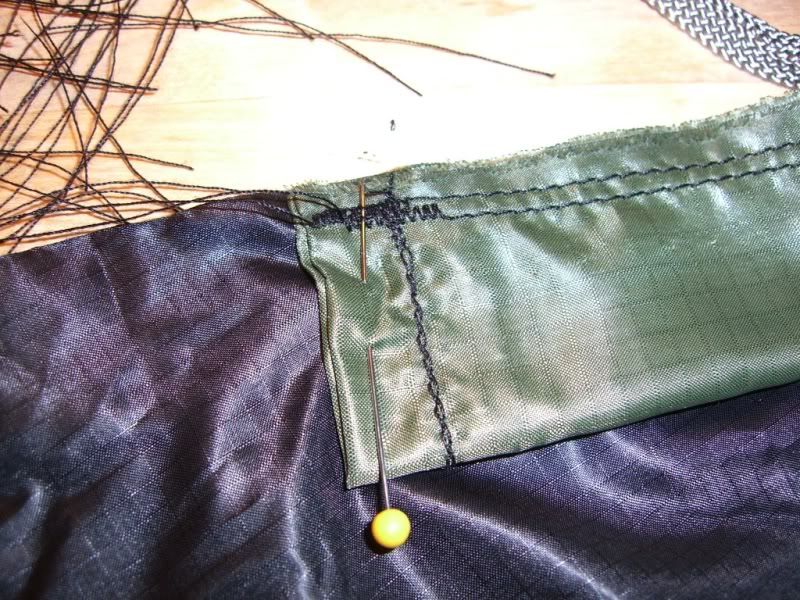
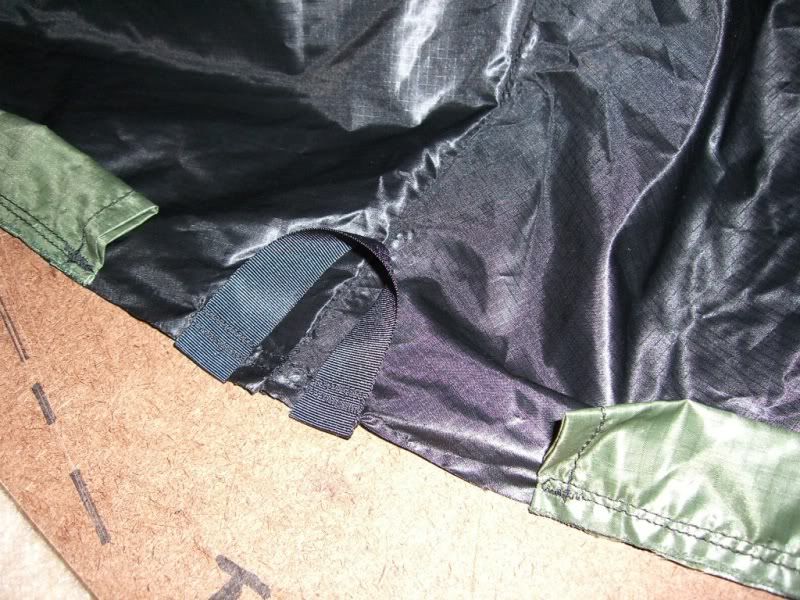
Sew up one side and down the other, then tie off the threads as described earlier. Note that the foot is flush with the edge of the material. In this shot, I'm on the second row of stitching. You can see that the needle is set to the right, creating about a half-inch of space between the two lines of stitching.

Here's a detail of the corner. Note the zigzag stitches used to start and finish each line of stitching and the two threads hanging out ready to be tied.
Repeat the attachment for all six shockcord housings. I like to do the long sides first and the foot side last, just because it seems to make the time go quickest.
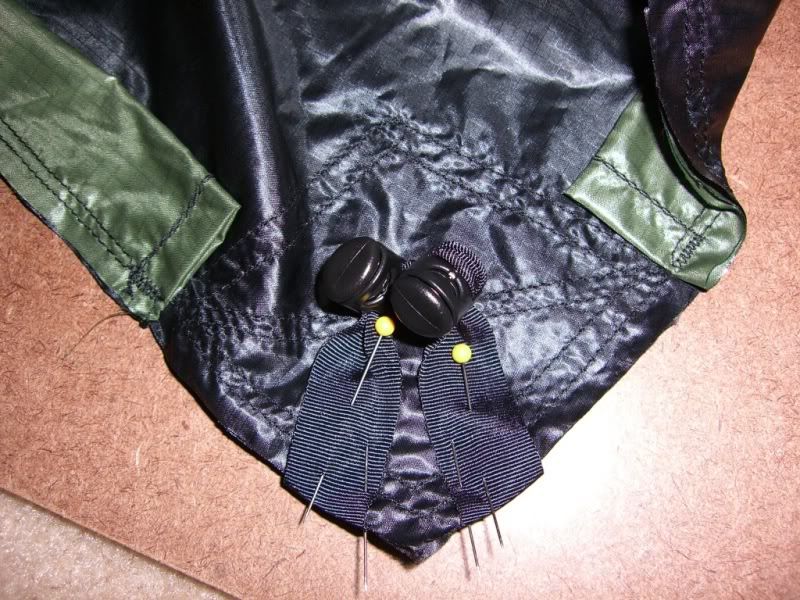
Cut your Grosgrain ribbon into six ten-inch lengths. Heat seal each cut end. On two of them, attach two Fastex slotted cordlocks. Fold the ribbon in half twice and feed it through each slot on each cordlock. Pull the cordlocks together to the very top of the ribbon. That will keep them out of the way while we sew.

The two ribbons with cordlocks are going to go at opposite corners. So, the top left corner will control the top cord and left cord and the bottom right corner will control the bottom cord and right cord. Again, attach the ribbon so that it's pointing in towards the center of the lining. Pin each end down about a half- inch from the corner and leave about two inches hanging off.
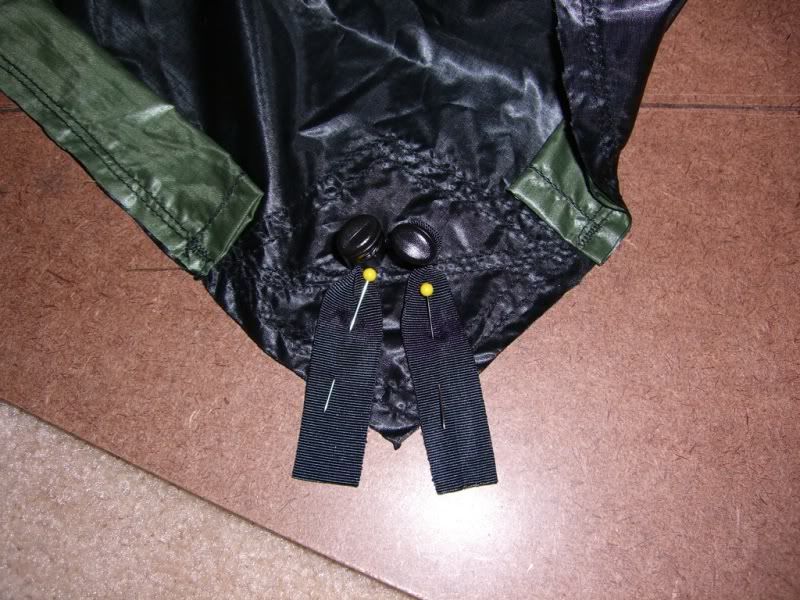
Take that two inches and fold it under and in so that the two ends form an X.

Here's the underside all pinned up.
And here's the top side ready for sewing. Note that the cordlocks are at the top of the loop and that they're sitting upright with the ribbon pretty flat.
When you sew them, use two lines of stitching, but this time use a wide, fairly close zigzag stitch on the ribbon itself. I don't bartack here because I don't want to poke a million holes in the ribbon.
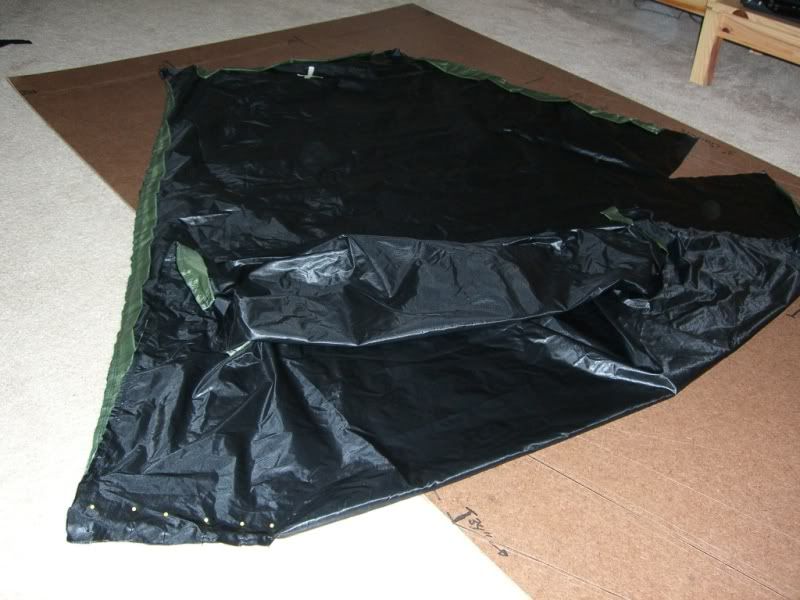
Here's the liner with shockcord housings and corner attachment loops all sewn on. Next, we're going to sew the darts together.
Fold your liner over so that the seam will be on the wrong side of the fabric. Pin the seam. If you're careful, you can do the left and right side at the same time and fold everything up. Be sure you're going right to the edge so that you don't have a hole there when you're done.
WARNING: I'm not sure why, but sewing the darts closed is when the fabric wants to wrinkle the most while you sew. Be extra careful that it's not happening underneath as you sew.
Sew only the liner darts. We're going to use the shell as a pattern for the insulation, so we'll do that afterwards.
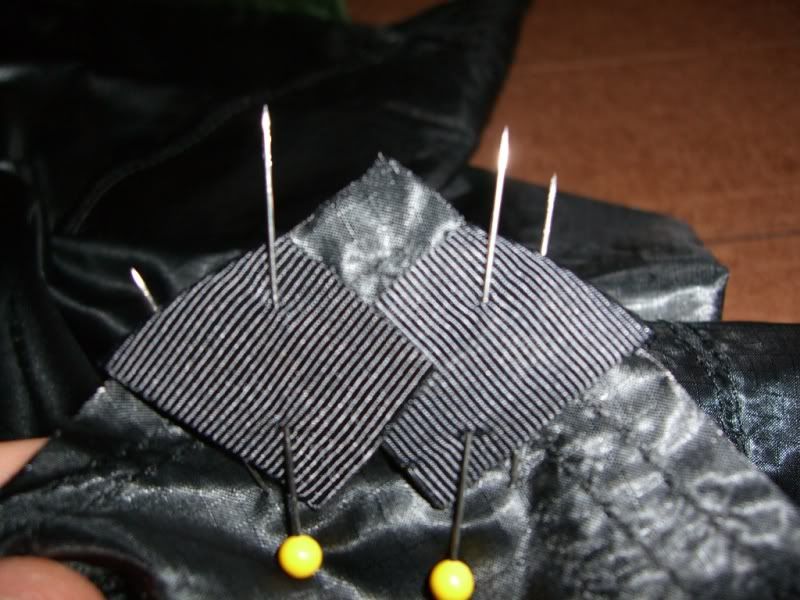
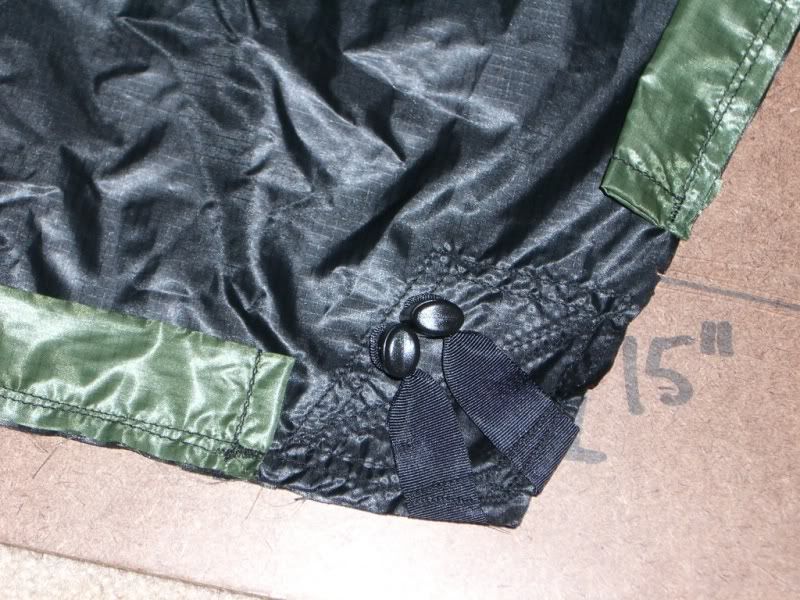
After you've sewn the darts closed, take your last two Grosgrain strips and attach the side loops. Use the same type of stitching that you did on the corners, but this time just fold the extra two inches of Grosgrain straight back under the liner.
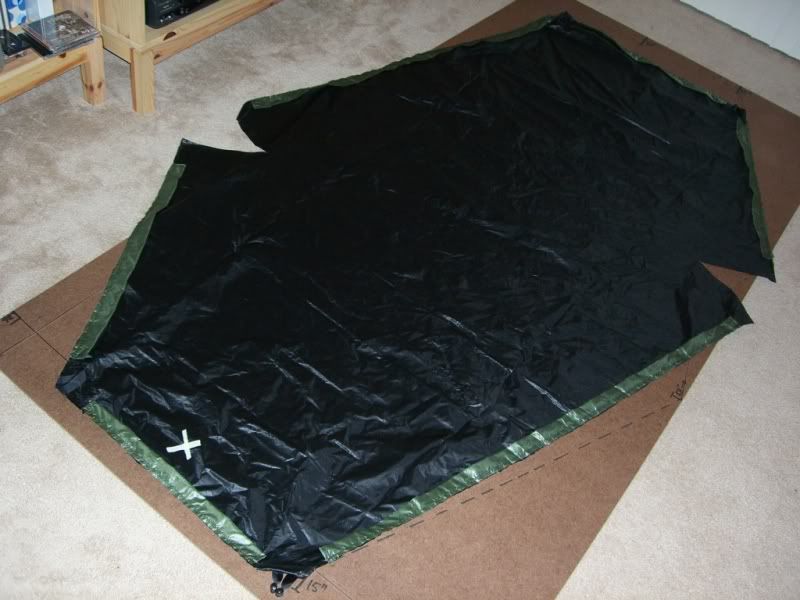
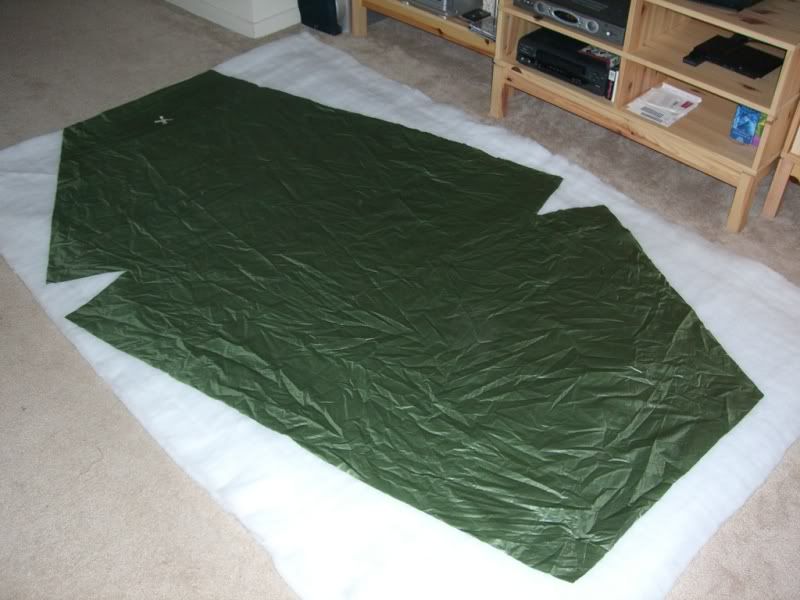
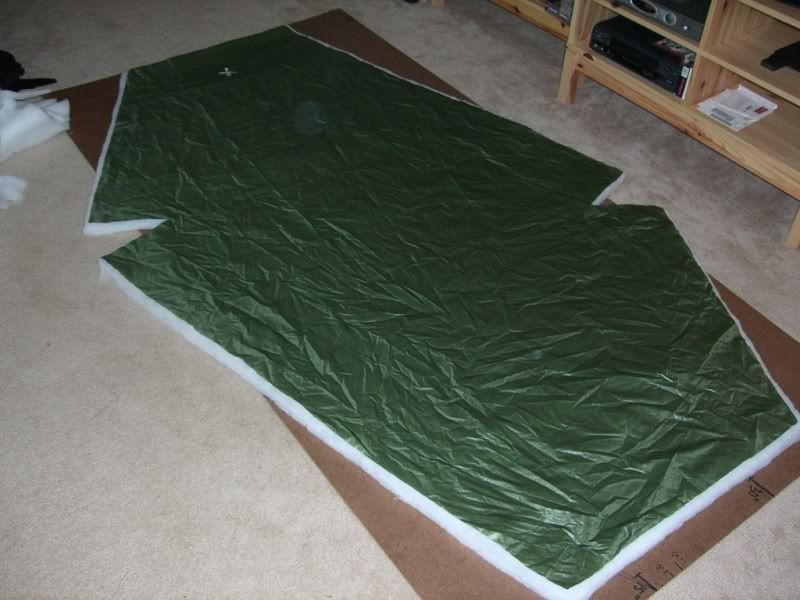
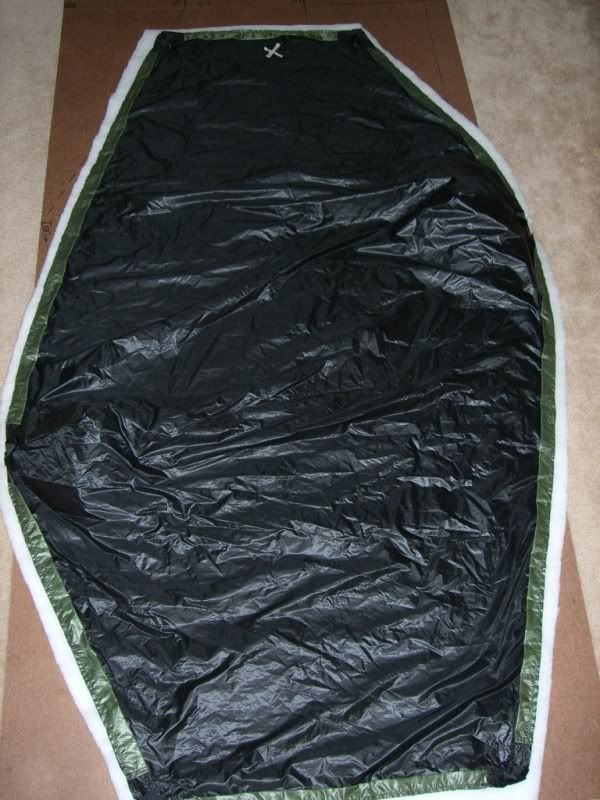
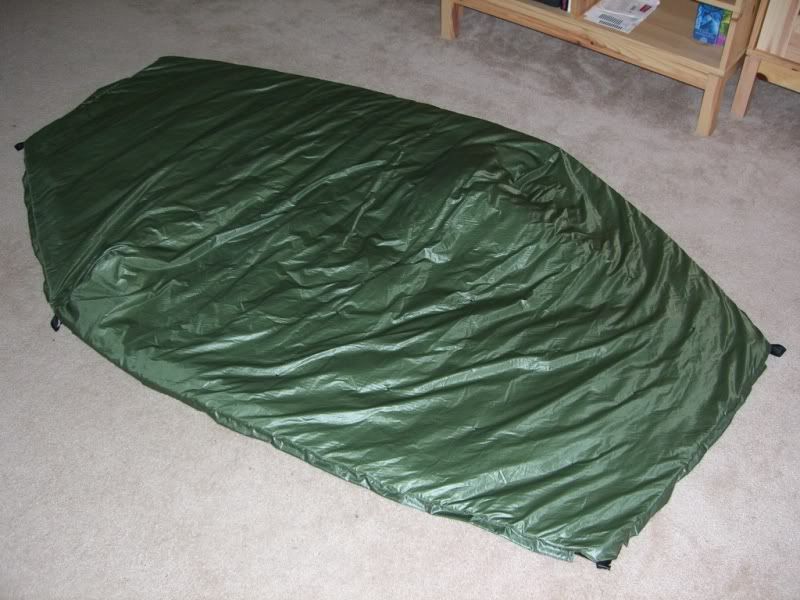
That's it for the liner. Here it is all laid out. If you did everything correctly, you've now got all six shockcord housings and the six Grosgrain loops sewn to the right side of your liner. You should also have the four reinforcement patches sewn to the wrong side, the darts sewn with seams on the wrong side, and two cordlocks on each of two opposite corner loops.

Part 3: Cutting and Sewing the Insulation
In this section we're going to cut the insulation to shape and sew its darts closed by hand. At the end, we'll also finish up with the shell nylon, which is just a few easy steps.
Approximate time: 1 hour
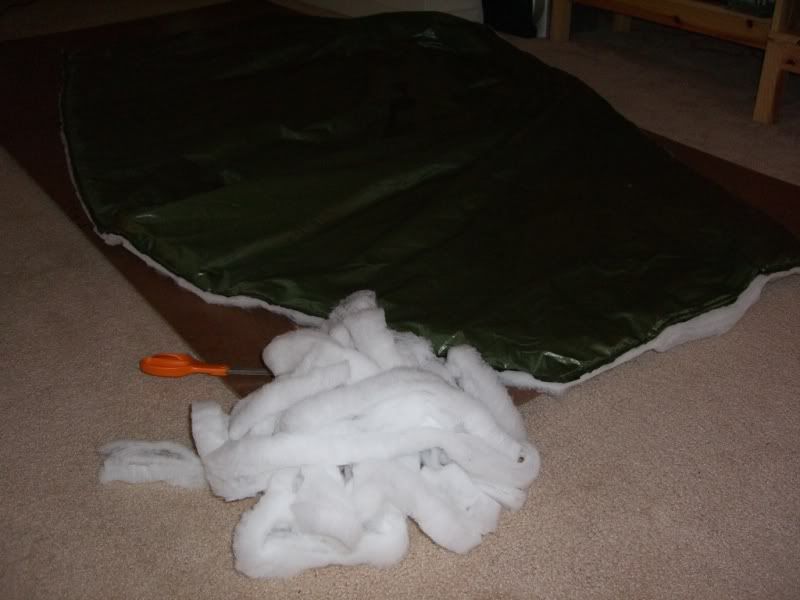
Lay out your insulation one layer on top of the other and lined up. Handle the 3D carefully. It's extremely grippy, so work on a slippery surface like a tile floor or large board if you can because it really hangs onto carpet. Be very sure that you're not stretching it out. It's easy for an edge to grab and put tension on the whole thing, which will severely reduce the loft. After you lay out and line up both pieces, fluff them from the edges several times and let the whole thing sit for a while to make sure that it's lofting properly.
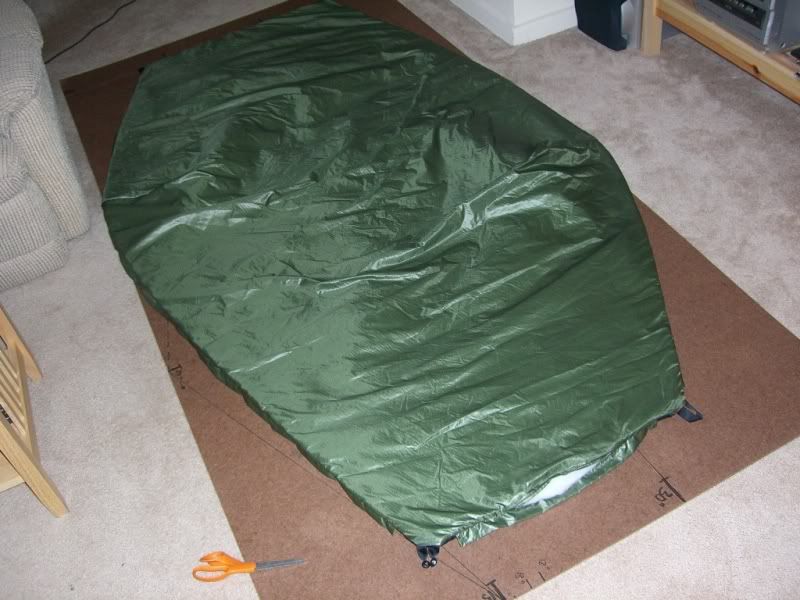
Get your shell. You'll use it as a template. Lay it out on top of the insulation. If you lay it wrong side up, that will leave the insulation oriented so that you won't have to flip it when it's time to put the whole thing together.
Cut the whole thing with at least an inch of extra material on the whole perimeter, including in the darts. You'll really appreciate a good pair of scissors here. Put the shell aside again.
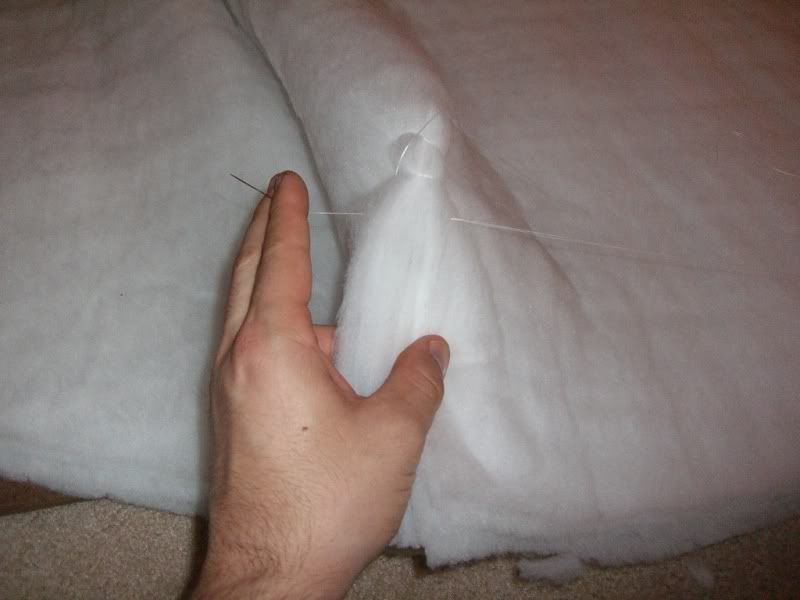
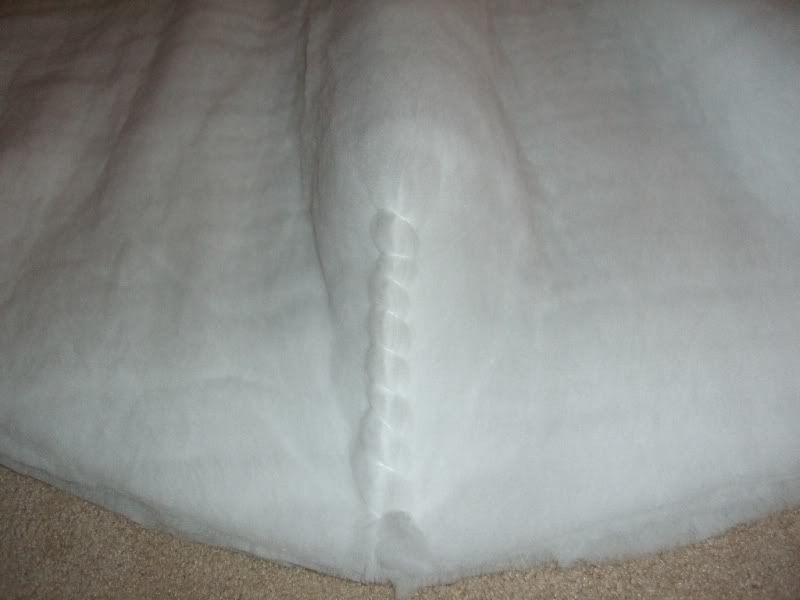
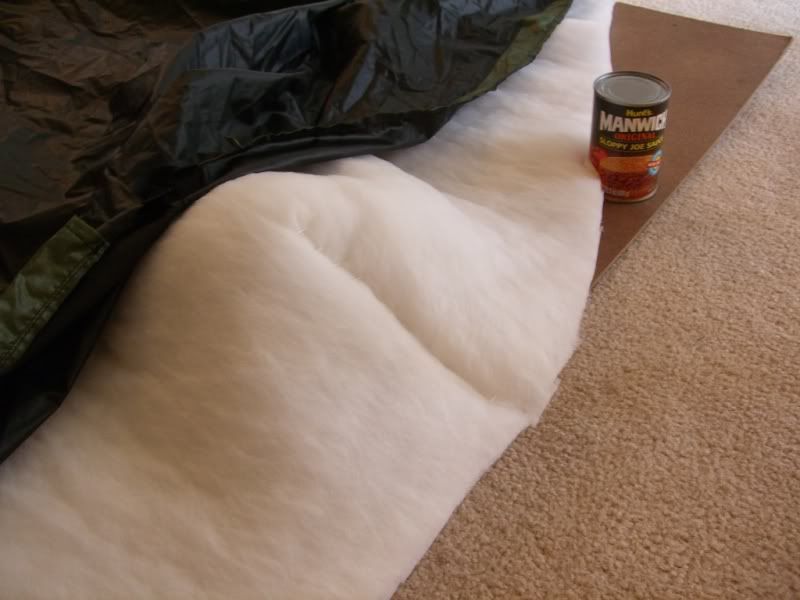
Now sew the insulation darts together. I find it helpful to put a can under each one to help it with it's final shape. Again, be sure you're fluffing it as you go and that the can isn't stretching the material. You're going to sew these pieces pretty loosely. You don't want to compress the insulation, just hold it together. I use a doubled up thread on a hand needle. Put the first stitch through then pull it back through the loop in the thread to lock the end.
TIP: I use a white upholstery thread from Guterman for the insulation. It's stronger than regular thread, which I think will help on these loose stitches and the white won't show through if a light colored shell or liner is used.
Use a stitch about a half inch from the seam and space your stitches about an inch apart. Keep the needle pushing into the same side each time and pulling the thread over on each stitch. Keep tension on the thread. You can compress the insulation a little, but not super tight. Sew from the center of the insulation out towards the edge and stop about an inch and half from the edge. You're going to trim the insulation at the end and you don't want to cut your stitches.
That's it for the insulation. The last step here isn't pictured, but involves the liner. Sew the darts closed with the seam facing the wrong side (opposite of your X). Then hem the foot end about an inch with the hem facing the wrong side also.
Part 4: Assembling the Parts
In this section, we're going to put all the parts in place in preparation of sewing it all together. Do not rush this step. All the pieces must be correctly lined up. A mistake here is going to be a lot of work to undo.
Approximate time: 1 hour
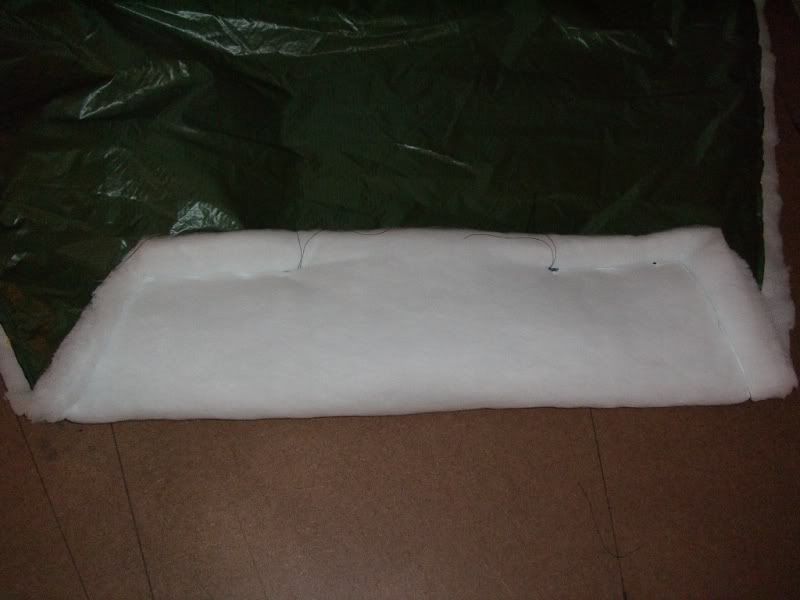
Your insulation should be laid out so that if you're standing at the foot, the top left side is a long one. Put a can under each of the darts to help its shape. Lay your liner on top of the insulation and adjust it so that it's draped evenly. Remember that the insulation is about an inch bigger all around than the liner and shell. Carefully adjust all of the shockcord housings and Grosgrain ribbons. Be very sure they're all laying flat.
Here is a detail of the darts. I use a can under each to help the whole thing keep its shape.
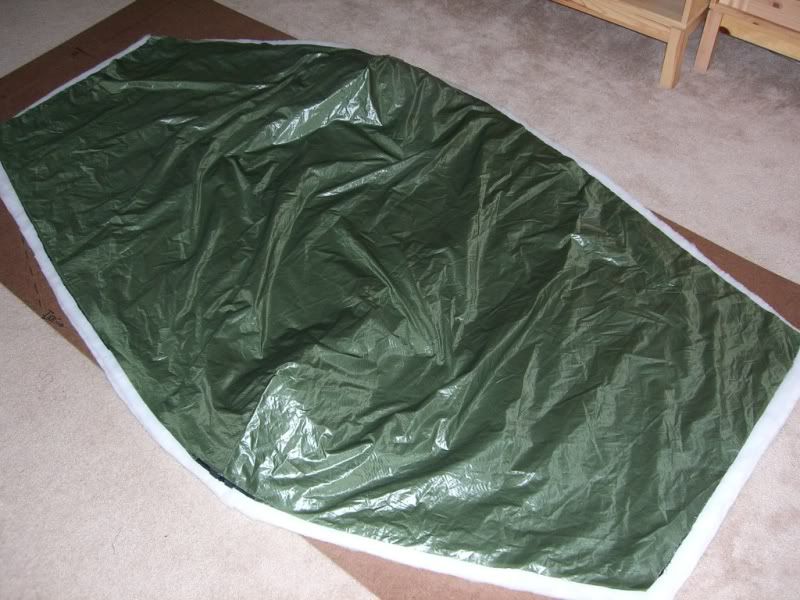
Now, lay the shell on top, wrong side up. Arrange it so that it's lined up with the liner, paying special attention to the corners. Double check everything, and make absolutely sure that none of the drawcord housings or Grosgrain ribbons have become folded or wrinkled.
TIP: This is another place where I actually have the liner sticking out about 1/8" of an inch so that I can see it while I'm sewing to make sure everything is lined up correctly.
Let's stop and make sure everything is laid out correctly. Foot ends are all facing the same way. From the floor up, you should have: insulation, liner (right side up), and shell (right side down).
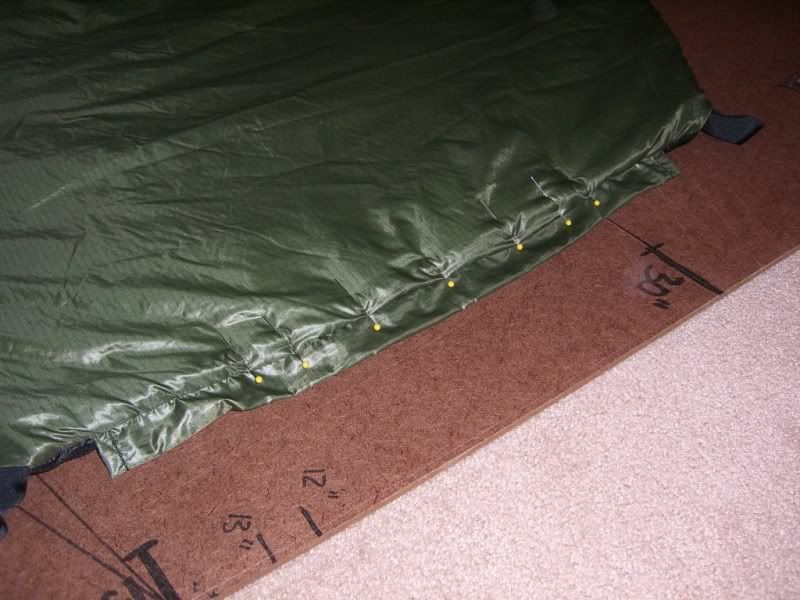
Time to pin everything together. More pins equals better here. Push the pins in from the top so that the ends and points are visible. I do a pin every couple of inches here. It's a lot, but it really helps keep everything in place while you're sewing. Pin around the whole perimeter except for a part of the foot about 18 inches wide and centered. That's going to be where you turn the whole thing inside out when you're done. After you've pinned the whole thing, feel around the edge again to make sure nothing has come out of place.
WARNING: Pin, don't clothespin. Some kits recommend clothespinning, but that makes sewing everything together much more complicated. Pinning doesn't hurt anything and doesn't leave any visible holes when you're done.
Take a deep breath and get ready to sew.
Part 5: Sewing It All Together
Time to sew the whole thing together. Take your time and handle the pinned quilt carefully as you move it around.
Approximate time: 2 hours
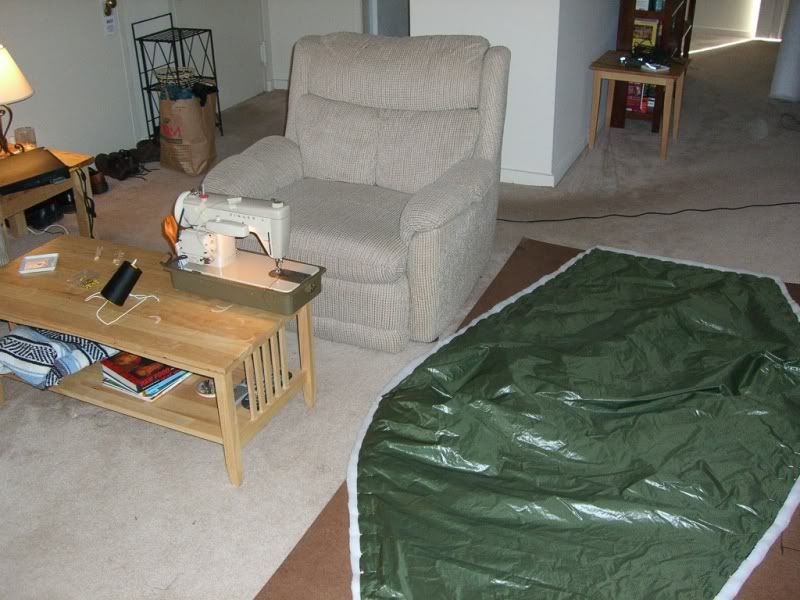
I set up my sewing machine, chair, and work board so that the underquilt lies on the board to my left as I sew. That lets is slide around easily as I progress. If you have to work on carpet, frequently check that the insulation isn't grabbing and pulling. Try to keep the underquilt as flat as possible to minimize your chances of having anything come out of place.
TIP: Before you start, it's very helpful to put in a full bobbin. One bobbin will do the whole thing and it's a real pain to have to change it out halfway through.
Okay, starting from the opening at the foot, sew all the way around the permiter (remember that you're leaving that opening that you marked off with pins in the last step -- don't sew over it). Sew with the insulation side down. I was instructed to do the opposite on my first top quilt and I think it's a huge mistake. With the nylon facing up you can very clearly see what you're doing and that everything is lining up correctly. Also, when I did it insulation up, it was constantly catching around the foot. Since doing insulation down, I get four or five snags for the whole thing.
WARNING: Be careful nothing is snagging, especially underneath. My sewing machine has a metal clip for the cover on the edge below the floorplate. That thing loves to catch the insulation. Also, be careful of the table corners, sewing machine foot, and everything else. Insulation loves to hang onto stuff.
Work slowly and carefully. It takes a long time to do this. If you get sick of it, take a break and read about working with down.
I sew this part with a slightly larger seam. Because of the insulation underneath, the nylon will fold up around the foot a little. I sew with enough of a seam that it's just nylon folding back up not insulation. Again, start with a good length of bartacking, sew the first line with the needle centered, then the next with the needle offset so that you have two lines of stitching a half inch or so apart.
TIP: Don't bother trying to sew "up and back" on this part. Just sew the two lines separately. If you start and end them at the same place, you'll still wind up with two threads on each side of each end to knot together.
TIP: For the other parts of the quilt I often pull the pins out after the first seam to avoid sticking myself as I work. For this part I leave them in for both because they help hold the shockcord housing and Grosgrain in place.

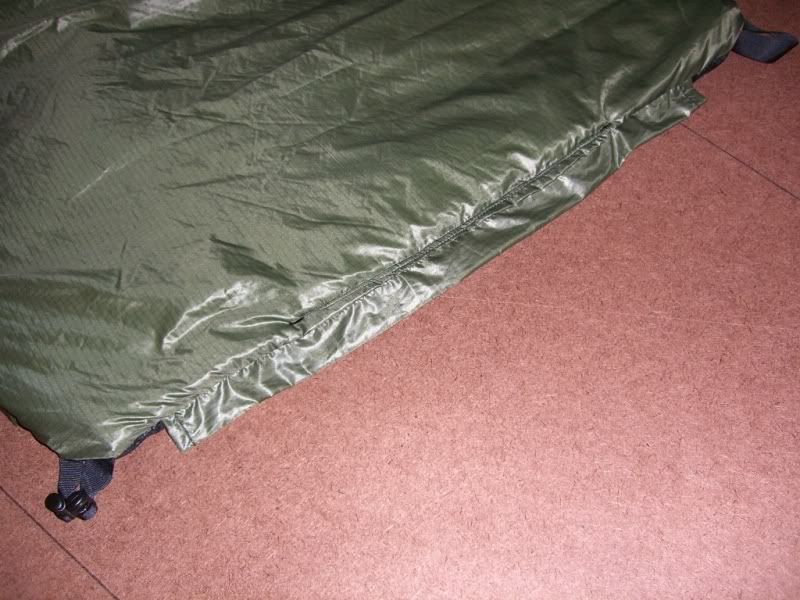
Here's the foot opening we left to pull everything right side out.
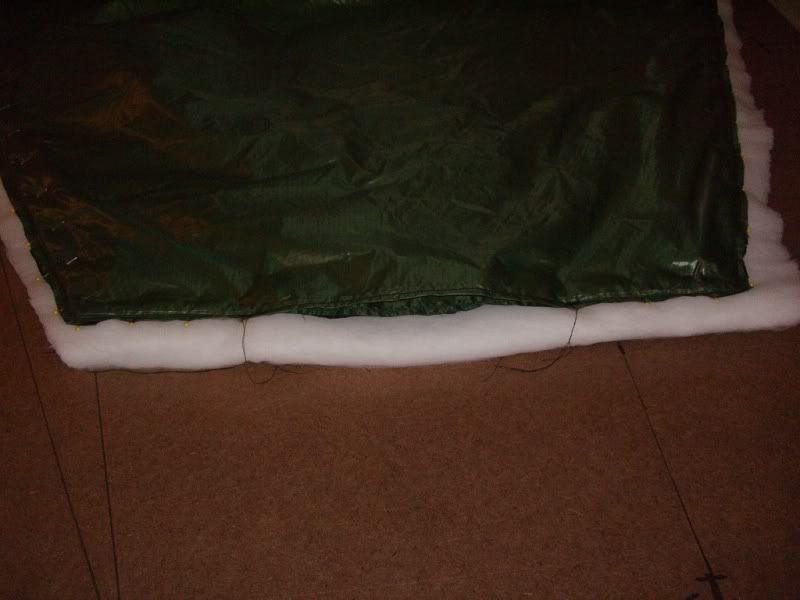
The underside of the foot opening. Note the threads waiting to be tied.
Once you're done, lay the whole quilt out and trim the insulation, leaving about 3/4" around the whole perimeter. You want enough to keep the stitches holding over the years, but will probably find that trimming the excess saves about an ounce.
Time to hold your breath and turn everything right side out. There's a real giving birth vibe to this part. Reach in the foot opening and pull everything carefully right side out. If it gets tight, try pushing from the back side. If everything went well, you should see all the drawcord channels and their openings and all of your Grosgrain loops.
The last step is to top-stitch the foot opening together. Again, pin everything first and work carefully. This and the reinforcement patch stitching are going to be your only visible stitches on the whole thing. It's better to get the insulation in the seam, but it's okay if you can't. It's a small area and the quilting will keep it in place anyway.
Top-stitching completed. Only one more big step to go.
Part 6: Quilting
Time to tie the quilting loops. These loops stabilize the insulation and keep everything in place.
Approximate time: 2 hours
I don't know why, but this is the only part I dread. Put in between 7 and ten rows of quilt loops with 3 or 4 per row. If your shell is camo, you're made in the shade. Position the loops in the black splotches. They'll be all but hidden and you won't have to worry about making neat rows and columns.
If you used a solid color, you'll need to plot out a grid. Start with the corners of the darts. Those will each be a row. The middle row will go in between them. I use pins to mark the points, but have been looking for a very impermanent marker. You could use chalk, but it's sometimes hard to mark nylon.
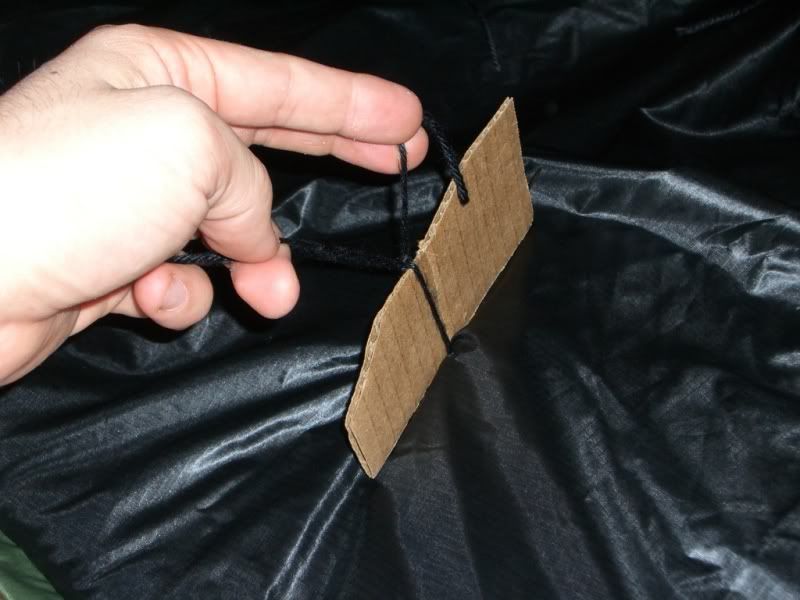
Make a mandrel out of cardboard. For two layers of insulation, mark it off to 2". That's the max height of the insulation. I don't think it ever gets that high, but that takes into account the nylon and a little room for error. Put the needle in on the liner so that the knot will be on that side. For each loop, tie it around the mandrel to get the size right. I triple knot each one very tightly and trim the ends to about a half inch.
Quilting complete.
TIP: If using a solid color shell, it's easier to insert all the loops first, then flip it over and tie them all. That makes it easier to keep the pins undisturbed while you work and makes the whole thing seem faster to me.
Okay, you're all but done. Just small stuff left.
Part 7: Finishing
Start at the cordlock end of each channel. Tie a figure eight stopper in the shock cord and push it through the shockcord channel. You should be able to just push it through, but can use the knot to help pull it if it gets stuck (usually happens when it hits the seam). When you get it all the way through, tie it off to the Grosgrain loop at the opposite end. Tying shockcord can be tricky. I've found it best to tie a bowline and finish it with a half hitch. Pull everything very tight to be sure the knots are set. Leave the bowline fairly open so that the shockcord can move easily on the Grosgrain. Melt the end of the cord.
Move back to the cordlock end. Cut the shockcord so that you have about a foot sticking out. Run it through the cordlock and tie an overhand loop, then melt the end. I like to slide the cordlocks back down to the seam to help keep them apart.
Do the same for all four shockcords.
The last step is to tie on the attachment shockcord. Use a six foot section for each end. Tie it to each corner with a finished bowline and leave it so it can move. Melt the ends. If you're using a Hennessy hammock, tie two small overhand loops about six inches up on the foot end. You'll clip these together over the hammock in "cold mode". Using them instead of the Grosgrain loops keeps everything snug, but give that extra bit of slack to aid in getting in and out of the hammock.
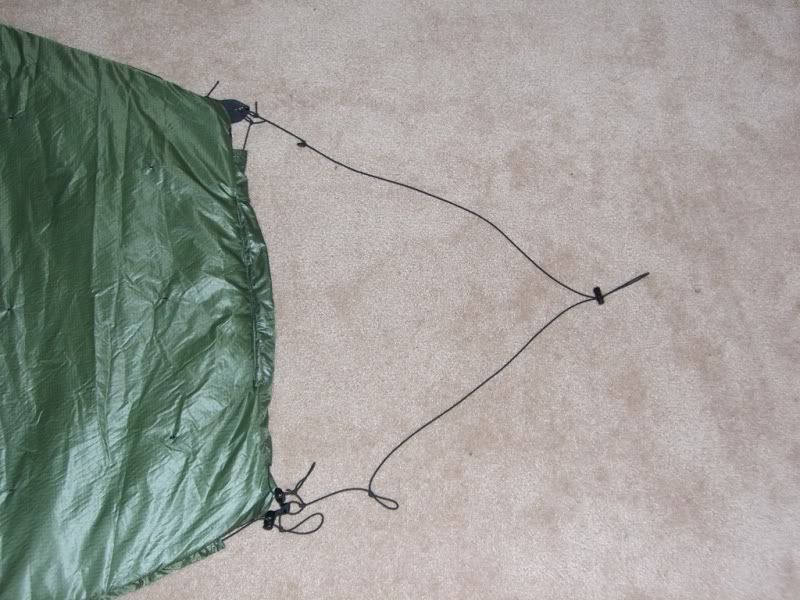
Attach a cord lock to each loop and you're done.
Congratulations, you've made your very own underquilt. You kick ***!