Articles
This tutorial was written and published by Blackbishop351, originally on his website. Huge thanks to Blackbishop351 for putting this together. This tutorial is also available in PDF format here and here (thanks gun parker and angrysparrow).
Materials List
This is a list of materials and tools you'll need to make your own BlackCat tarp. I've listed the amounts you need for the main portion of the materials, and optional items are listed separately. Click on an item to view details as to where to get it, its usage, etc.
Materials:
1.1 oz. Silnylon - 8 yards
Corner reinforcement material - 1 yard
Nylon accessory webbing - 4 feet
100% Polyester thread - One large spool
Seam sealer - One container
Tools:
Marker
Cutting tool
Straightedge
Ruler
Optional:
Pattern material
Grosgrain webbing
1.1 oz. silnylon (8 yards)
Use: This is the body material for your tarp.
My preference: I buy this in black from Ed Speer. Advantages: Ed's sil is $4 a yard (compare to $6.50/yd. or more elsewhere) and it's 66" wide, which nicely fits my 11' width dimension. Be aware that other suppliers may not carry sil this wide. Disadvantage: Ed only sells it in three colors - black, royal blue, and silver grey. And for someone who enjoys stealthy earth tones, black is the only option there. I was a little skeptical about the color at first, but I ended up liking it so much that I named the tarp after it!
Options: Other material can be used here. I do recommend using silnylon over other waterproof fabrics for a variety of reasons, and I also recommend using 1.1 oz. rather than other weights. Heavier material will add a lot of weight to a tarp this large, and I wouldn't trust lighter material for strength.
If you want to use a different ridge length - 8 yards is 24' to accomodate my 12' ridge length - just make sure to order at least twice the length you want the tarp to be, rounded up to the nearest yard.
Corner reinforcement material (~ 1 yard)
Use: You guessed it, reinforcing the corners of your tarp for tie-out attachments.
My preference: I use 1.9 oz. untreated ripstop nylon from the Walmart $1 bin. This is a grey color, which looks nice against Ed's black sil, and I've heard that it can be found in a lot of Walmarts. It has a fairly stiff hand, which is nice to work with, and it has some sort of water-resistant coating (although I wouldn't call it DWR).
Options: Again, you're welcome to substitute your own material here. Just remember that you want strength but not a lot of weight. Water resistance is not needed.
Nylon accessory webbing (4 feet)
Use: This is for your tie-out attachments.
My preference: I get it from a variety of places, both online and brick-and-mortar. If I'm ordering other materials from an online supplier (like the grosgrain trim mentioned below) I'll order the webbing from them too and save shipping. If not, I'll go to a local outfitter and pay a little extra to avoid shipping costs. My preference for width is 3/4" so far.
Options: Some people recommend grosgrain for tie-outs, but I think the strength and durability of the webbing is well worth the little bit of added weight. You could use a different size webbing if you want. The trade off on the width is the contact area (between the webbing and the corners) versus weight. I've seen 1/2" webbing do a fine job of taking tension, but I wouldn't go any smaller. I also wouldn't go much larger than 1" for weight reasons.
100% polyester thread
Use: I think this one is pretty obvious...
My preference: I use some from Thru-Hiker. You pay around $13 and get a cone of this stuff - I can't remember how many yards - that most people couldn't use up in a lifetime.
Options: You need something strong, light, and above all hydrophobic. Other people swear by Gutermann's, which you can get in most sewing supply stores, but I think it's a bit more expensive.
Marker
Use: Marking your fabrics.
My preference: For the black sil I use, lots of markers won't show up, so I use a white paint pen from Walmart. It shows up great and the paint doesn't permanently bond to the sil - after it dries, it kind of flakes off on its own.
Options: Lots of things might work here. Just make sure it'll bond long enough to use the marks, and that it shows up well against the material you're using. For instance, a Sharpie works great for lighter color materials.
Cutting Tool
Use: Umm...you should really know this one...
My preference: I use a good sharp pair of sewing scissors. I like them because with the 'V' of the scissors and the light weight of the sil, you can get a cut going and just 'push' it through the material. This makes for a really nice, clean cut. I also have scissors around anyway for general sewing purposes.
Options: Other people use razor knives, which I imagine work just as well. Some people also use a fine-point soldering iron, which seals the edges of the nylon as it cuts. This isn't necessary on sil, but it might be handy in general. Pretty much anything with a VERY sharp edge will work, just find something you're comfortable with.
Straightedge and ruler
Use: Obvious again...
My preference: I used to build houses for a living, so I use my old metal tape measure for a lot of measuring and as a straightedge (use the tools you're comfortable with, I always say!). I think a long metal ruler might work better, but I haven't tried it yet. Either of these can be found at any building supply or hardware store.
Options: In the end, you need something at least 7' long and straight, and you need something to measure with. It's convenient to have one tool to do both, but improvise at will.
Seam sealer
Use: Only one job on this tarp - sealing the ridge seam.
My preference: I buy clear 100% silicon caulk at Walmart for about $2, then thin it with some mineral spirits. You can get these things at a building supply or hardware store too, but I think Walmart is cheaper.
Options: You can buy a premade product for this, but I'm fairly sure it's more expensive. I've heard some people swear by certain brands, though. If you do buy something, make sure it specifies that it will bond with silicon-based materials, or it'll peel off of your tarp after a while.
Pattern material
Use: This is for making a pattern for your catenary cuts. It's optional, but a pattern does make things easier.
My preference: I used carboard for this because I had some laying around the house. What I had wasn't even long enough to make the pattern in one piece, so I seamed a couple of pieces together using duct tape. If you think that sounds kind of crappy, you're right!
Options: This could be almost anything. It needs to have some thickness to it (so you can mark along the edges) and you need to be able to make marks on it. Something at least 7' long by 10" wide would allow you to make the pattern in one piece.
Grosgrain webbing (14 yards)
Use: This is used to trim the edges of the tarp after hemming, and is optional if you want to reduce weight and/or cost.
My preference: I like to use the 1" width. I usually buy it from Thru-Hiker, but lots of places sell it. This length (at 1" width) should cost around $10, and it will add about 4 oz. to the overall weight of the tarp. In my experience, the trim definitely makes the tarp stronger. I've also heard others claim that a trimmed tarp pitches tighter, but I'm not wholly convinced on that.
Options: You could substitute 3/4" grosgrain here if you want to reduce weight, but it won't reduce your cost by an appreciable amount. I've also heard it's a lot harder to sew. I definitely wouldn't go any smaller than 3/4" because you'll have trouble getting it to cover the hems in the sil edges. You could probably get by with only 13 yards, but I always get 14 just to be safe. You can always find other uses for short lengths of leftover grosgrain.
Nylon (or strong plastic) D-rings (6)
Use: Optional attachments between your tie-out cord and tie-out webbing.
My preference: Obviously, these should match the width of your tie-out webbing. If you use a good-size webbing for your tie-out attachments - 3/4" or larger - these will prevent the webbing from 'puckering' under tension. Consequently, you'll get a nicer pitch. There may be some added durability here, but I'm of the opinion that it's mostly an aesthetic thing. They'll add about $6 to your total cost, but not much weight (I would say mere grams if I had to guess).
Options: There are a TON of different D-ring designs out there. In fact, if I were going to put some on a personal tarp, I might use Tri-rings instead. They might help center the tie-out cord better. On the other hand, I've had trouble finding a reliable source for Tri-rings in the right size.
Step 1 - Measuring and Cutting
This is a complicated step, but it doesn't take too long once you get a feel for what you're doing. Since I already have a pattern made for my catenary cuts, this Step takes me less than 2 hours.
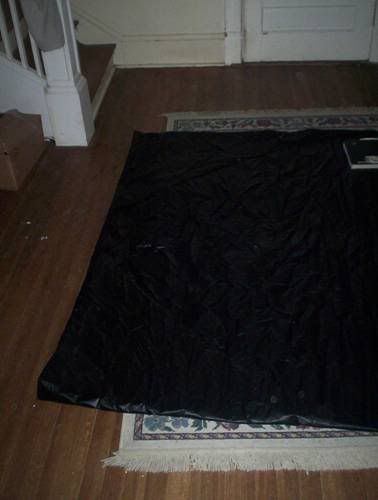
To start with, you need a space to work. A table large enough to accomodate this tarp would be way too big to be practical, so I use the floor in my foyer. The space needs to be at LEAST 14' by 8' so you can lay half the tarp out flat and still have room to walk around the edges. If you don't have a room that big (or there's furniture in the way), you can use a smaller space and work with one end or one edge at a time. This will make things MUCH harder though, as well as increase the chance of getting lines/cuts crooked.
First we're going to cut a rectangle out of the sil. The long side of the rectangle (along the factory edge) will be your ridge length, and the short side will be your desired width.
Roll out a little over half your sil (your ridge length plus at least a foot) and get it as flat and straight as you can. You'll probably need some sort of paperweight (I use textbooks) to keep it this way. Four (one in each corner) works nicely.
Cut the layed out portion to your ridge length. Again, my ridge dimension is 12' if you want to make my exact design. The half you just measured and cut off is the "working half". Put the other half aside.
Note: Don't worry about making sure the short edge you measure from (the free edge) is perfectly square or straight. If it's so out of square that you can tell by looking at it, contact me and I'll walk you through how to square it up. Otherwise, it won't matter much.
Now measure and cut the working half to your desired width. Mine is 66". If you're using my design and Ed's sil, you don't have to make a cut here! Convenient, isn't it?
Next you need measurements for your tarp. This isn't quite as easy for the hex-cat as it is for, say, a rectangular tarp! But, thanks to lvleph of Hammock Forums, it's not that bad!
Calculation File (MS Excel)
Calculation File (MS Excel)(Mirror)
Save it someplace easy to find and open it up. Be sure to click "yes" if it asks you whether to allow or enable macros. The whole file is color-coded, which makes things pretty nice. The yellow cells are information only, the green cells are where you input data, and the orange cells are where the results for the hexagonal shape are displayed. The pink and purple cells in the center are horizontal and vertical measurements (respectively) for your catenary pattern.
If you're using my dimensions, the cells already have the proper data in them! Skip ahead to the next section - leaving the file open, of course.
If you're not using my dimensions, you'll need to enter some information. First enter your desired ridge length in the green cell marked "L". Then enter your desired width in the green cell marked "c". The diagram to the right of the file is a layout of how half your tarp will look (before the cat cuts), so refer to that if there's any doubt.
Now you need to decide how much cut-in you want for the catenary edges. Somewhere between 1" per foot and 1.5" inches per foot should be plenty, but exactly how much is a personal preference - and there's a tradeoff. The more cut-in you use, the tighter the tarp should pitch. More cut-in also means less coverage, though. You want a good balance of both.
To get an idea of how much coverage you'll lose at the center of your edge, enter a cut-in value in the green cell labeled "Sag inch/ft" and push the "Feed the Cat" button. The orange cell labeled "Sag" is how far into the tarp (from the original edge) the cut will go, at the center. To understand what I mean by "at the center", take a look at the graph on the right side of the file, below the hex diagram.
From my own experience: I've used 1" per foot of cut-in so far and it's worked well, but I think 1 1/4" per foot might help my tarp pitch a bit tighter. For a tarp that's a good bit smaller than mine, you should be fine with 1" per foot.
Once you've decided on the amount of cut-in, enter your choice (in inches per foot) in the cell labeled "Sag inch/ft" and push the "Feed the Cat" button again. You're done entering data!
When the file is done calculating, take a look at the cell marked "Angle AB". This is the measure (in degrees) of the angle between diagonal "a" and side "b" in the hex diagram. If the angle is larger than about 55, you're fine. Skip ahead to the next section, leaving the file open.
If "Angle AB" is less than 55 or so, look at the bottom of the spreadsheet. There should be a new tab there, labeled "AlternateShape". Click this to view it. You'll use these measurements instead of the ones on the main sheet.
The reason for having alternate measurements here is that you want "Angle AB" to be around 60 degrees. This gives the right amount of end coverage, in my opinion. To accomplish this (while keeping the ridge length and width you want) requires making the tarp edge parallel to the ridge (between points "O" in the diagram) longer than the other two, instead of having all three the same. Unfortunately, this complicates the layout process - you'll have to make two different catenary patterns. This is why there are two "a" measurements ("a1" and "a2") and two sets of catenary measurements ("a1" and "a2") on the "AlternateShape" sheet.
Refer to the hex diagram in the main sheet if you're having trouble picturing any of this.
If this is still confusing, I apologize for not explaining it very well. This isn't something that's very easy to convey in writing. Feel free to contact me and I'll try to clear things up for you. Of course, the easiest way to avoid these complications is to use my dimensions!
Once you've got all your measurements, leave the file open and go on to the next section.
Note: Be sure to thank lvleph if you see him on the Forums! He spent a LOT of time putting the Calculation file together. And believe me, it makes things MUCH nicer and easier!
Now that you have your measurements, it's time to lay out and mark the general hex shape on the working half. Just to be sure we're clear, you won't be making ANY CUTS in this section. Referring to the hex diagram in the Calculation file while you're laying this out will help a lot.
If you're using the "Alternate Shape" measurements, "a" will mean "a1" from your sheet unless otherwise indicated. If you're using the main sheet, "a" just means "a"!
Lay your ruler out with the "zero end" at one corner of your working piece. Rotate the ruler, keeping the "zero end" at your chosen corner, so that it crosses the opposite edge NEAR length "a". It doesn't have to be exact at this point. The ruler should lie across your working half so that it looks like one of the diagonals labeled "a" in the diagram.
At the corner you picked, secure the "zero end" of the ruler with some sort of weight. The weight you used to hold down that corner works well, but make sure you don't add any wrinkles to the sil in the process. The long edge adjacent to this corner is now "down" in the diagram, and the other edge is "up".
Note: If you cut for width above, you may want to choose a corner on the UNCUT long edge. This is a factory edge and it will probably be straighter than the one you cut. This will help insure that your ridge seam is straight later.
Now adjust the free end of your ruler until it crosses the "up" edge at EXACTLY length "a". Do this gently so you don't disturb the "zero end". It's not a bad idea, once you have "a" measured, to make sure the "zero end" hasn't moved before you mark anything. The intersection you just found is one of the points "O" in the hex diagram.
Once you're sure everything is right, put a mark on the "up" edge where the ruler crosses it. This mark is one of the points "O" in the diagram.
Now repeat this process on the other end of the working piece, marking the second point "O".
Now, to check everything, measure between the two points "O". The measurement should be "a" if everything has gone well - or "a2" if you're using the "Alternate Shape" measurements. If it isn't, you pretty much have to judge for yourself what to do. If you're sure you measured the two diagonals correctly, you may just have to "fudge" things a bit. If you have to "fudge" a measurement by more than 2" or so to get things to work out, your best bet is to go back and redo your layout - you probably messed up somewhere.
Once everything is adjusted properly, mark the sides of the hex (as shown in the diagram) on your material. DO NOT CUT ON THESE LINES. You may have to move your corner weights a little to mark your lines, so make sure nothing moves around or gets wrinkled in the process. When you're done, the marks and edges should form a trapezoid, just like the one in the diagram.
Leave the working piece laid out flat for the next section.
Now it's time to get your catenary measurements onto your tarp. These are found in the long pink and purple sections in the Calculation file.
I highly recommend making a pattern, for a couple of reasons. First, you have to mark three edges, but you only have to measure once to make a pattern. Since there's a lot of measurements for the curve, this will save a lot of time. Second, making a pattern allows you to fix any mistakes before working with your actual material.
Regardless of how you're planning to transfer your measurements to your tarp, print them out first. This will keep you from having to run back to your computer every few seconds. You may think this is obvious, but it took me a minute to think to do this on my first tarp!
If you're going to make a pattern, the horizontal measurements should be along a factory edge of your pattern material. If you're marking directly onto your tarp, the horizontal measurements should be along one of the edges marked "a" in Figure 1.
Go slowly and carefully when marking out your curve. Make some sort of mark for each measurement. A "+" sign works well, because it specifies both the horizontal and vertical position. Try to make the vertical measurements as close to perpendicular to the horizontal as you can. I used a carpentry square for this when I made my pattern, but you can probably just square the verticals by eye and be fine. After you finish all your marks, sight the curve to make sure it's pretty smooth. It should look something like the catenary curve graph in the Calculation file.
When you're completely satisfied with your marks, go ahead and connect them to form your curve. Because the marks are laid out so close together, a straight line for each segment should be fine.
When you're done, sight the curve again to make sure it turns out the way you want it.
If you're using a pattern, line up the straight horizontal edge of the pattern with one of the "a" edges you've marked on your tarp. Secure the pattern so it can't move, and mark out the curve. Repeat for the other two "a" edges.
If you're not using a pattern, you've already completed one curve marking. Hopefully you're happy with it at this point and don't have to change it. Repeat the entire measurement process above for the other two "a" edges.
Note: If you're using the "AlternateShape" measurements, you'll have two different curves to do. I recommend making two patterns, even though you only have to mark the long parallel edge ("a2") once. This way you can make another tarp later if you want. Either way, though, make sure you match up the right catenary measurement set with the right edge - "a1" to "a1", "a2" to "a2".
Now you have your final edges marked, so it's time to do some more cutting. If you're using scissors, you can leave the working piece laying where it is for this part. The sil is thin enough that once you get a cut going, you can just push the "V" of the scissors through the material, leaving a much cleaner edge.
If you're using a single-edged tool like a razor knife or a cutting wheel, you'll need to move your material onto a smooth, hard surface.
Cut along the cat marks on your working piece slowly and carefully. Try to stay as close the marks as you can. When you get done with all three edges, you should have something that looks like this:
Now get your working piece out of the way if you haven't already. Lay out the OTHER half of your sil the same way you laid out your working half to begin with, making sure to get it flat and secure at the corners. Then lay your working half on top of it, being very careful to line up the long ridge edge ("down" in the diagram). You may need a couple of additional weights in the middle of this edge to keep the two halves completely aligned.
Now make sure the rest of the working half is nice and flat by putting a bit of tension on the cut corners (points "O" in the hex diagram). You'll probably want a couple more weights to hold these corners when you get them where they should be.
Once your two halves are lined up as described, use the working half as a pattern and mark its edges onto the other half. A lot of light helps here because the material is so thin - especially if you're using Ed's black sil. Again, go slowly and carefully, making sure not to stray too far from the working half.
When you're satisfied with your copy, "roll back" the edges of the working half - DON'T remove it. This gets the material out of the way so you can cut the bottom half, but leaves both pieces lined up. The reason for this will be clear in the next Step. Cut out the second half of your tarp by following the lines you just drew. Stay close to your lines and try not to jostle anything out of alignment. Leave the two pieces laid out and lined up when you're done.
You're done with Step 1! Congratulations!
Step 2 - Seams and Hems
Parts of this Step are very easy, and parts are very tricky. It's definitely the most time-consuming part of the project. I get it done in 4-5 hours usually.
If you've used a sewing machine before, you should be familiar with the type of setup you need for it. In addition to that, a fairly large table is nice because you're working with a pretty large piece of fabric.
First we're going to connect the two tarp halves with a flat-felled seam at the ridge (long edge, "down" in Step 1, Figure 1).
Your two tarp halves should be laid out flat, one on top of the other, with the ridge edges lined up - that's how you left them in Step 1.
Remove the weights from the short edge ("up" in Step 1, Figure 1), but leave the ridge edges secured. Starting at the short edge, roll the material, both pieces together, toward the ridge. Try to remove as much air as possible. Stop the roll about 18" short of the ridge edge. Secure the roll to itself - I use large binder clips for this. The reason for rolling up the material is to make it easier to work with while you're sewing.
If you're not terribly comfortable with sewing yet, you might want to pin the two halves together along the ridge. You may also want to pin the material during the rest of the seam.
Working slowly to keep the two pieces lined up, roll and sew the flat-felled seam. be sure to keep the halves as aligned as possible, because getting this part crooked will make for a less-than-ideal pitch when you're finished.
Sewing tip: I generally back-stitch about 3/4" at each end of each stitch line. I also leave enough loose thread at the ends of my stitches so I can tie the ends together. After tying, I clip loose ends to about 1" and then melt the thread with a lighter - the polyester melts into a nice little glob around the knot, reinforcing the stitch even more. I use this method on pretty much anything I sew, not just this particular seam.
Once the seam is finished, it's a good time to stop and take a break if you want since everything's together and aligned. Just stuff the whole tarp into a grocery bag or something and stow it out of the way.
Now you're going to prepare the tarp for the corner reinforcements to be added. First, you need to pick one side of your tarp to be "out". If you ended up with some messy stitching on your ridge seam, you can choose the nicer side (usually only one side looks bad when this happens) to be "out".
Lay the tarp out like you did before, folded in half with the "out" side out. Put small marks on each of the six corners, within 2" of the edge of the material, on the "out" side. That way you can tell which side is which no matter what corner you're looking at.
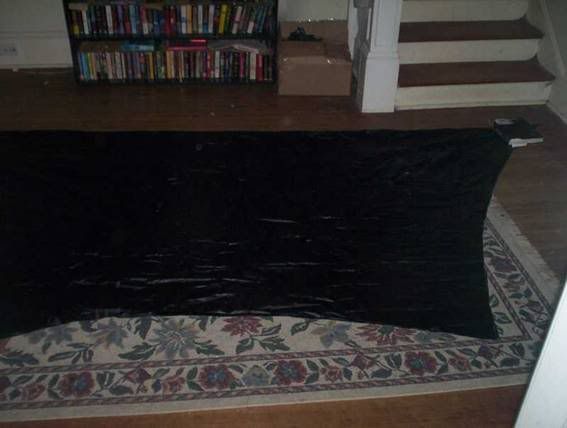
You don't need to worry about getting the sil flat and straight this time. It does help, however, to put a weight on each of the cut corners. Your tarp should look something like this:
The next bit is just how I do things, but it works pretty well. Fold the ends of the ridge toward the middle like this:
Now fold the new corners of the shortened ridge toward the middle again:

Now roll the fabric toward the weighted corners, removing as much air as possible. Stop about 18" from the edge and secure with binder clips or whatever. The tarp should now look something like this:

Once everything is secure, lay the tarp bundle out on your sewing table.
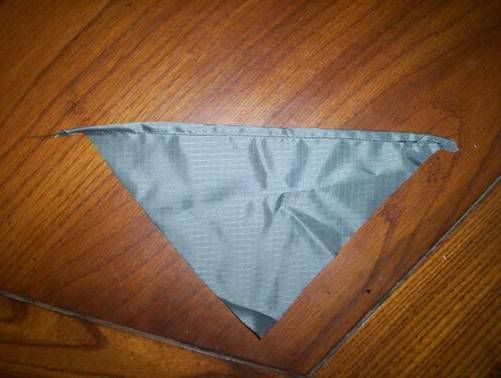
Now we're going to make the corner reinforcements. These will be triangular patches of the material you picked for this purpose.
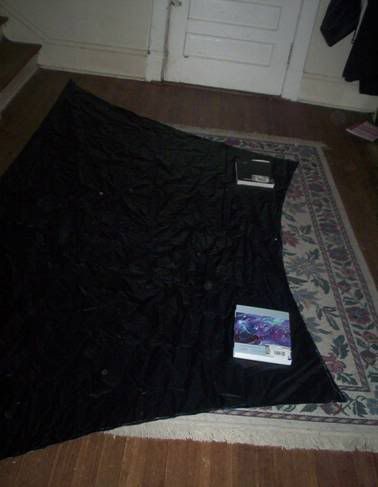
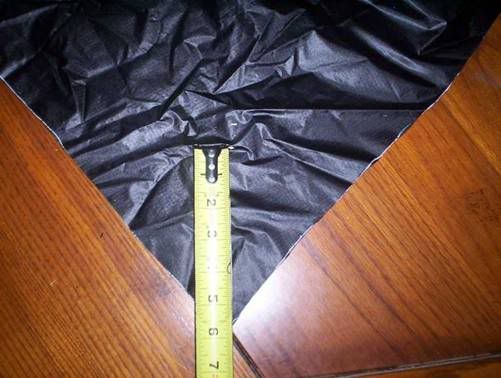
We need measurements for the patches. If you're using my measurements, your triangle should be about 12" long at the base and 6 1/2" high at the center. Here' a pic of the pattern I use for mine:

If you're not using my dimensions, you need to measure one corner of your tarp. Flatten out one of the four exposed corners. Starting at the very tip of the corner, measure in about 6". Make a mark at about the center of this part of the material:
Now measure across the material at this mark, trying to stay square to the shape of the corner:
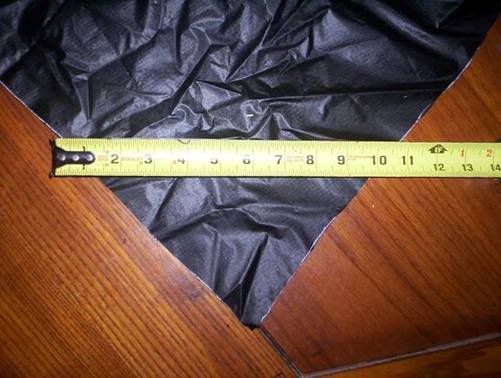
If the width you measure should be at least 10". If it isn't, slide the ruler toward the body of the tarp until you reach a 10" width. Mark the edge of your ruler there. Then remeasure up from the tip of the corner, but this time measure the height to the mark you just made. The measurements for your corner patches will now be 10" wide at the base, and the height you just measured at the center of the triangle.
Since you have to make six of these patches, I strongly encourage you to make a pattern. A piece of the material you used for your cat pattern will work well for this. If you didn't make a cat pattern or don't have enough material left, you can make one out of a variety of materials. I made the one pictured above out of several layers of printer paper.
Lay your pattern on your reinforcement material and mark out six patches. Cut the patches out and lay them near your sewing machine.
Now sew a singly-rolled hem in the base (widest) edge of each patch. The hems should be about 1/4" wide, and only require one line of stitch. The hemmed edge will face toward the body of the tarp when attached. Put the patches back near your machine, but out of the way of the foot.
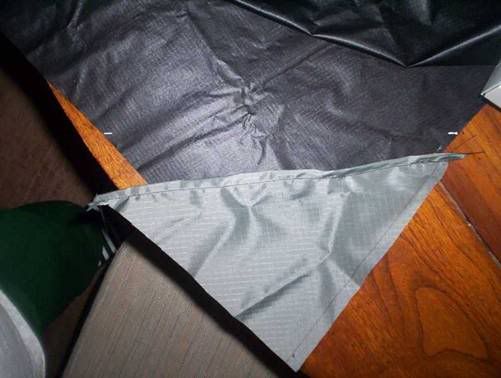
Now we secure four of the patches to the four exposed corners of the tarp. This is by far the trickiest part of the project, so take things extra slow here.
If you have enough room, do this while sitting in front of your sewing machine. It'll make things easier in a minute. Begin by laying a patch on one corner. If you want the patches to show (I like the contrast of my two colors), make sure you put the patch on the marked side of the corner (the "out" side). If not, put it on the other side.
Getting it lined up isn't easy. There's a fair amount of guesswork and "fudging" involved. Realize now that it's not going to line up perfectly. For one thing, if you measured and cut your cat curves properly, even this short section of your tarp edge has some curve to it, while the patch is straight. Don't worry about this overmuch. Just try and line up as much of the perimeter of the patch as possible.
When the patch is aligned the way you want it, mark the tarp where the top of the patch hem lies, one mark to each side:
Now take both the corner of the tarp and the patch, keeping them as aligned as possible, and slide them under the foot of your machine so that one end of the patch (and one edge of the tarp) is under the needle. Now's the time to scoot the patch around a bit so it lines up with the mark you made. Drop the foot once things are lined up. I always go ahead and drop the needle down too, just to be safe.
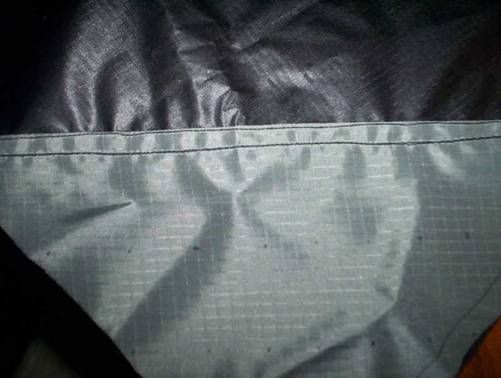
Keeping the other end of the patch lined up with the other mark you made, pull things tight so you get a straight line. Run a line of stitching across the ensemble, right on top of the stitch line you made to hem the patch. Stop just short of the other edge of the material.
Now move the needle over to the very edge of the patch (the outside of the hem). Turn the material around and sew back to where you started, staying as close to the edge of the patch as possible. Finish by trying to get the needle to stop exactly where it started on the first stitch line - this will make it easier to tie the thread ends together. Make sure you leave enough loose thread for tying, too. You should have something that looks like this (but hopefully neater!):
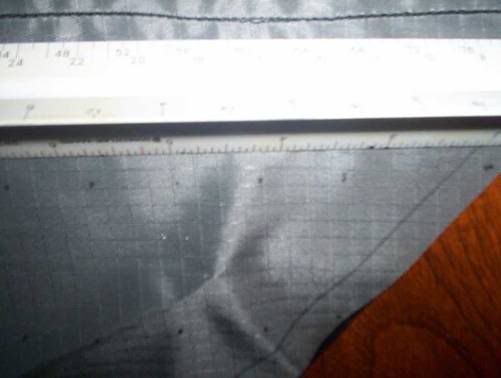
Now lay the corner out by your machine again. Starting with the "zero" of your ruler at the first stitch in the patch hem, lay the ruler out toward the tip of the corner. Make two marks (just dots work well here), at 1 1/2" and 3". Repeat this 3 or 4 times across the width of the patch.
Use your straightedge to fill in a few more dots along these two lines. There should be enough so there won't be any guesswork as you stitch across the lines.
For me, this is the most irritating part of the project. It's impossible to get the patch and tarp perfectly flat with one another. One piece or the other will be pulled tighter, and the other will "pucker", at least a little bit. Under tension, this means that one piece will take more pressure. You want the patch to be that piece, so you want to pull it a bit tighter than the sil when you sew. This isn't a terribly easy thing to accomplish, but do your best.
Tightening both fabrics against the stitching you just laid a minute ago, slide the whole thing under the foot. Line up with one end of the 1 1/2" line you marked, then drop the foot and needle. Stitch slowly, trying to pull a little tighter on the patch than on the sil. Stop the stitch just short of the other edge.
It's hard to tell what's going on with the sil while you're doing all this. You may end up with a lot of "pucker" underneath, in which case you probably want to stop now, rip the stitching out, and start over with some different tactics. I've had to do this a couple of times myself, and I've had a fair amount of practice attaching these things.
When you're happy with the first line of stitching, move the needle over 1/8" - 1/4", turn the material around, and stitch back to where you started - just like the stitching at the top.
Repeat this technique across the 3" marked line. When you're done, tie off the ends and melt the thread. Your corner should look something like this (this one's hemmed already, but you get the picture):
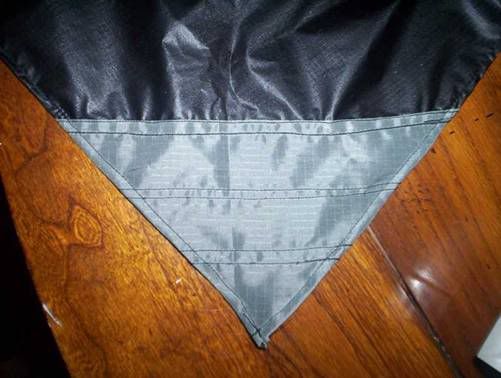
Notice that, in addition to four exposed corners, your tarp "bundle" also has two exposed edges. We're going to hem those now, since they both have corner patches at each end.
Sew a basic full-rolled hem on each edge. The hems should be rolled away from your "out" side, and should be ideally 1/4" wide, at most 3/8".
A note on sewing here: I always pin these hems after I roll them. For a curve like this, it makes keeping everything straight a lot easier. If you're not a very experienced sewer, you can pin and stitch more than once during the rolling process.
I always stitch the inside edge of the hem first. If you're adding grosgrain trim later, this is all you need. If you're not adding trim, you'll need a second line (close to the outside of the tarp edge), but it'll be cake if you sew to the inside first - everything will be lined up already.
Another note on sewing: If you only used one line of stitch on the hem, you have to backstitch at each end. If you're using two, it's better to anyway, and then make sure you tie off the thread ends. Melting the thread ends in either case is also a good idea. Also, with two stitch lines, you'd like to turn around at one end and make both lines continuous. However, with a piece of material this bulky, that's not practical unless you have a large machine. Just start the second line back at the original end.
After you finish the two exposed edges, unroll the tarp. Lay it out like you did at the beginning of this Step (folded in half), but with a different set of corners defining the long edge. Basically, you're forming a new ridge when you lay it out, one that doesn't follow the ridge seam. Roll the tarp back up as before and clip.
Now you have a different set of corners and edges. Neither edge should be hemmed, and two of the corners should be missing patches. Attach the two patches first (making sure they're on the proper side of the tarp), then hem the edges.
Unroll, rotate, and reroll once more. This time, all the corners have patches but only two edges are unhemmed - make sure you rotate and roll with the two unhemmed edges exposed. Hem those edges. Now every corner should look like this:
Yes, that's the same Figure as before...get over it!
Two notes: If you're going to add grosgrain trim to your edges, leave your tarp "bundled" at this point. If you're not going to trim your edges, you can add your tie-outs as you "complete" your corners. A "complete" corner has both adjacent edges hemmed. See the Tie-out section of Step 3 for instructions. Doing this may save some time.
You're now finished with Step 2, and the bulk of the work on your tarp!
Step 3 - Trim, Tie-outs, and Sealing
This is the easiest Step, with a couple little snags. Without trimming the edges, it takes me 1-2 hours (not counting drying time for the sealer). With trim, add another 1-2 hours.
If you want to trim your edges, now's the time. If not, skip to the next section.
Your tarp should still be "bundled" from the last Step, leaving two edges exposed. We'll trim those first. If you're using black (or other dark color) sil, you'll need a small light source - I use my headlamp (I guess I could've mentioned this in the Materials section). A small flashlight might work just as well.
I'm sure there are other ways to add the trim, but this is the easiest way I've found. We'll use the whole length of trim instead of trying to pre-cut it. If you're not comfortable sewing yet - you should be pretty good, after Step 2! - you can pin the trim on each edge before sewing and cut it to length then. For most people, I don't think that's necessary though.
Heat-seal the two free ends of the trim first. For some reason, the suppliers I've used don't feel the need to do this. Get your tarp "bundle" ready to feed into your machine. Have the trim coiled up near you, with one end accessible. Wrap the end of the trim around the tip of the corner you're feeding into the machine. Make sure the edges of the trim (one on each side of the tarp at this point) are lined up. Slide the material under the machine's foot, line it up to stitch the inside edge of the trim, and drop the foot and needle.
If needed, set your light source at near the foot of your machine and turn it on. The beam should be shining up through your tarp. This will let you see both edges of the trim, top and bottom. Line them up about 6" away from the needle.
Sew 6" at a time, staying ideally 1/16" from the edge of the trim and no more than 1/8". After each section, move further down the tarp and line the trim up again. Every couple (or three) sections, check underneath what you've just sewn. The stitch should be the same distance from the edge of the trim on the bottom side as it is on the top. If it's not, don't panic - just adjust a bit on your next section. If you're further into the trim on the bottom, you're fine. You just don't want to come off the trim.
Stop about 1 1/2" from the end of your edge. Clip off the trim but leave about 1/2" past the tip of the corner. Heat-seal the end of the trim, then fold this bit of trim under itself so the heat seal isn't exposed. Finish the stitch. Start back at the beginning with a second row of stitching, this time lining up about 1/8" from the outside of the trim. Tie off the ends and heat seal the thread.
Repeat this process for the other exposed edge. Then unroll, rotate, and reroll - just like you did with the hems in Step 2 - until you've done all six edges. Leave your tarp "bundled" for the next section.
Note: As you finish a "complete" corner - one with trim on both adjacent edges, you can add the tie-outs, too. See the section below for instructions on that. It might save you a little time.
Now it's time to add the tie-outs. Lining these up can be a pain, but this part is pretty quick overall.
The length of webbing you need can vary. For instance, if you're going to add D-rings, you might need a bit more than if you're not. I've made tarps both ways, and if I remember correctly, they both used about the same length webbing for each corner. The length I've used is 5 3/4". You could use 6" just to be safe - you ordered 48".
One way to figure the tie-out length you need is, of course, to measure. On one corner of your tarp, measure 2" straight in from the tip. Your ruler should be parallel to the stitching lines in the corner patch. Put a small mark where 2" falls.
If you're not using rings, put the free end of your webbing on the mark. Measure 1 1/2" past the tip of the tarp and mark the webbing. At the mark, double the webbing under the corner and mark where it lines up with the free end on top. From the free end to the last mark you made (underneath, lined up with the free end) is the length you want.
If you're using rings, run your ring onto your webbing first and then put the free end on your 2" mark. Instead of measuring the bit past the tip of the corner, just make sure you've got enough room to put a line of stitch behind the ring, across the width of the webbing - without stitching through the corner tip. Be aware that the ring needs some room to move, and that you can only get the foot of the machine so-so close to the ring. Once you've done that, double the webbing under the corner and mark where it lines up with the free end on top. That's your length.
Once you have the length you need, cut six pieces of webbing and heat-seal all the ends.
If you're using rings, you want to go ahead and sew the stitch line just behind the ring. If not, skip ahead to the attachment.
Run the ring onto the webbing piece, then double the webbing over and line up the free ends. Slide the ring into the center of the webbing, which is easy since it's doubled. Slide the doubled webbing under your machine's foot, getting the needle as close to the ring as possible. Make sure the edges of the webbing are lined up, then drop the foot and needle. Sew across the webbing and backstitch to where you started. Tie and melt the thread ends. This stitch will keep the ring from getting "cockeyed".
Now to attach the webbing to the tarp. Without rings, wrap your webbing around the corner and line both edges up on your 2" mark. Using a light source underneath will help with this. When you're sure the ends and edges of the webbing are aligned, sew a double box stitch through both layers of webbing and through the tarp sandwiched in between. Tie off and heat seal your thread ends.
If you're using rings and you measured your webbing length right, you should be able to slide the webbing onto the corner so that the tip is up against the stitching you just put in, and the ends of the webbing line up on your 2" mark. If you aren't lined up with your mark it's OK, but you'll have a bit less surface area for strength. Line everything up and box stitch as described above. Tie off and heat seal.
Sewing tip: I usually stitch between 1/16" and 1/8" away from the edges of the webbing when I sew the box stitches. That way, if the webbing isn't lined up exactly, I'm still sewing through both layers.
To finish the rest of the tie-outs, you have a few options. You can unroll, rotate, and reroll as before, doing four corners and then the other two. You can just unroll the whole tarp - since you only need to get to the corners - and do all six at once. As I mentioned in Step 2 and above, you can also add tie-outs while hemming or trimming the edges.
The only thing left is seam-sealing the ridgeline. Hopefully you have a place in your yard or in your house to hang your tarp, because that's the easiest way to apply the sealer. If it's inside, make sure the area is well-ventilated. Hang your tarp before you start mixing the sealer (if you're mixing your own).
I've never used premade sealer, so if that's what you're using, you're on your own! If you're mixing your own sealer, it's pretty easy. Get a disposable container (I use the "jars" that come with dried beef) and some sort of applicator. The applicator could be a paintbrush, a sponge, a soft cloth - almost anything that'll give you good coverage and let you work the sealer into the seam. I don't think terrycloth (towel material) would work very well because of its rough surface, just as an example of what to avoid.
Mixing is pretty much by eye. Add some caulk, then some mineral spirits. It's better to have too little than too much, because you can always mix more. Mix the two together until there's no visible "ribbons" of caulk in the mix - I use an old wood pencil as a stirrer. You're going for a consistency somewhat thicker than water. You can test the consistency by dipping your stirrer in the mixture, then allowing it to drip off. The speed at which it drips will give you an idea of the mixture's thickness - slower is thicker, faster is thinner. If it's too thin, add some caulk. If it's too thick, add some mineral spirits. I usually start with a pretty decent amount of caulk, then add the spirits a little at a time. That way I don't end up with a huge amount of sealer that I can't use up.
When you've got the sealer mixed, just use your applicator and apply it to the seam. Try to work it into the stitching as much as possible. I usually apply at least two coats. The rationale there is that a lighter coat will have a better chance of penetrating the stitching. I also seal both sides of the seam, and the entire surface of the corner patches that the seam runs through. Better safe than sorry!
Let the sealer dry for several hours. It will still feel rubbery after it's dry, but you won't be able to leave fingerprints in it.
Guess what? YOU'RE DONE!! Now get out to the woods and enjoy your new tarp!!
BlackCat Pictures
These are pictures of some of the BlackCat tarps I've made, in various configurations. Click on a picture to view it full-size.
Hammock Use
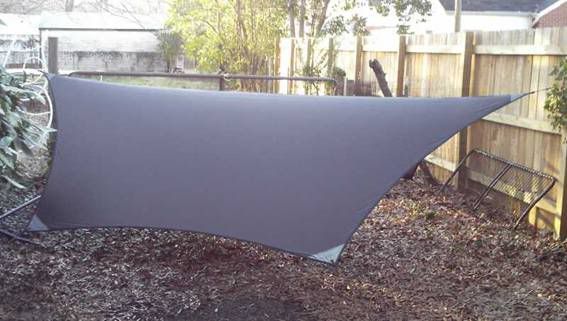
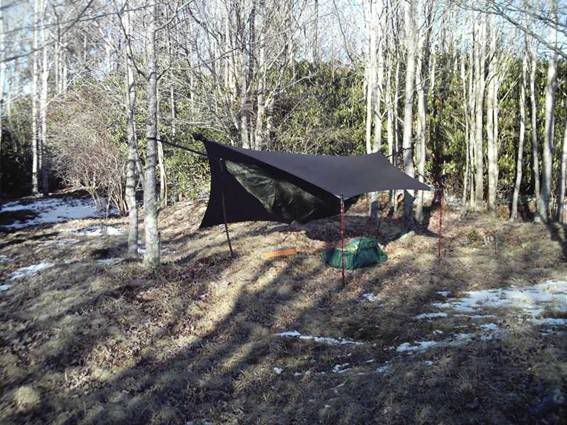
My basic BlackCat, hanging in my yard. This is the tarp I still use.
BlackCat Mark II (with grosgrain edge trim), also hanging in my yard. This one belongs to a friend.

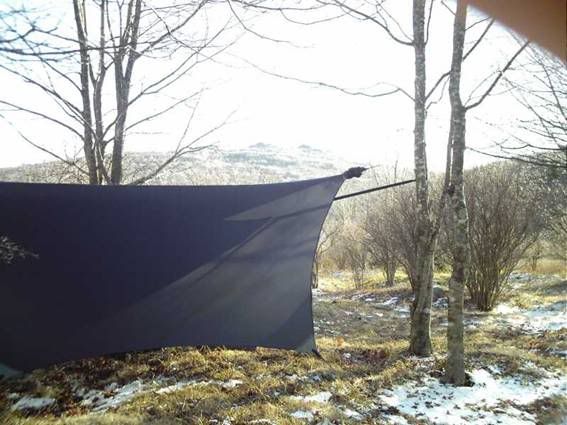
BlackCat Mark III (with trim and D-rings) at Mt. Rogers, covered in snow and ice. This one also belongs to a friend.
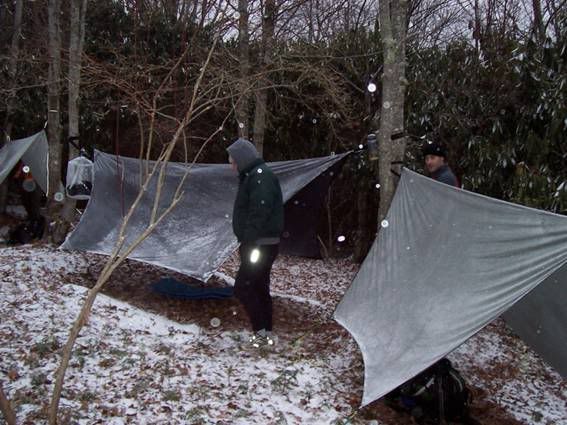
My BlackCat again, This time at the Hammock Forum Winter Campout. One side elevated with trek poles for ventilation.
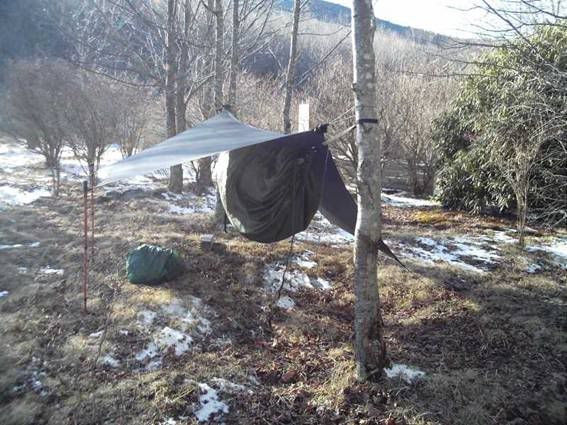
Another view of my BlackCat at Mt. Rogers
Yet another pic of my tarp at Mt. Rogers - you can see the outline of my hammock through the tarp to give you an idea of the coverage.
Ground Use
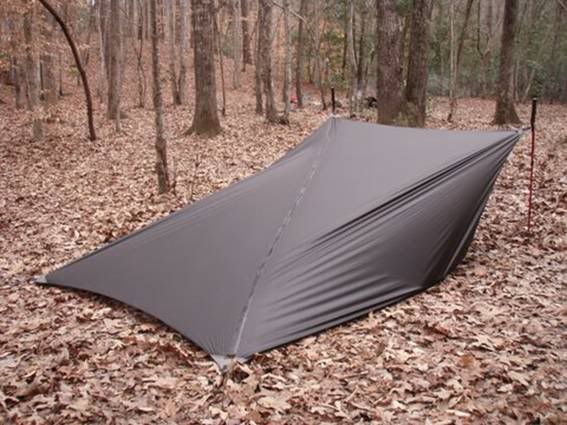
This section is in response to people I've heard say "a hex tarp is too limited for ground pitching." Well, guess again! All these pics are of my tarp on a trip to Uwharrie National Forest. My photographer for this trip was slowhike. Bear in mind here that I'm not fluent with all the "proper" tarp pitch terms. If I've gotten something wrong, I guess you'll either have to email me about it or live with it!
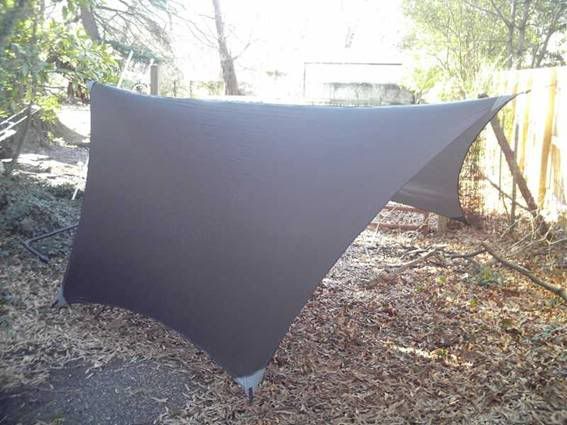
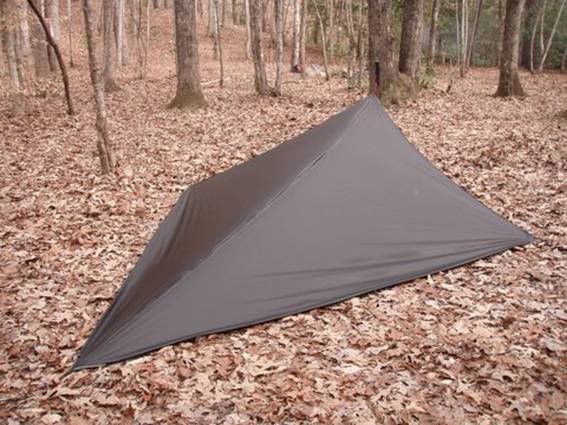
Bombproof diamond configuration. Gear inside is holding down the long edges - keeps the gear dry, too.

Back of the diamond. This setup uses one pole and four stakes.
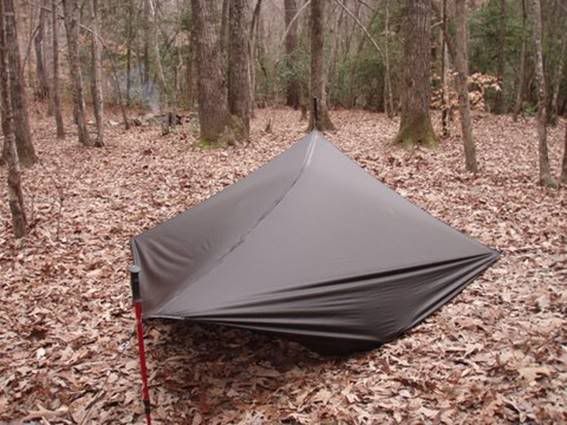
Ventilated diamond configuration. Note the large ventilation area in the back.
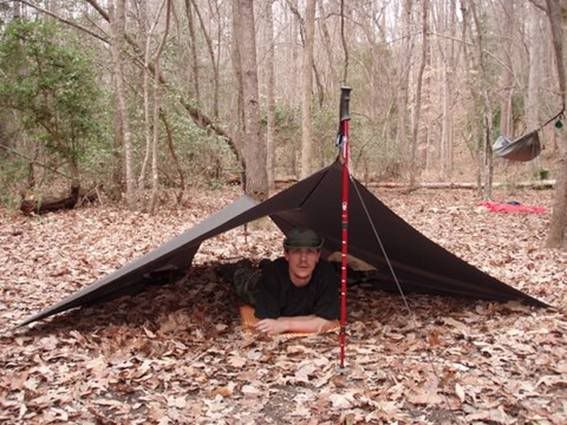
Regular A-frame pitch. This one needs two poles and six stakes. It's also much easier to pitch if you have two people.

Bombproof wedge. This one has plenty room for two plus gear.
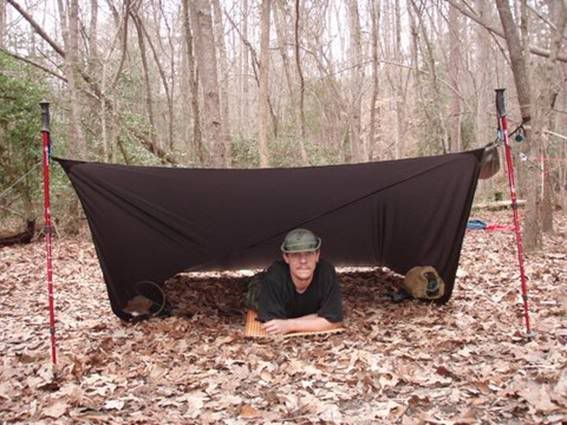
Back of the wedge. You need two poles, but only four stakes.