


Hey everybody, I wanted to share my most recent venture into DIY, a silnylon tarp. This is my first attempt at making a tarp (certainly not my last). I learned a few things and all in all I think it turned out pretty good. I finally decided to start this build because I'm having hip replacement surgery in little over a week and part of my recovery plan is working towards a 3 day overnight on the Ouachita trail. With that goal out in front of me I didn't want to have to make the tarp for that trip during my recovery. Let me know what you think.
Finished dimensions are: 132x108 and weighs 26 oz with all lines and Argon stuff sack.
I started with 16 yards of 1.1oz grey silnylon 2nds from DiyGearSupply. (Enough material for this tarp and the next one) I don't know why I didn't think about using the garage floor for large layouts before this, but I will definitely use it again. I swept and cleaned up really well before I started so it wasn't an issue. Also the hard concrete floor made it much easier to "slide cut" with my shears so that job was a breeze.
I had my fabric folded over and cut both side all at once at 142 inches giving me both sides already facing the right way.
Next, I laid out my Tadpole to use as a guide. This is my most favorite tarp, in fact I love it so much I sold my Cuben tarp because I hardly ever used it! I wanted to end up with a slightly larger version of a Tadpole and with doors.
This is the step that I think I messed up on the most. I got the measurements wrong for how much offset I needed to have the doors line up the way I wanted. If anyone has good dimensions or plans other than the ones on DiyGearSupply.com let me know.
Anyways, in this pics I just cut the sides of the tarp body from bottom to top on an angle. This step shortened the ridgeline to 130 inches but left the bottom edge 142 inches.
Next I trimmed the bottom of the tarp body down six inches and measured and marked my four corner tieout locations. They ended up being 30 inches in from either side with 82 inches between them. (if you are reading this for guidance, 30 inch doors are too short, start with a longer tarp body and angle the edge more for larger doors)
Once all my marks were laid out, I needed to make my catcut template. I used a large heavy duty cardboard box. I measured out 82 inches and cut it to length, then folded it in half to find center. I marked it at 4 and 5 inches because I wasn't sure how much curve I wanted. I ended up going with 5 inches and think it turned out great. I used the string method and it was really easy, in fact the hardest part was tracing next to the string with out moving it. Once all tracing was done all I had to do was cut out the template. (The template edge looks really rough because my garage scissors went missing so I used my pocket knife. I traced about 1/4 inch away from the template so I could get a clean line.)
With the template cut out I marked the curve on the tarp sides and cut them out all at once. Again, using the hard concrete floor made this really easy. My shears just glide right along it and gave a really clean cut. Key to success is lots of weights holding everything in place.
And that's it for cutting and layout. Next I pinned my ridgeline together to keep things in order while I moved to the sewing room. Once there I used those long 6 inch strips to cut out squares for my reinforcements and also cut out webbing and grosgrain for the tieouts. I choose to use Beastee D's on the ridgeline and Linelocs at the tieouts. This is my first time using linelocs and absolutely love 'em! Much easier to adjust that purssiks and they hold really well.
I had to decide which ridgeline seam I was going to use. I really wanted to use a Warbonnet style bound ridgeline because I think it looks great and is probably really strong. I've also heard they don't require seam sealing, but if it did leak I think it would be a pain to try to seal. So, I ended up going with a flat felled seam and in hind sight it was easy to sew and feels plenty strong. I didn't get any pictures during this process but a quick search will get you all the info you need.
After the ridgeline was sewn I pined my reinforcements in place and began the tedious task of roll hemming the perimeter of the tarp. I timed it at 47 minutes to hem the whole thing which is a lot faster than I thought it was going to be. Once hemming was done I attached my tieouts and was DONE!
A little seam sealer and this thing is ready to go.
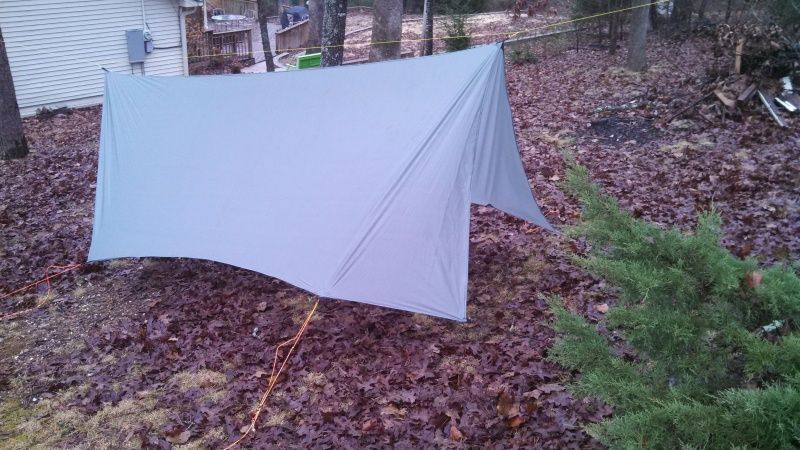
I made my corner and door tieouts out of Glow wire and shock cord and added them to the tarp and hung it on a continuous Zing-it ridgeline.
Here you can see the doors don't close all the way but I think it will still be usable and hey I made it myselfI may in the future try to fix that by adding some more material to the edges of the doors.
Overall I'm really happy with the shape and size and even though it didn't turn out exactly as planned I think it's going to be great tarp.


 Reply With Quote


Bookmarks