


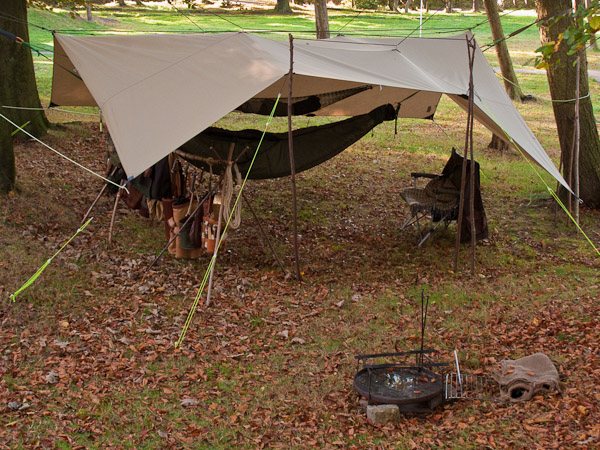
First of all I have to say that so far I'm not yet a "lightweight" hammock user, I use mine to be comfortable, mostly on bushcraft meet ups in the UK and I take a van full of other gear to demonstrate crafts and techniques.
I have used my current set up for a while now which is the Snugpack under-blanket and quilt combination and it's handled sub zero, still conditions with no problems.
The hard Winter we had over here last year has given me cause to wonder how it will cope with worse conditions though, so I though a recent weekend at Spitewinter would be a good safe opportunity to test out a new set up. Spitewinter campsite is about 300m above sea level on the windward side of an exposed hill so it is notoriously chilly and lives up to it's name well.
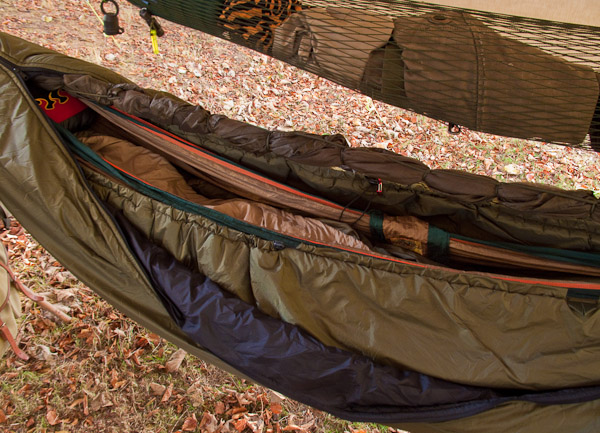
Some time back I bought a "Cocoon" made by Snugpack from another BcUK member. He had tried it but found it a bit too baggy for his needs. For what I wanted that sounded perfect.
My thought was that it would double the insulation around the hammock without compressing the under-blanket and thus reducing it's effectiveness.
Here you see the set up. From the inside there is the quilt in the hammock, the under-blanket and then the cocoon on the outside.
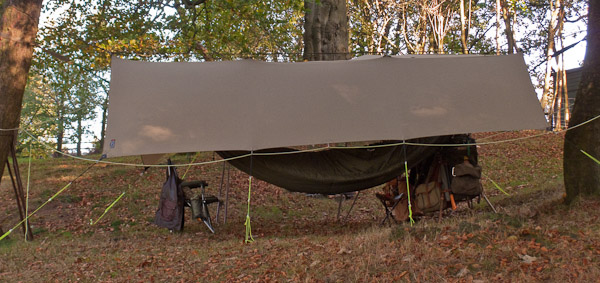
The hammock was deliberately slung a bit lower than I usually have it and I had picked an exposed position, on a ridge directly in the wind. The forecast was wet and windy, getting colder for the second night.
Had I been in just the under-blanket I think it would have made for a very uncomfortable weekend.
So how did it work out?
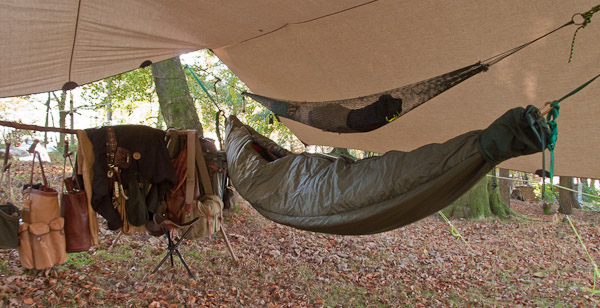
Getting in was a straight forward affair, I had rolled and reefed the mozzie net up which formed a ridge line that raised the cocoon up snugly around the under-blanket. I have yet to experiment with a SRL but I'm sure that would achieve the same result..
When in the hammock I found this to be a little too close to my face, so I used a mini crab to clip the mozzie net to the bottom of my gear hammock and give me a bit more breathing space.
I didn't zip the cocoon up fully as I prefer fresh air to the inside of a bag any time, but I was aware that if needed there was that option.
The first night was wet and windy as predicted. The low position put me directly in the wind but just out of the rain.
At one point I did wonder if the tarp was actually going to hold up to the buffeting it was getting, but fortunately the loops of bungee cord that I always add to each of my guy lines gave enough flex that no pegs were uprooted and the tarp itself was undamaged by the strain. No small wonder in the blustery conditions that night.
The only adjustment I made during the worst squall, was to reach out and check that the rain was not hitting the bottom of the cocoon and then pulling the windward side a little higher to reduce the breeze across my face. First test passed with flying colours.
The next night was certainly colder but much less windy. Same set up but now, without the wind, I found myself getting rather too warm. This was soon remedied by unzipping the cocoon somewhat and this second night passed comfortably and without event.
Of course, this needs to be tested in more severe situations but I am at least confident that it will cope with normal cold conditions without much adaptation.
Bring on the Winter...

 Reply With Quote


 and I'm glad you like the websites Bradley.


 Sorry, I forgot you guys tend to think in Fahrenheit.


Bookmarks