Page 1 of 2 12 LastLast
Results 1 to 10 of 18

Thread: IX UQ Complete!

  1. #1
    New Member
    Join Date
    May 2011
    Location
    Northern Virginia
    Hammock
    Nano 7 w/BugSock
    Tarp
    OES MacCat Std
    Insulation
    IX UQ, XP TQ.
    Suspension
    Whoopie Slings
    Posts
    33

    IX UQ Complete!

    First off I would like to thank MacEntyre for spending the time to provide me feedback on my plans and overall instruction and advise. The UQ would not have turned out as well as it did without his input.

    The plan is below:
    Finished Dimensions: 54"L x 44"W
    Finished Weight: Hoping for 10oz, 12oz with optional IX layer.

    Layer 4: IX Optional for Cold Weather
    Starting dimensions: 56"L x 43"W
    Darts Side (Affects Length): x4 1.5" x 6" = 6" loss
    Darts End (Affects Width): x2 1.5" x 6" = 3" loss
    Finished dimensions: 50"L x 40"W

    Layer 3: SB/IX (Combine SB/IX together by sewing edges before darting)
    Starting dimensions: 56"L x 43"W
    Darts Side (Affects Length): x4 1.5" x 6" = 6" loss
    Darts End (Affects Width): x2 1.5" x 6" = 3" loss
    Finished dimensions: 50"L x 40"W

    Layer 2: IX
    Starting dimensions: 58"L x 51"W
    Darts Side (Affects Length): x4 1.5" x 6" = 6" loss
    Darts End (Affects Width): x2 1.5" x 6" = 3" loss
    Pleats (Affects Width): 6 x 1/2" = 6" loss
    Finished dimensions: 52"L X 42"W

    Layer 1: M90
    Starting dimensions: 60"L x 47"W
    Darts Side (Affects Length): x4 1.5" x 6" = 6" loss
    Darts End (Affects Width): x2 1.5" x 6" = 3" loss
    Finished dimensions: 54"L x 44W

    Materials:
    4 yards insultex
    2 yards shell M90
    20ft 1.5" gross grain
    24ft 3/32nd shock cord
    4 cordlocks
    2 #1 sbiners
    Total cost: $50ish.

    Result:
    I started at about 3pm on Saturday and worked fairly non stop until about 10pm. I put in another hour or so on Sunday, and another hour last night testing and tweaking the shock cord suspension.

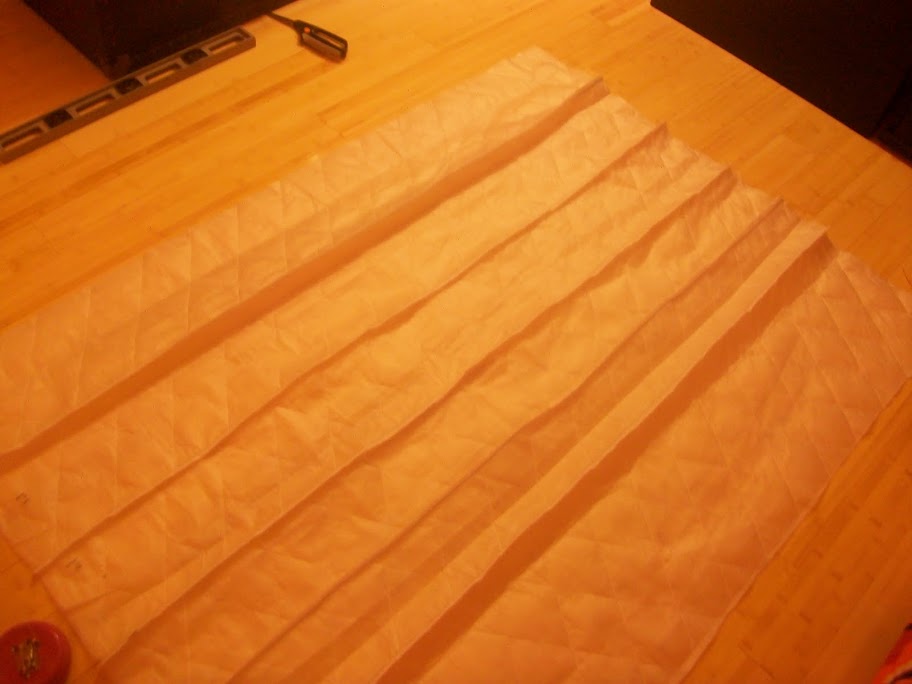
    Here are some pictures of the process and testing:


    Happy with the results considering my knowledge and DIY skill level. Between doing the Climashield TQ and this project I have learned a lot and my sewing IS getting better. Just need to slow down a bit more and think about all the possibilities before deciding on a course of action. Sometimes I make the process harder then it should be.

    End dimensions actually ended up being closer to 52"L x 42"W. Lost a little bit during sewing and the differential cut gave me a little trouble.

    I tested it myself, but ended up having my son (in the pics) lay in it so I could really see how it fit and adjust the end and side cordlocks. It seems to seal up good especially at the head end, and decently at the foot end. Depends on the lay. The sides actually come up over the hammock sides, so tightening those down pulled everything in and it seemed tight.

    The suspension is just shock cord in the side channels that I have connected to the hammock ridgeline with tiny sbiners. It feels right, but if I should be doing it a different way please let me know.

    I will be taking this with me on a 4 day trip in two weeks, so that will be the true test.

    Thanks again for all the great knowledge on this forum. Without reading and being inspired by others I could never have done this!

  2. #2
    Senior Member raiffnuke's Avatar
    Join Date
    May 2011
    Location
    Pittsfield, MA
    Hammock
    WBBB,WBRR,DIY
    Tarp
    HG WP,WB Superfly
    Insulation
    Hammock Gear
    Suspension
    Whoopies&DutchGear
    Posts
    3,779
    Images
    44
    Nice looking work!

  3. #3
    Senior Member Redoleary's Avatar
    Join Date
    Feb 2009
    Location
    Pennfield Twp, MI
    Hammock
    DIY gathered end
    Tarp
    Hinterland gear
    Insulation
    down bag
    Suspension
    strap & E.T.'s
    Posts
    3,910
    Images
    70
    Hey that looks great, nice job.
    Good luck,
    RED

    My Youtube Channel

    Deep peace of the running wave to you.
    Deep peace of the flowing air to you.
    Deep peace of the quiet earth to you.
    Deep peace of the shining stars to you.
    Deep peace without end to you.
    adapted from - ancient gaelic runes

  4. #4
    Senior Member
    Join Date
    May 2008
    Location
    Bayview Township
    Hammock
    WB Blackbird & Traveler
    Tarp
    MC SpinntexDeLux
    Insulation
    MW3,Yeti,HGsb,UL90
    Suspension
    WS
    Posts
    837
    Images
    6
    Nice job! Found with IX uq like most uq the perimeter seal is really important regarding keeping you warm. If you feel a cooling effect from a leak on a calm night imagine a windy night without any tarp protection.
    Noel V.

  5. #5
    Senior Member
    Join Date
    Feb 2010
    Location
    Davis, CA
    Hammock
    DIY 11' gathered end hammock
    Tarp
    DIY Winter Tarp
    Insulation
    Jarbridge UQ, Sock
    Suspension
    Whoopie, MSH
    Posts
    274
    Images
    12
    Very nice. Can a so, so sewer make one of these?

  6. #6
    Senior Member MAD777's Avatar
    Join Date
    May 2009
    Location
    White Mountains, New Hampshire
    Hammock
    DIY, WBBB & Switchback
    Tarp
    HG cuben,OES Spinn
    Insulation
    DIY 3/4 UQ/TQ, UGQ
    Suspension
    Dynaglide / Dutch
    Posts
    10,950
    Images
    39
    Impressive design AND execution!
    Well done on both points!
    Mike
    "Life is a Project!"

  7. #7
    New Member
    Join Date
    May 2011
    Location
    Northern Virginia
    Hammock
    Nano 7 w/BugSock
    Tarp
    OES MacCat Std
    Insulation
    IX UQ, XP TQ.
    Suspension
    Whoopie Slings
    Posts
    33
    Quote Originally Posted by Girotogo View Post
    Very nice. Can a so, so sewer make one of these?
    I am not sure I could even consider myself a so, so sewer! I am learning though. Just take your time and think it through and you can do it. If I can, anyone can.

  8. #8
    Senior Member Les Rust's Avatar
    Join Date
    Sep 2008
    Location
    Athens, TN
    Hammock
    DIY
    Tarp
    WL Big Daddy
    Insulation
    AHE/WL/DiY
    Suspension
    straps and stuff
    Posts
    984
    Looks good. Looking forward to hearing how it works for you. I'm a DIYer myself and am definitely considering the best route to take to an UQ in the future.

  9. #9
    Senior Member dragon360's Avatar
    Join Date
    Nov 2010
    Location
    Toronto, ON
    Hammock
    WBBB/TR, DIY, HH, SB DL, GT UL
    Tarp
    ID/OES/WB/WL
    Insulation
    HG/WB/Go-Lite/WB
    Suspension
    Whoopie/Straps/DW
    Posts
    4,704
    Images
    1
    Great job! On top of my own DIY list.
    The key to immortality is first living a life worth remembering. - St. Augustine

    Some people feel the rain. Others just get wet.
    - Bob Marley

  10. #10
    Senior Member sclittlefield's Avatar
    Join Date
    Sep 2008
    Location
    Northern woods of Maine
    Hammock
    It's a Secret.
    Tarp
    BWDD Winter Dream
    Insulation
    Crowsnest
    Suspension
    Slings
    Posts
    1,431
    Images
    95
    Great looking quilt. Keep a good seal and you'll be good to go. Nicely done.
    DIY Gear Supply - Your source for DIY outdoor gear.

  • + New Posts
  • Page 1 of 2 12 LastLast

    Similar Threads

    1. UL Set Up Complete ...
      By MDSH in forum General Hammock Talk
      Replies: 34
      Last Post: 11-19-2014, 15:50
    2. It is now complete....well almost.
      By wa4chq in forum Do-It-Yourself (DIY)
      Replies: 3
      Last Post: 04-15-2014, 06:12
    3. My Complete HH Set-Up
      By Leebums in forum General Hammock Talk
      Replies: 14
      Last Post: 01-11-2014, 09:58
    4. DIY UQ - Complete
      By Tendertoe in forum Do-It-Yourself (DIY)
      Replies: 19
      Last Post: 08-04-2011, 09:30
    5. DIY UQ complete
      By silentorpheus in forum Do-It-Yourself (DIY)
      Replies: 8
      Last Post: 06-23-2010, 17:24

    Tags for this Thread

    Bookmarks

    Posting Permissions

    • You may not post new threads
    • You may not post replies
    • You may not post attachments
    • You may not edit your posts
    •