Page 1 of 3 123 LastLast
Results 1 to 10 of 26
  1. #1
    Senior Member
    Join Date
    Jun 2008
    Location
    Michigan
    Posts
    117

    Before I get started, Critique my plans?

    Hey guys, first post, and I've been lurking and reading threads for a few days. I have been inspired by headchange4u's hard work and great hammock, here. I've been thinking of using a hammock for backpacking for a while now. I have a Castaway hammock, made of thin
    parachute material (not sure what exactly it's made of, but it's quite thin and pretty soft, doesn't stretch too much.) I've been napping in it for a few years, so I know I can sleep in a hammock. I've been drooling over hennessy hammocks for a while, but would rather put my mind and resources into customizing a hammock that works well for me. My biggest problem with the hammock I have right now is that it doesn't really allow me to lay sideways, as it's too narrow and is "scoops" up on the sides (I plan on re-whipping to experiment with patterns that can eliminate this).

    I have removed the standard mounting stuff from the hammock and done my own whipping, which worked pretty well. I'm getting more experience with knots and the effect that whipping has on how the hammock lays. I have a couple months before a backpacking trip I have planned, so I have time to experiment with my design and re-whip and hang many times to get the formula right.

    To my knowledge, the comfort and lay of the HH style asym hammocks depends on three things:

    1 - The asymmetrical side tieouts
    2 - The whipping
    3 - The attachment and shape of the bugnet/cover
    4 - The structural ridgeline

    So, after assessing a few different hammock builds, I have taken largely from headchange's thread to design my own hammock. For each section of the project, I'd like to tap into your knowledge to assess any design problems before I get in too deep. Any constructive criticism is greatly appreciated!

    1: Dimensions. I am 6'3", 140 pounds. HH explorers are 132X60", while the Safari model is a foot longer at 144". The extra foot in length isn't too much of a concern as far as weight goes, but will it affect the lay too much if I go a foot longer? I was thinking since both of these models support an individual over 6', I could go with 132" AFTER hemming the edges, so about 135" unhemmed. For the taller people out there, does this length seem sufficient?

    2. Whipping. I plan on experimenting with different patterns of whipping, so finding something perfect immediately isn't a huge concern. In the mean time I'll experiment with the hammock I have, which is only 48" wide. As far as the rope for the whipping, is standard paracord sufficient, or must it be high-strength? It seems to hold well now but I don't want to mess around with cheap stuff when I build a new hammock. I'm only talking about the wrap on the whipping, not any part of the suspension.

    3. Support. Here's one of the areas I plan to deviate from some of the builds that I've seen. I want to use this this type of 1" polypro web for the entire support, including the structural ridgeline. I like this idea because I don't have to have separate straps for trees, simplifying my package. 1" webbing also has an advantage I'll talk about when I get to my ridgeline.

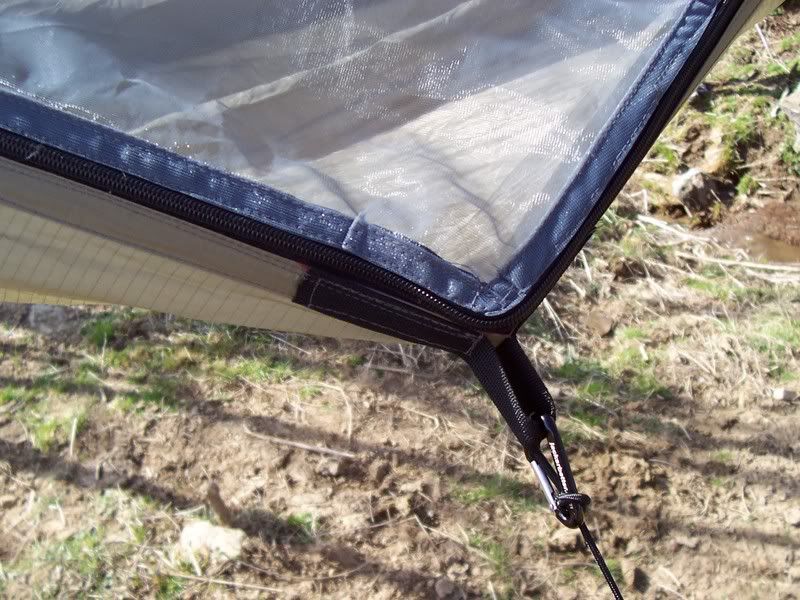
    Starting from where the webbing is tied to a tree, it will be threaded through the whipping (think of how headchange4u did it with the ridgeline, in the 8th photo of his first post.). On the inside of the hammock, it will attach to a carabiner or steel ring (of the proper load bearing quality, of course). The other end of this carabiner will attach to the ridgeline, which will also be made of high strength nylon or polypro that I linked earlier.

    To clear this up, I drew a diagram of my idea.


    I like this setup for a few reasons. It lets me use fewer knots, adjust the ridgeline easier, and I can easily attach things like a gear bag, small LED lantern, water bottle, etc. at the head and foot of the hammock to the carabiners. The ridgeline will also support the bug net, which I'll get to later.

    3 - Ridgeline: Although explained earlier, I want to go over how I'll set it up. The head and foot will have similar carabiner setups, but the foot will have the following attachment: Reducing Loop. This will allow me to attach one end to the carabiner, and the other to the 1" nylon web. This will allow me to easily adjust the length of the ridgeline and therefore the sag, without dealing with knots. I will put it at the foot so any slack in the webbing will not be in my face.

    4 - Bug net: I plan on sewing on a zipper on one side after I have the formula down. I'll sew the bug net to one side of the hammock, and attach a couple toggle/loop points on the side it's sewn down to so I can roll up the net when it's unzipped.

    5 - Material: I'll probably go with ripstop 1.9 nylon or silnylon. Still researching the pros/cons of all materials but I won't be going cheap. I'll so a simple hem around the perimeter, make a tube out of the first 8-12" of each end like headchange did, and do reinforced tieout straps. Nothing revolutionary there.

    6 - Tarp.... that's another post for another day

    That's all I can think of right now, but I'm sure I'll have more questions later. Go over my design/plans if you would like, and post any problems you forsee I might have, especially with the support system. In exchange for help, I'll post pictures of the progress/finished product/bruises acquired when/if it fails.

    Thanks!
    Last edited by booone0; 06-10-2008 at 22:29.

  2. #2
    Senior Member GrizzlyAdams's Avatar
    Join Date
    Apr 2007
    Location
    Illinois
    Hammock
    GrizzBridge Ariel
    Tarp
    HG Cuben Winter
    Insulation
    DIY UQ
    Posts
    4,777
    Images
    564
    Quote Originally Posted by booone0 View Post
    Hey guys, first post, and I've been lurking and reading threads for a few days.
    and your post makes it clear you've been absorbing what you've read.

    I have been inspired by headchange4u's hard work and great hammock, here.
    HC4U is an inspiration to us all...


    To my knowledge, the comfort and lay of the HH style asym hammocks depends on three things:

    1 - The asymmetrical side tieouts
    2 - The whipping
    3 - The attachment and shape of the bugnet/cover
    4 - The structural ridgeline
    My idiosyncratic take on what makes the HH work is that the hammock is long enough and wide enough to give you a nice diagonal. The tieouts move the fabric to keep it from flopping in your face when you're on the diagonal (also contributed to by the whipping). Likewise the cut and lay of the bugnet moves the fabric to show you where the diagonal lies and to encourage the fabric to adopt to that use.


    1: Dimensions. ... I could go with 132" AFTER hemming the edges, so about 135" unhemmed. For the taller people out there, does this length seem sufficient?
    6' 1" here. Just built a hammock with about 130" finished length and it is plenty long.


    2. Whipping.... is standard paracord sufficient, or must it be high-strength?
    paracord is fine.

    3. Support. ...
    If I understand you, then what keeps the hammock in the air is the jamming of the carabiner inside the hammock, being pulled up against the whipped end. There can be a lot of force there, and in this design it is concentrated on a small spot where the biner comes up against the end of the whipped fabric, on the inside. paracord takes a lot and is probably OK here, but if I were doing it I'd do the whipping with some narrow spectra.

    It isn't clear to me how it will work out to be whipping around a heavy flat piece of webbing. The webbing may double over. Only experience will tell on that.

    I would also think about trying to do something on the end of the fabric outside to jam the whipping if it should start to slide along the fabric towards the end. In the HC4U article on putting a ridgeline onto a Warbonnet there are pictures of the Warbonnet wrap, which creates a ball of fabric at the end. That's the ticket.


    3 - Ridgeline: Although explained earlier, I want to go over how I'll set it up. The head and foot will have similar carabiner setups, but the foot will have the following attachment: Reducing Loop. This will allow me to attach one end to the carabiner, and the other to the 1" nylon web. This will allow me to easily adjust the length of the ridgeline and therefore the sag, without dealing with knots. I will put it at the foot so any slack in the webbing will not be in my face.
    That's a neat piece of hardware.
    So I have some of this same strap you're talking about using, and in my world the weight of it as a ridgeline far exceeds the benefit of being able to use a glider or something to make it adjustable. You won't get more than a couple hundred pounds of tension on the ridgeline, you won't end up adjusting it much once you've found the sweet spot. I warrant there are a number of much lighter solutions involving cord. I imagine a cord with a number of loops spaced closely at one end, along the cord. Pick the loop you want and slip into the biner.

    But that's me...cords and knots and loops are my friends. Except for straps around the trees, I find webbing to be more weight than needed for most everything.

    4 - Bug net: I plan on sewing on a zipper on one side after I have the formula down. I'll sew the bug net to one side of the hammock, and attach a couple toggle/loop points on the side it's sewn down to so I can roll up the net when it's unzipped.
    I've seen the full zipper mod that 2Questions has done on HH hammocks. Look at his gallery. An interesting thing is that to do a full zip plus rollup on one side, he put also a 1/3 zip on the opposite side as well. I thought about this recently and see that it needed because of the geometry of the bugnet, a parallelogram. If you cut the bugnet that way, and do a zip only on one side, you have to determine whether the middle of the bugnet can, when unzipped, be pulled all the way over the the side without pulling also on the ends of the hammock. 2Q's second zipper completely removes the netting from being connected at both ends of the hammock, which otherwise might limit your ability to pull it over to the side.

    5 - Material: I'll probably go with ripstop 1.9 nylon or silnylon. Still researching the pros/cons of all materials but I won't be going cheap. I'll so a simple hem around the perimeter, make a tube out of the first 8-12" of each end like headchange did, and do reinforced tieout straps. Nothing revolutionary there.
    You won't want to be laying on top of silnylon. 1.9 is more than adequate for 140 lbs.

    I'm a believer now in double-bottomed hammocks. You could do a double bodied one using two pieces of 1.1 oz, easily. The very big win is that you can use a pad between the layers, and it stays put when you lay on it. A Very Big Win in my book.

    In exchange for help, I'll post pictures of the progress/finished product/bruises acquired when/if it fails.
    c'mon, we expect that anyway!! You've drunk from the fountain of experience at HF already, and so are duty bound to contribute back! Indeed, I think we ought to have a sticky thread on "Great Ideas that Just Don't Work"

    good luck. Use a crash pad...

    Grizz
    Last edited by GrizzlyAdams; 06-10-2008 at 07:52.

  3. #3
    Senior Member headchange4u's Avatar
    Join Date
    Oct 2006
    Location
    Kentucky
    Hammock
    Dual Layer WB Blackbird
    Tarp
    OES Cuben
    Insulation
    SnugFit
    Posts
    6,249
    Images
    35
    First off, welcome to hammock forums.

    Grizz did an excellent job of answering your questions. I did have a little to add on the subject of zippers. Recently at the RRG hangout, I had some pretty major zipper problems. Of course it was dark when the problems came about, which only added to my frustration. Basically the zipper messed up and I couldn't get my cover to zip closed. The problem was where the zipper had to make a sharp turn at the asymmetrical tie out point. I found out that night that zippers don't like to make sharp turns, especially when you are lying in the hammock. 2Questions' wife does an excellent job with her zipper mod on the HH. Check out this picture to see how is should be done to avoid the problems I was having. I also think you are on the right track by just having the zipper located on one side and having it tie off to the other side.
    Last edited by headchange4u; 06-10-2008 at 13:50.
    “Light thinks it travels faster than anything but it is wrong. No matter how fast light travels, it finds the darkness has always got there first, and is waiting for it." -Terry Pratchett


    Premium Quality, Fresh Roasted Coffee
    www.meancatcoffee.com

  4. #4
    Senior Member jeffjenn's Avatar
    Join Date
    Aug 2007
    Location
    sw,va
    Hammock
    HH Expd Asm or DIY or WBBB or .....
    Tarp
    HH Hex
    Insulation
    DIY UQ / CCF Pad
    Suspension
    Whoopie!!!....
    Posts
    672
    Images
    23
    Griz's Quote... "You won't want to be laying on top of silnylon."

    Why is this?

  5. #5
    Senior Member
    Join Date
    Oct 2006
    Location
    New Orleans, LA
    Posts
    3,554
    Images
    57
    Quote Originally Posted by jeffjenn View Post
    Griz's Quote... "You won't want to be laying on top of silnylon."

    Why is this?
    It doesn't breath. Different thoughts by different people on this. May be worth a cold weather test. In hot weather breathablity is everything. Plus I think I breathable hammock body allows your body to heat up an UQ faster than warm yourself up faster than a non-breathable.
    Is that too much to ask? Girls with frikkin' lasers on their heads?
    The hanger formly known as "hammock engineer".

  6. #6
    Senior Member
    Join Date
    Oct 2006
    Location
    New Orleans, LA
    Posts
    3,554
    Images
    57
    Quote Originally Posted by headchange4u View Post
    First off, welcome to hammock forums.

    Grizz did an excellent job of answering your questions. I did have a little to add on the subject of zippers. Recently at the RRG hangout, I had some pretty major zipper problems. Of course it was dark when the problems came about, which only added to my frustration. Basically the zipper messed up and I couldn't get my cover to zip closed. The problem was where the zipper had to make a sharp turn at the asymmetrical tie out point. I found out that night that zippers don't like to make sharp turns, especially when you are lying in the hammock. 2Questions' wife does an excellent job with her zipper mod on the HH. Check outthis picture to see how is should be don to avoid the problems I was having. I also think you are on the right track by just having the zipper located on one side and having it tie off to the other side.

    What is the size of the zipper? The #5 I use seems to hold up rather well. I played around with a #3, but it seems way to small for consistant use. Do you think that extra width in the bug netting would help with this?

    I ask all this, because a zipper bugnet hammock is coming up fast on the DIY list.
    Is that too much to ask? Girls with frikkin' lasers on their heads?
    The hanger formly known as "hammock engineer".

  7. #7
    Senior Member headchange4u's Avatar
    Join Date
    Oct 2006
    Location
    Kentucky
    Hammock
    Dual Layer WB Blackbird
    Tarp
    OES Cuben
    Insulation
    SnugFit
    Posts
    6,249
    Images
    35
    I used a #5 coil zipper that I took from a couple of cheap Target sleeping bags. Cheap zippers could be causing some of my problems. Odd thing is that I had never had any problems before that night, even using my hammock on the beach where sand get trapped in the teeth, and I had the same problem with both my netting top cover and my fabric top cover, on the same side of the hammock. It would zip fine until it hit the corner of my tie out, and then it would stick. I could wiggle it and it would move past the corner but the zipper behind the pull was not zipping closed. My weight in the hammock would continue to pull the zipper apart.

    Here's a pic of my corner tie out. You can see what a sharp turn the zipper has to make as compared to the picture I linked to above. The angle of the turn becomes more acute when you are in the hammock.
    “Light thinks it travels faster than anything but it is wrong. No matter how fast light travels, it finds the darkness has always got there first, and is waiting for it." -Terry Pratchett


    Premium Quality, Fresh Roasted Coffee
    www.meancatcoffee.com

  8. #8
    Senior Member
    Join Date
    Oct 2006
    Location
    New Orleans, LA
    Posts
    3,554
    Images
    57
    Thanks. I'm thinking really simple for me. Probibly just a simple top loader with a zip down one side.

    Are you still running your ridgeline through the whipping on the ends?
    Is that too much to ask? Girls with frikkin' lasers on their heads?
    The hanger formly known as "hammock engineer".

  9. #9
    Senior Member NCPatrick's Avatar
    Join Date
    Oct 2006
    Location
    Winston-Salem, NC
    Hammock
    WB Traveler
    Tarp
    Custom OES tarp
    Insulation
    JRB Down UQ/TQ
    Suspension
    Whoopie slings
    Posts
    8,797
    Images
    40
    Quote Originally Posted by Coffee View Post
    Thanks. I'm thinking really simple for me. Probibly just a simple top loader with a zip down one side.

    Are you still running your ridgeline through the whipping on the ends?
    How are you going to deal with the bugnetting closing at the ends? Are you going to do it that way?


    "Civilization is the limitless multiplication of unnecessary necessities."
    - Mark Twain
    “I go to nature to be soothed and healed, and to have my senses put in order.”
    - John Burroughs

  10. #10
    Senior Member
    Join Date
    Oct 2006
    Location
    New Orleans, LA
    Posts
    3,554
    Images
    57
    Quote Originally Posted by NCPatrick View Post
    How are you going to deal with the bugnetting closing at the ends? Are you going to do it that way?
    If I remember correctly Headchange runs the ridgeline through the whipping. That way you can sew the bugnetting dirrectly to the hammock all the way around except for the zipper opening. My only issue with that is it puts the bugnetting closer to your face. The only other option I can come up with is to hang the bugnetting down from a ridgeline outside of the hammock. Not a good option for me either.

    I'm just looking to take a good 6 or 8 oz out of the pack by switching from my bug bizy to this. Next up 1/2 length UQ.
    Is that too much to ask? Girls with frikkin' lasers on their heads?
    The hanger formly known as "hammock engineer".

  • + New Posts
  • Page 1 of 3 123 LastLast

    Similar Threads

    1. Unsolicited critique
      By clean in forum Dutchware
      Replies: 8
      Last Post: 04-28-2013, 12:00
    2. Critique my set up please…
      By ohski in forum General Hammock Talk
      Replies: 11
      Last Post: 04-23-2011, 16:16
    3. Critique my suspension set up please.
      By atison in forum Suspension Systems, Ridgelines, & Bug Nets
      Replies: 19
      Last Post: 03-25-2009, 11:24
    4. Critique my blueprint
      By Patrick in forum Do-It-Yourself (DIY)
      Replies: 15
      Last Post: 10-23-2008, 09:52

    Tags for this Thread

    Bookmarks

    Posting Permissions

    • You may not post new threads
    • You may not post replies
    • You may not post attachments
    • You may not edit your posts
    •