


So back in the fall when Hennessy was clearing out the no-bugnet, no-fly Safaris for cheap, I succumbed to the lure of the bargain and bought two of them for fairweather hammocking. However, I am not one to leave well enough alone and was looking for my first DIY project. Around the same time, my best bud and hiking partner discovered that his (very heavy) Columbia tent had developed a few rips and a broken pole over its many years of service, so he was going to be without shelter for this coming Spring hiking season. He had been interested by my hammock on our last trip, so I decided to take it upon myself to take one of my Safaris and "finish" it with a large fly and bugnet and give it to him for Christmas. In my usual ambitious (and often rubbish) way, I decided to do a cat-cut tarp and a fully removable bugnet. I bought an old Necchi sewing machine and got to work.
Nothing I did was really groundbreaking or new, and all inspiration was drawn from these HF threads:
MacCat Clone with Build Process (PIC HEAVY, BEWARE)
http://www.hammockforums.net/forum/s...ad.php?t=35718
Adding a Bugnet to the $49 Safari, Pic Heavy
http://www.hammockforums.net/forum/s...ad.php?t=41115
Huge thanks to those guys for doing a guide on their experiences, it helped me a ton.
The first step was the usual supply-gathering. Most of my materials came from DIYGearSupply, notably the bright red silnylon 2nds, Oxford nylon, and the 54" NoSeeUm mesh. Various stuff like Gutermann thread and acetal triangles were also sourced from DIYGS. The 120" separating zippers were ordered from Amazon, and the silk ribbon for the tarp edge came from eBay.
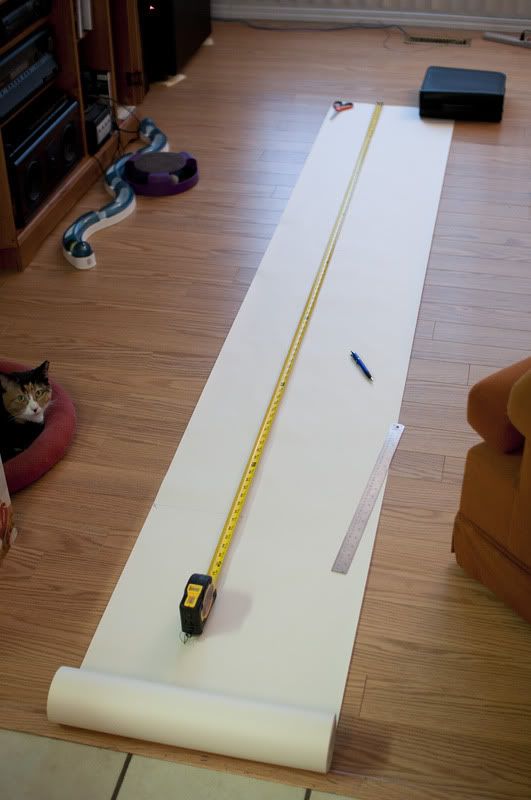
After I decided on my tarp size (12') I used the Blackbishop calculator (found on this page) to dimension the cat cut patterns.
I honestly didn't take many pics of this part, Chicky's thread is very comprehensive and better to follow than my stuff. I'll post pics of the finished tarp with details at the end, it's pretty standard stuff.
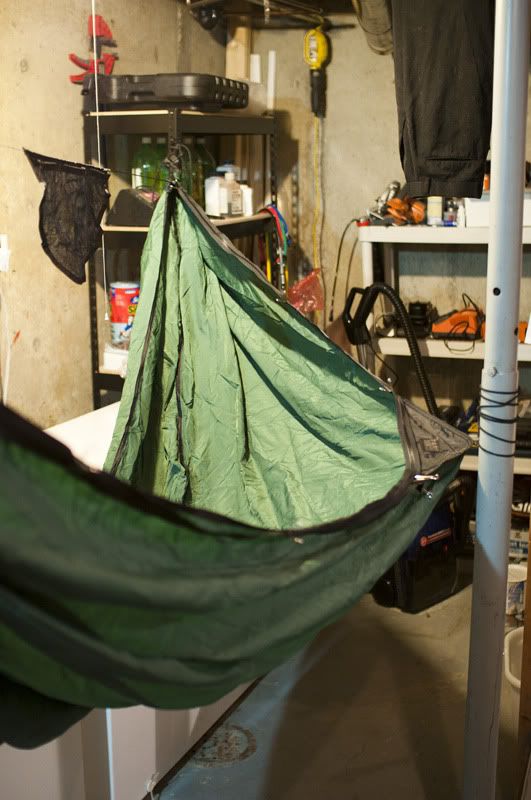
For the removable bugnet, before ordering supplies I first strung up the hammock in my basement and used some paracord (aided by binder clips) to determine the necessary zipper length. 120" turned out to be pretty much perfect and a test fit of the zipper confirmed that.
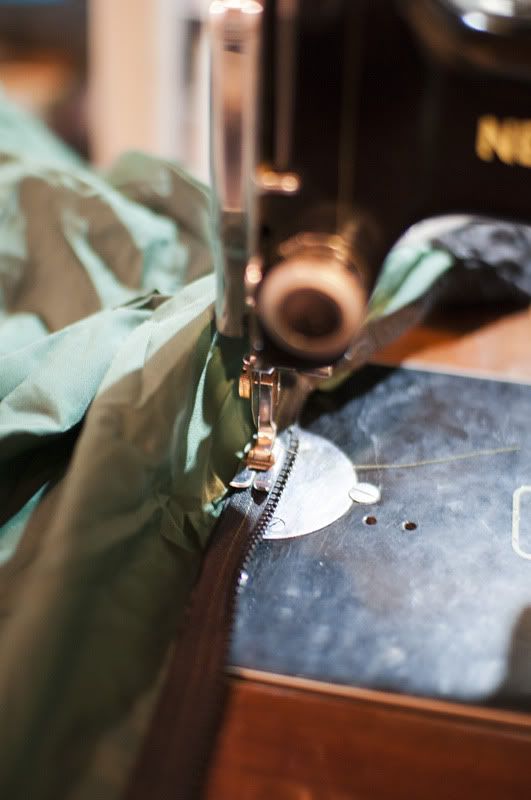
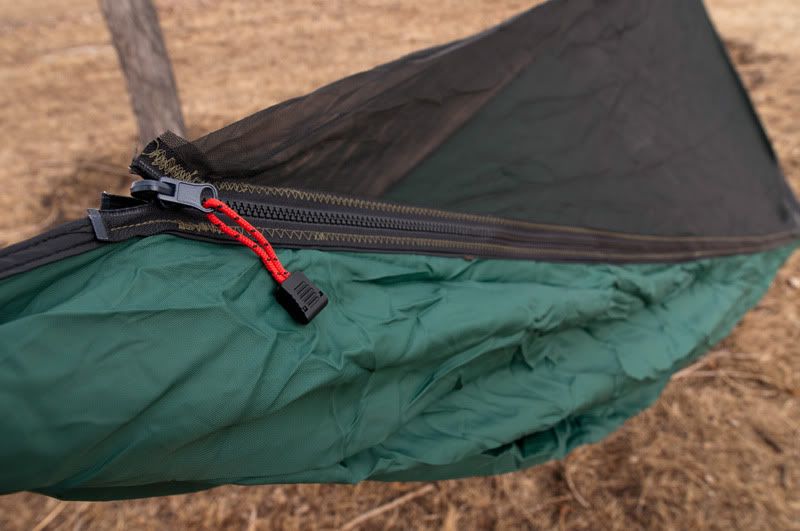
Knowing the zipper length was fine, I pinned it up and stitched it to the hammock body using two stitching passes. It's a good thing I practiced stitching on some spare material, it had been over a decade since I last used a sewing machine and I was rusty as heck.
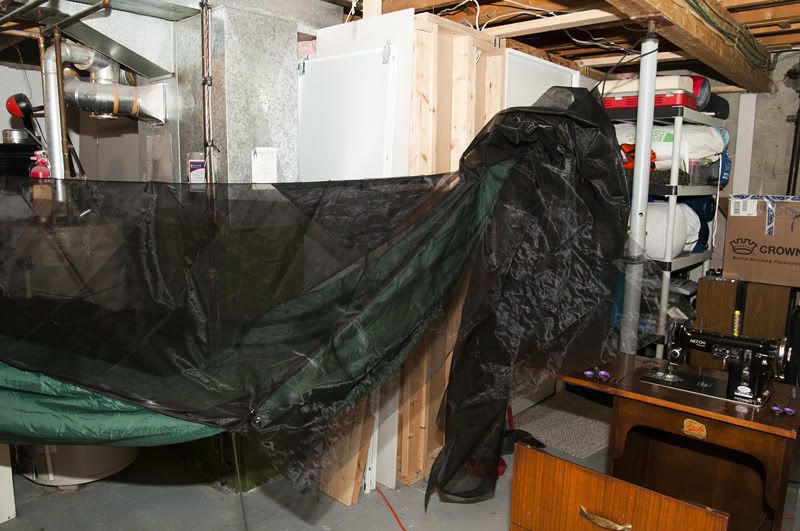
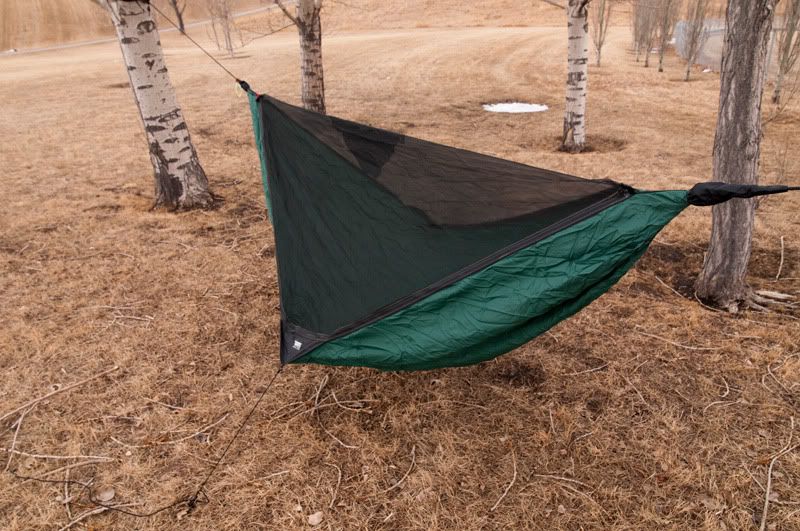
Once the zipper was sewed to the perimeter, I test-fit the big mesh. I ran into the same problem as Brickwurx in his thread, in that the 54" wide noseeum mesh isn't sufficiently wide to reach both sides of the Safari when draped over the ridgeline. His nylon "patch" was a cool solution but I wasn't sure my sewing skills were up to that task. After pondering the problem for a bit, I remembered reading somewhere that Hennessy hammocks, while laid out asymmetrically, were actually made from a rectangular piece of nylon but had the corners gathered instead of the ends. Maybe I could do something similar with the bug mesh!
Perfect! It's tough to see in that photo, but by angling the mesh so its corners (rather than the middle of its ends) met the ends of the hammock, the mesh lined up excellently with the curve of the hammock and was pretty much exactly the right width. I ended up wasting very little material and it stitched on very easily, once I got it in place with a hojillion pins.
On the scale, the hammock with mesh/zippers and stock suspension comes in at 1210g.
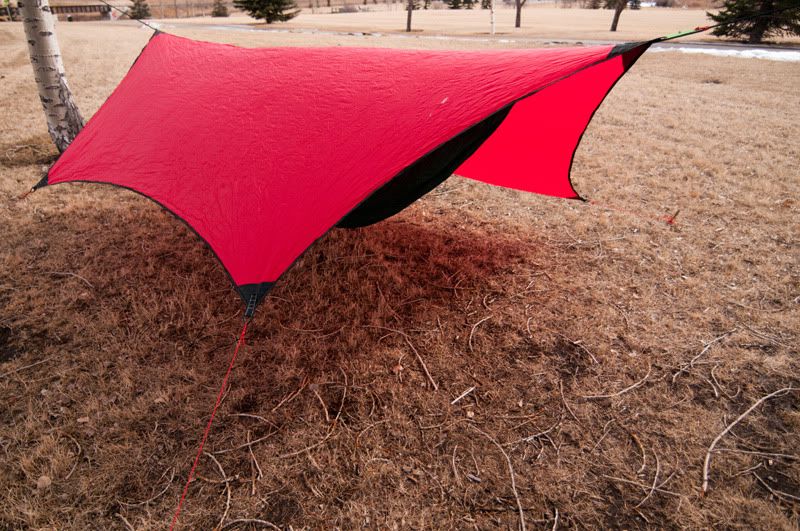
The tarp ended up at 644g, being made of the heavier 70D silnyon.
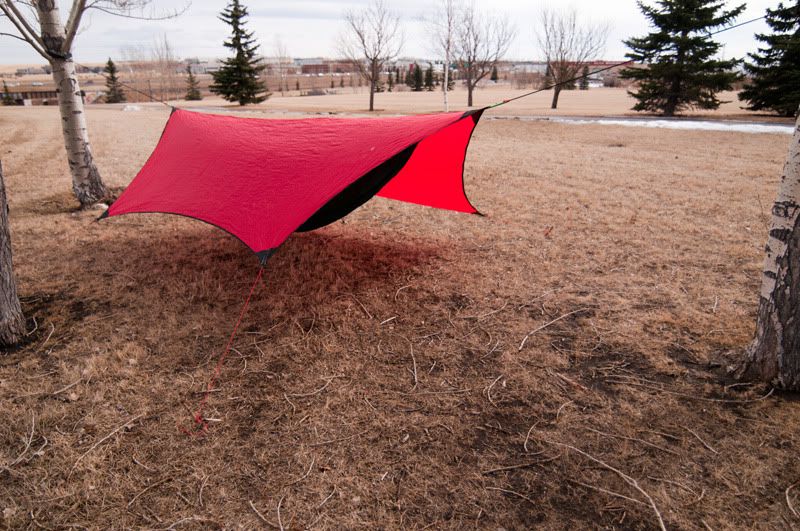
I finished the hammock shortly before Christmas and gave it to my friend before I had a chance to take any pictures of it set up, and he immediately headed off to New Zealand with it to test it out. I finally managed to get it back this weekend to take some pictures of the final product all set up.
It was windy, and the Safari is a large hammock, and therefore an excellent parachute!
I forgot to bring pegs, but sticks work much better than I had imagined. The trees were quite far apart and I ended up hanging it quite low; fine for demonstration purposes.
I had added some 4mm cord and pulls to the zippers for easy use. The zipper pull style allows them to be operated from both inside and outside the hammock. You can see that with the removable design the mesh does not "seal" over the ends, but the zippers are installed slightly offset so the zipper rest against each other when closed and close off the gap. The far end has a small piece of Velcro to cover that end.
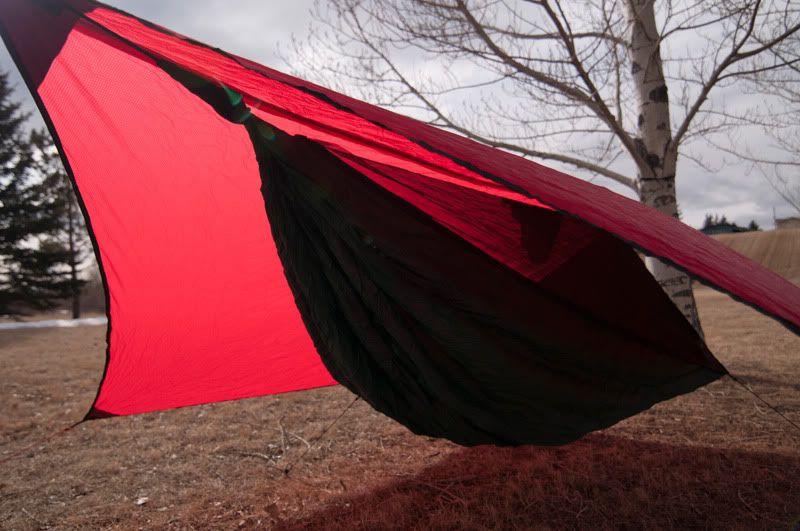
Here's how the tarp turned out, it's perfect for stealth camping!That's genuine New Zealand bird poo.
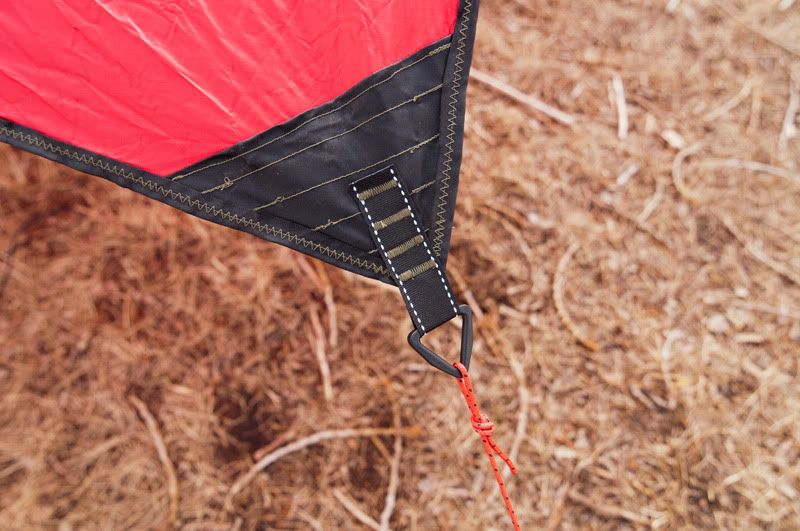
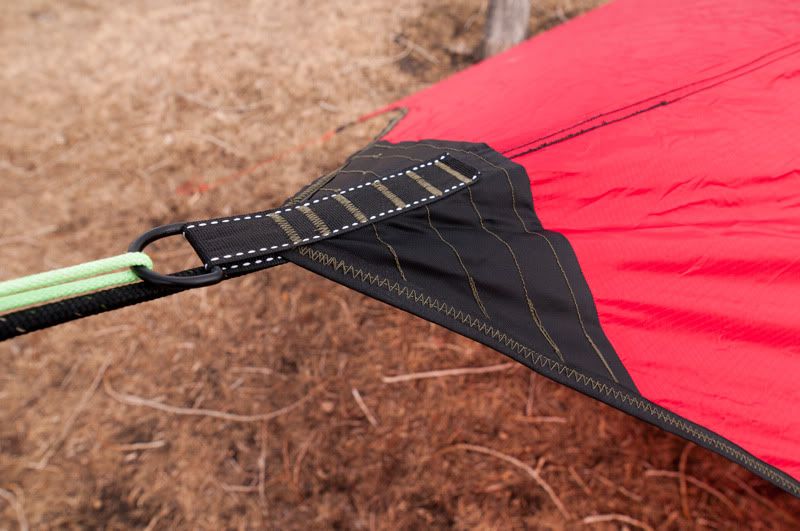
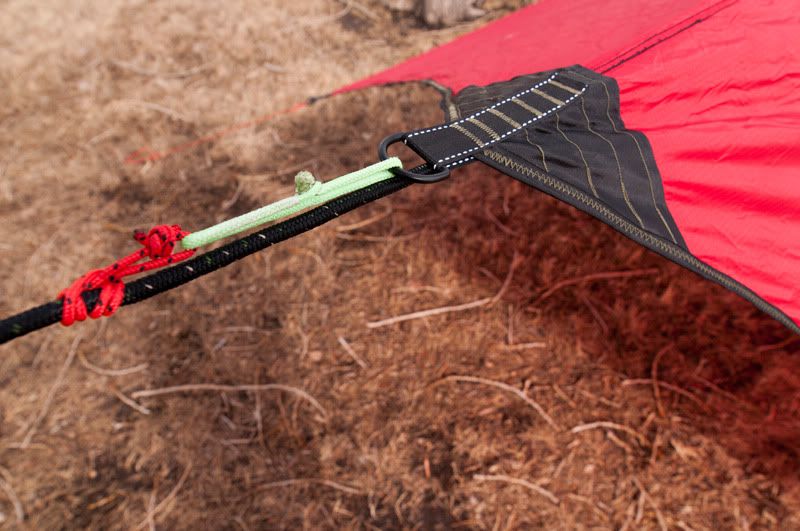
Details on the tieouts. The tarp ridgeline is tensioned in the same fashion as the stock Hennessy fly, albeit with Dynaglide soft shackles instead of plastic clips.
So that's how the project turned out, I'm quite happy with it. In fact, I ordered enough supplies to finish my second Safari as well, so I will likely do that over the early spring and use it as a "loaner" hammock for hiking buddies that want to give hammocking a try. I also have some grey 1.1 silnylon that I will use to make a lighter version of the red tarp. Wish me luck!


 Reply With Quote


 H.Y.O.H.


Bookmarks