


I've always said that there are three kinds of learners in the world. There are those that learn by listening, there are those that learn by watching, and there are those that just have to touch the electric fence and find out for themselves. Anyone care to guess which kind of learner I am?
I've been wanting to give a tyvek tarp a try for a while now. I've done a several searches here on HF and on other gear and camping boards and read many of the pluses and minuses of tyvek for use as a tarp. I understand tyvek can sometimes tear and it doesn't pack down well if stuffed. On the other hand, it folds flat nicely, its water proof and best of all, its relatively inexpensive.
I got lucky last weekend when I delivered a couple of PLUQs that I made for a friend and his youngest son. We were adjusting the PLUQs and talking hammock stuff when the subject of tyvek came up. My friend mentioned that he had a little bit of a roll left in his basement and that I was welcome to it if I wanted it. SCORE!!!
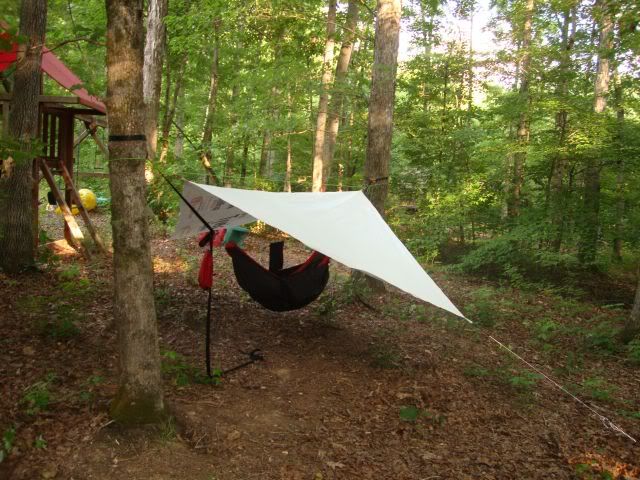
Wednesday evening I finally got around to cutting off a piece to try making a tarp from. Now I had all intentions of making a cat cut hex tarp with a 144 inch ridgeline. But...somehow I managed to cut the tyvek about 24 inches too short (long story...). After I realized that I had goofed and that there wasn't enough left on the roll to cut another piece long enough, I had to figure out how to salvage what I had. The solution...an 8 x 10 rectangular tarp to be pitched asym. I'd still get pretty good coverage, it would ultimately be a little bit lighter and I'd only need two stakes to tie it out. Its the same size and shape as 5 other blue poly tarps that I've made for my daughters and friends so based on their experiences, I know the coverage is decent. OK, problem solved.
I cut the tarp out and squared it up at my office. Glass-topped conference tables sure make nice cutting tables. I had all intentions of including cat cuts but I got lazy and decided to just go with a plain ol' straight-sided rectangle. Once home I tossed the piece of tyvek and a few old tennis shoes in the dryer, set it on low and gave it a spin for half an hour or so to soften it up. To my surprise, it was still pretty crinkly and crunchy when I took it out. It didn't take long to discover that I could take the crinkliness out pretty darn well just by twisting it and wringing it around by hand.
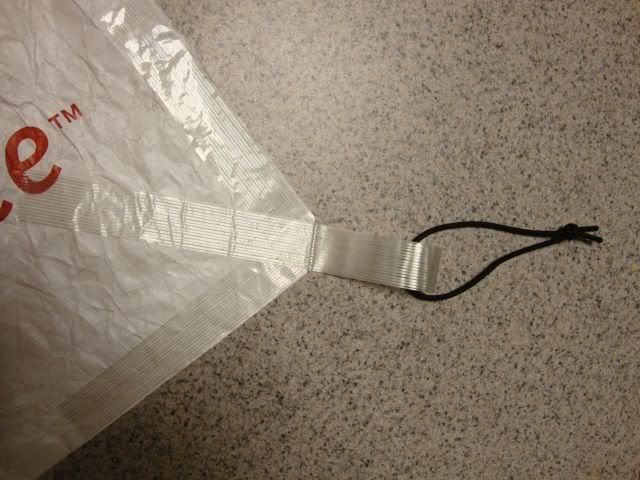
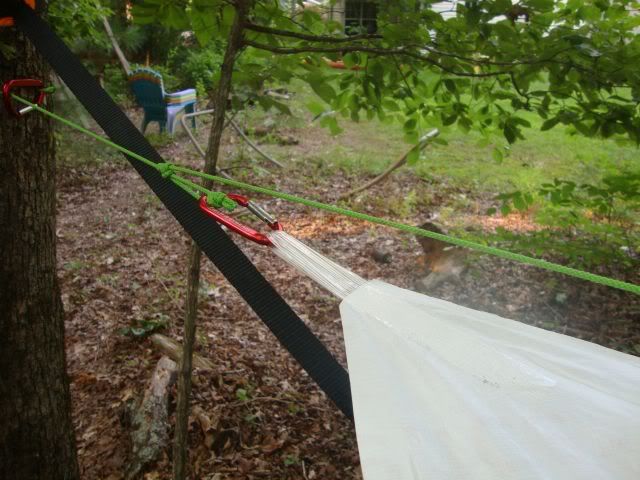
Once I was satisfied that I'd done away with most of the crinkliness, I added the tie-out tabs. Rather than buy some pre-made tie-outs, I used fiberglass-reinforced strapping tape. To make the tabs I cut two pieces of tape, one 18 inches long and the other 6 inches long. I stuck the 6-inch piece of tape to the 18 inch piece of tape at the midpoint (sticky side to sticky side). The tape would be folded over and and stick to the tarp so that the edge of each end of the 6-inch piece just touched the corner of the tarp itself. I also added a couple of 6-inch pieces of tape along the edges of the tarp at the corners for reinforcement. The result looked like this...
For a little extra protection from gusty winds, I added a piece of 1/8-inch shock cord to two of the opposing corners. All in all it took less than two hours to make and about half of that was marking, squaring and cutting the tyvek.
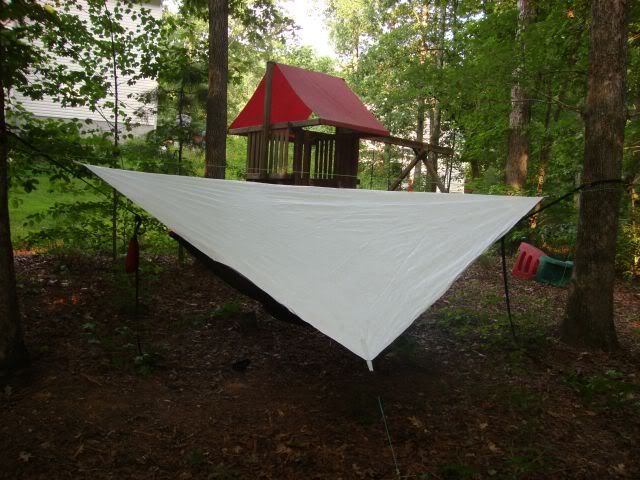
I hung it up late this afternoon in my favorite hammock gear test site (aka the woods behind our house) for its first test drive.
I'm pretty pleased with the way it went together. We'll see how well it holds up over the next several months. For those that are wondering how much it weighs...according to the postal scale at work, 17.2 ounces.
I definitely can't argue about the cost - for all practical purposes, this one was free. But, if one was able to by the tyvek by the yard and pick up a roll of strapping tape to go with it, you would likely come in at $20 or so for a pretty decent tarp. Even a 144 inch tyvek hex tarp wouldn't set ya back much more than that...

 Reply With Quote


Bookmarks