Page 1 of 2 12 LastLast
Results 1 to 10 of 12
  1. #1
    Senior Member onfire's Avatar
    Join Date
    Dec 2013
    Location
    Brecon Beacons, Wales
    Posts
    122

    DIY Ripstop Nylon Hammock

    Hi, I am sure this has been asked before but the words 'DIY' and 'Hammock' come up in almost every thread ever posted when I used search!

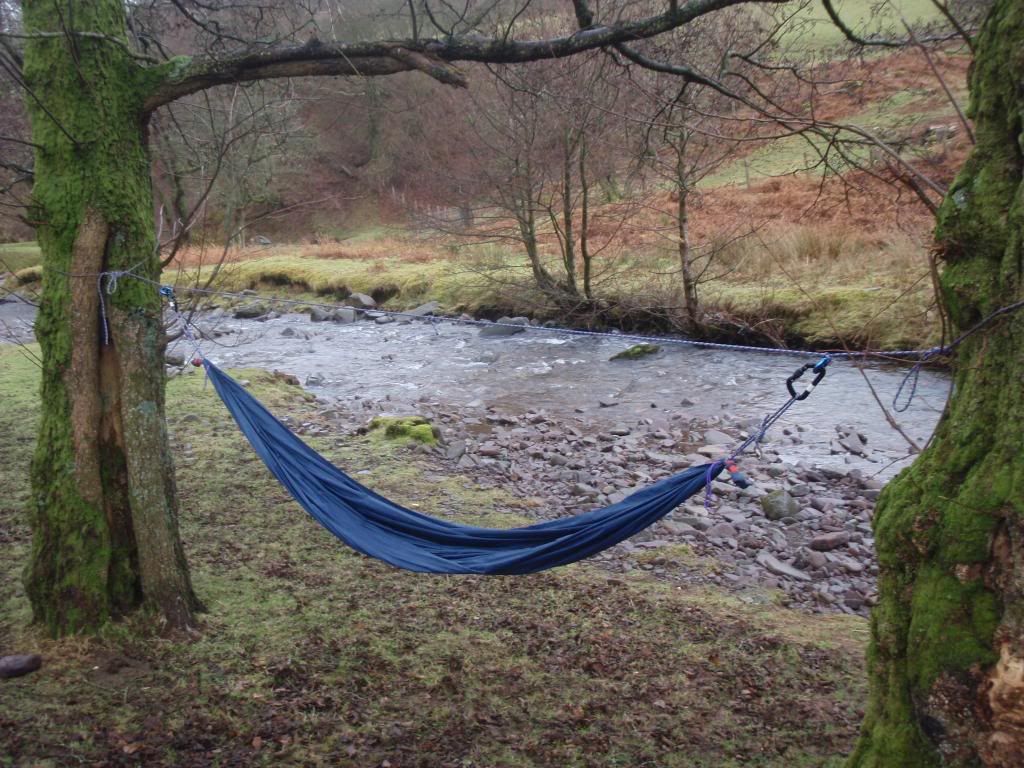
    I have tried to make a simple ripstop nylon hammock (using 75gsm fabric) but I don't have a sewing machine and went for the superlazy design. I took the 3m x 155cm rectangle and simply bunched the material into my fists as I scrunched from the outside edges into the middle. I then took a plastic zip tie / cable tie / tie wrap and cinched the bunched material about 6 inches or so from the end of the hammock. As I closed the zip tie I pulled the long edges out slightly to reduce the amount of loose flap that the sides would have later on.

    I set it up with a loop of climbing cord larksfooted below the zip tie and sat in it. One end held perfectly but the other quickly began to slide and the cord pushed the zip tie off the end of the hammock. Before it went I had chance to lie in it and found that the centre line of the hammock was too pronounced (although the edges were great) so once the end slid off I did a field repair and simply tied a knot in each end (bunching the material in the same manner) before re-hanging it. This time I had pulled less of the long edge through and the sides were much flappier and drooped over my face, but the centre line was still too raised and my legs had to go one either side of it.

    I am aware that the raised centreline could be because the suspension was too tight but Im not convinced that is the problem, Im thinking it is to do with the way I have bunched the material ... so do I:

    Get hems sewed on each edge and then pass the cord through the channel on each end to make a gathered end once hung?

    Fold the fabric like the Hennesey ... and then tie in a big knot ... clamp and heat a nail with a blowtorch to make holes in it to be whipped like the hennesey?

    Use the W fold from Jeffs website

    ... Im a little bit lost as I thought it would be the simplest thing to do and now its caught me out lol With hindsight I wonder if I should have started with 3.5 or even 4m length of fabric but it is set at 3m now!

    Thanks, T

  2. #2
    Senior Member Alamosa's Avatar
    Join Date
    Aug 2010
    Location
    Bozeman MT
    Hammock
    WB RR
    Tarp
    12' Winter Shelter
    Insulation
    Quilts
    Posts
    1,166
    Your 3m hammock is only a few inches short of the 10ft mark, which is a very common size, so I think that will not be a problem.

    One very nice part of making a DIY hammock is that you can experiment with a number of different gather methods which all produce a slightly different result. You can even choose to gather the head and foot end differently if you find you like the foot and head end to have slightly different characteristics.

    Without an end channel, it will be hard to do a gathered end like the Warbonnet, but it is still very easy to do a folded style like the Hennessey, a "W", or a number of other styles I have seen.

    I would suggest using a whipping on the end instead of the zip-tie. Then use your larkshead inside of that. I think it will hold much better as the whipping actually compresses on itself under pressure.

    Another trick that will really help lock the suspension is to put a half-hitch on the inside of the larkshead with the end going to the tree. Under pressure, this puts a slight twist in the end of the hammock so the whipped end is not trying to slide directly out. Hopefully, that description makes sense without a picture.
    We must, indeed, all hang together, or assuredly we shall all hang separately. - Ben Franklin
    (known as a win-win on this forum)

  3. #3
    Senior Member dangerous's Avatar
    Join Date
    Jul 2011
    Location
    Littlerock AFB Ar.
    Hammock
    DIY Dangerous Bird
    Tarp
    DIY Rooftop
    Insulation
    DIY Apex/Argon
    Suspension
    whoopies
    Posts
    1,163
    Images
    59
    Quote Originally Posted by onfire View Post
    the sides were much flappier and drooped over my face, but the centre line was still too raised and my legs had to go one either side of it.
    just from reading your post, I wonder if you are laying diagonally in the hammock? Picture laying on a rectangle with your head on one corner and your feet on the opposite corner. This will let the fabric cradle you in its natural curve. What you're describing sounds like you're laying straight inline with the hammock, which is great sometimes to just sit up and look around but not the most comfortable.
    -Jon-

  4. #4
    Senior Member onfire's Avatar
    Join Date
    Dec 2013
    Location
    Brecon Beacons, Wales
    Posts
    122
    Thank you both for your ideas.

    The whipping will definitely be an improvement over the zip tie (I just kinda wondered how effective it would be, so it wasn't a total failure) ... I fancy trying the Hennesey fold but I don't think the material will cope with too many trials-and-errors without looking the worse for it so am looking for the mistakes to be pointed out first ;-)

    I did lay diagonal and had a really comfortable lie in one direction ... my feet tucked into a 'box' nicely but I couldn't get my head comfy in either direction. The centre line was still noticeably high though. To be honest I have only ever lain in straight line hammocks so the world of diagonal lying makes sense but is totally new to me!

    I love my other hammocks and am slowly getting to grips with the best suspension for my new DD Frontline ... but with this one I just wanted a super simple, lightweight hang

  5. #5
    Senior Member Alamosa's Avatar
    Join Date
    Aug 2010
    Location
    Bozeman MT
    Hammock
    WB RR
    Tarp
    12' Winter Shelter
    Insulation
    Quilts
    Posts
    1,166
    You are going to want to go far more diagonal than you think is reasonable.

    This advice is based on a head-left foot-right lay. Typically, on a 60" wide hammock, the tip of my left shoulder and the crown of my head are touching the edge of the hammock. The heals of my feet are just inside the edge on the other side. Keep moving your butt left until the ridge basically disappears under your left leg.

    Good luck.
    We must, indeed, all hang together, or assuredly we shall all hang separately. - Ben Franklin
    (known as a win-win on this forum)

  6. #6
    Senior Member
    Join Date
    Sep 2011
    Location
    Statesville, NC
    Hammock
    DIY Bridge
    Tarp
    Old Man Winter
    Insulation
    Balloons
    Suspension
    Whoopies
    Posts
    465
    Quote Originally Posted by Alamosa View Post
    You are going to want to go far more diagonal than you think is reasonable.

    This advice is based on a head-left foot-right lay. Typically, on a 60" wide hammock, the tip of my left shoulder and the crown of my head are touching the edge of the hammock. The heals of my feet are just inside the edge on the other side. Keep moving your butt left until the ridge basically disappears under your left leg.

    Good luck.
    Agreed. Also, make sure that your hang angle is not too shallow. A diagonal lay works better with a deep arc. The Brazilian approach is to have a very wide hammock hung at a very deep arc. The outdoor approach here is to try for a 30 degree angle on each end.
    I love the unimproved works of God. - Horace Kephart

  7. #7
    Senior Member onfire's Avatar
    Join Date
    Dec 2013
    Location
    Brecon Beacons, Wales
    Posts
    122
    Progress!

    I took the hammock apart again and started afresh with the Hennesey style fold ... I did one end last night while the dogs were hiding on the bed so I had the floor to myself but I waited until tonight to do the other end - which unfortunately means that I ended up putting one extra fold into one end, but hopefully it wont make much difference!

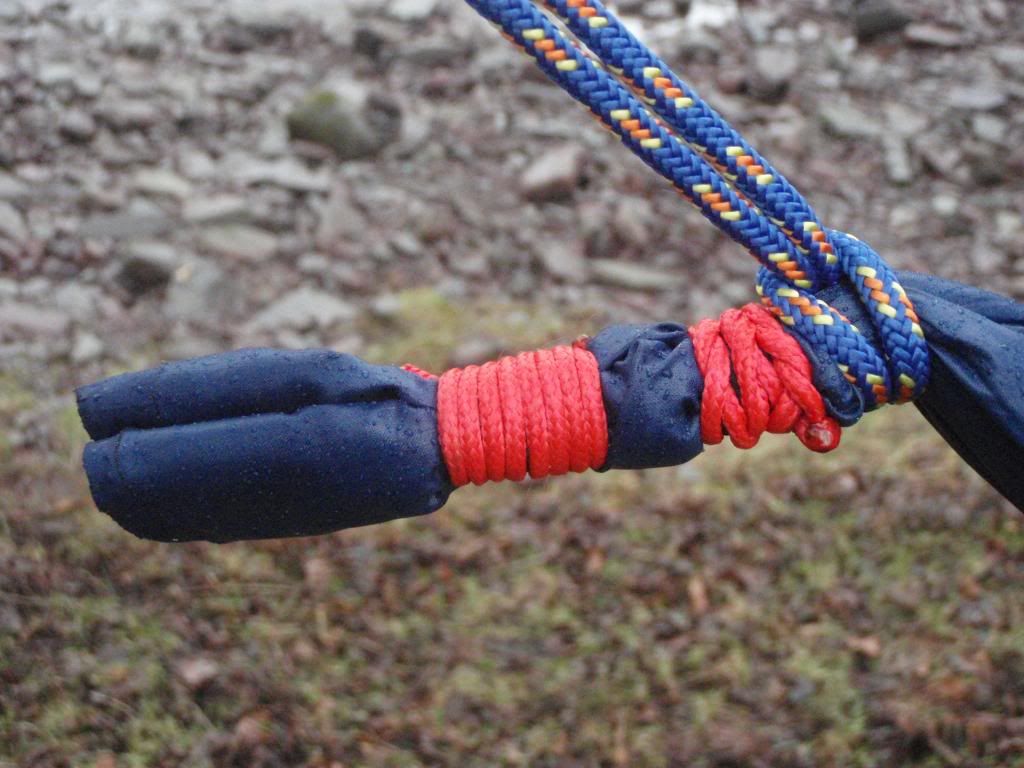
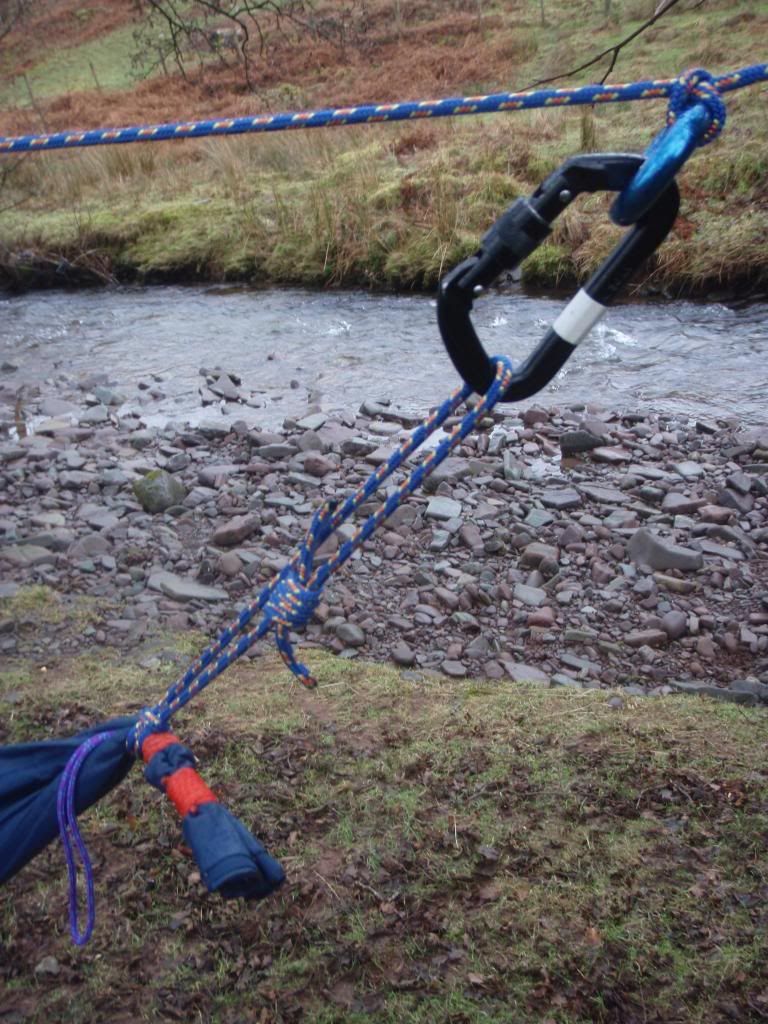
    I whipped the ends as close to the end of the material as I dared but then I got a bit concerned that it would slide off the end so I added a second whip further into the body of the hammock. I saw a great idea on the DIY Hennesey thread on here so I added a knotted loop along the centreline before whipping it. There is an overhand at the extreme outer end, then a second overhand knot which sits between the two sets of whipping ... I hope this will help prevent the whipping slipping but will also give a handy loop for clipping kit or a light ridge line.

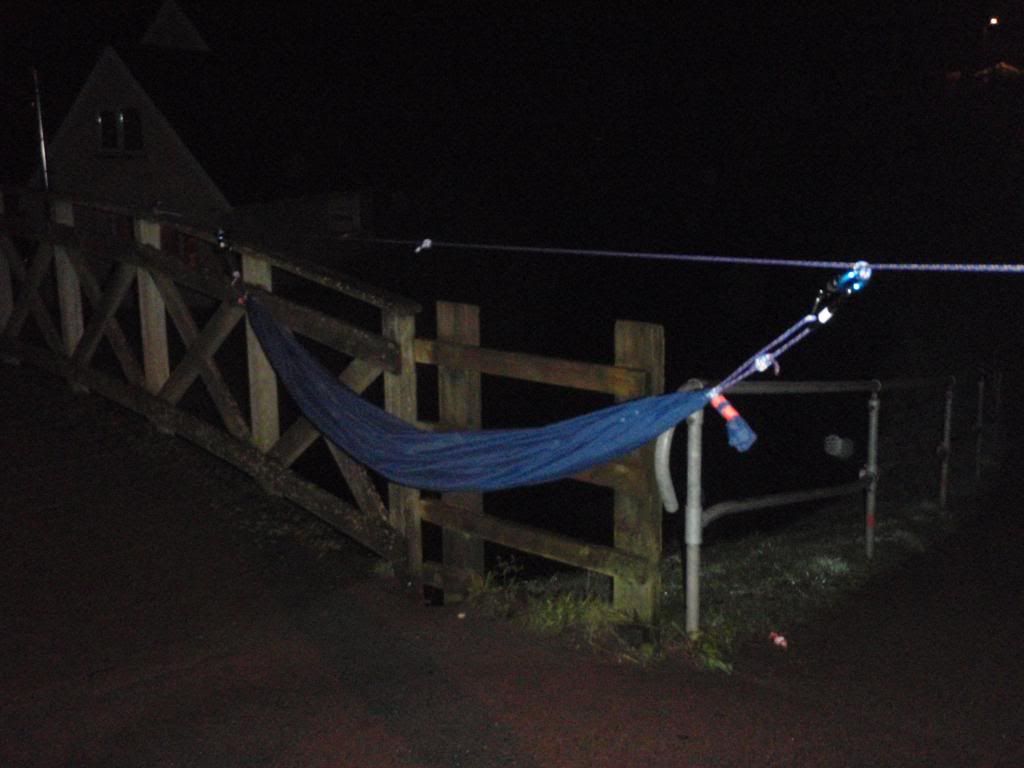
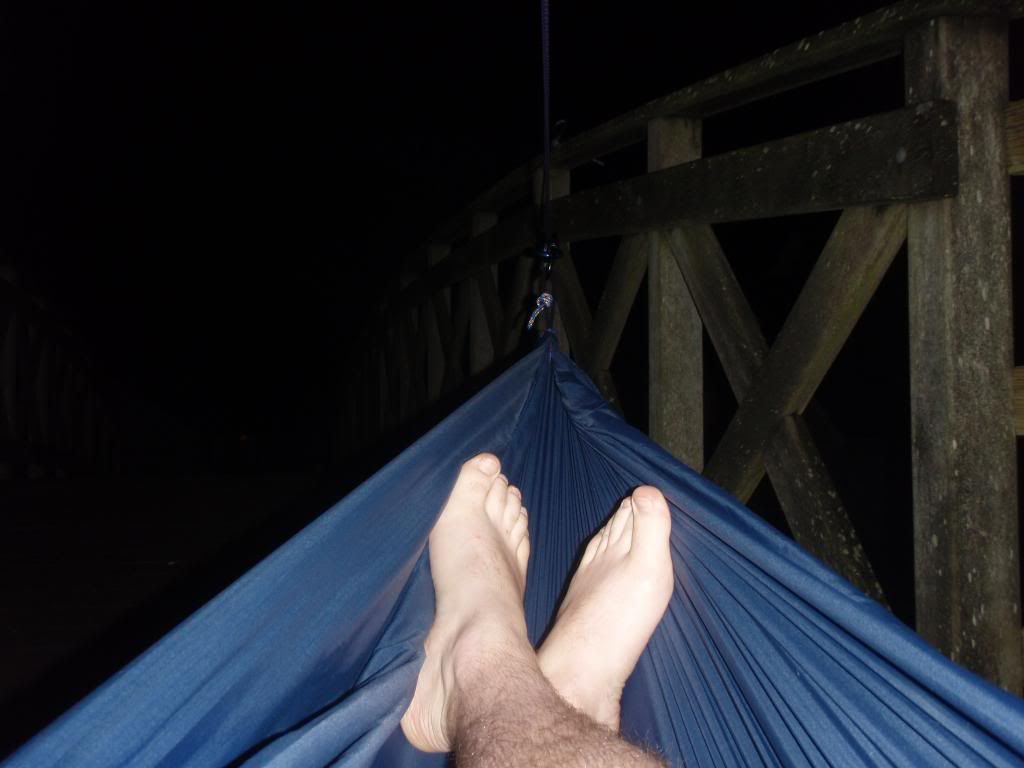
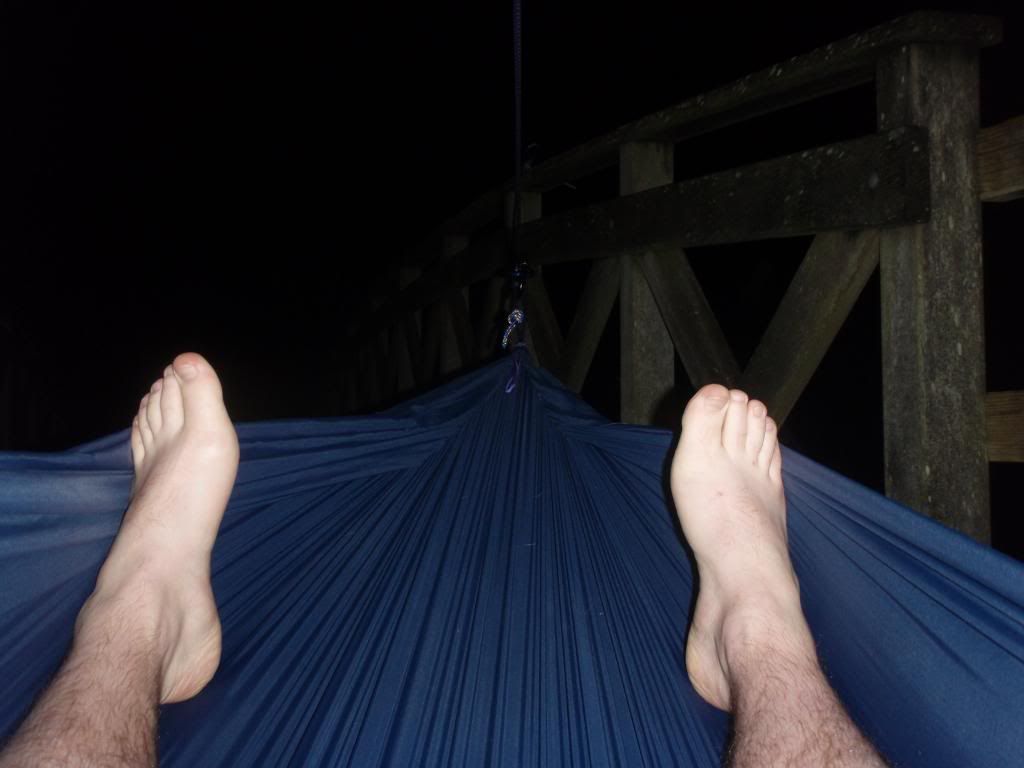
    I took it out in the dark to test but the only place to try it was the footbridge over the canal next to the house ... a touch too low for my liking as I was using a 5mm climbing accessory cord as a structural ridge line and it stretched until my bum touched the ground - which I really hope hasn't weakened or damaged the nylon! The lay was too shallow and I didn't get to try diagonal but it already seems much more comfortable and there is plenty of fabric to the sides so I have high hopes for it!


    The SRL broke from my traditional set up - I used two aluminium rap rings cloved hitched onto the line and simply karabinered the hammock to them. I tensioned the SRL using a slip knot (truckers hitch I believe) to set up a pulley ... I hoped this would be my new set up (with the 3mm Marlow D12 line that I have just bought) but I found that the slip knot tightened so much that it would not pull undone after loading :-(

    Thanks again for your input


  8. #8
    Senior Member onfire's Avatar
    Join Date
    Dec 2013
    Location
    Brecon Beacons, Wales
    Posts
    122
    Here are a couple of closer / clearer shots of the whipped ends:


    The double whip is probably overkill but having watched the slippery nylon slip through the original cable tie I have tried to over engineer the solution ... so that IF the larksfoot forces the whipping to slide it will be stopped by the internal knot or the second whip

  9. #9
    Senior Member oldpappy's Avatar
    Join Date
    Nov 2012
    Location
    Northern Virginia
    Hammock
    Argon 11 ft or HH BKUL
    Tarp
    Asym DIY Pole Mod
    Insulation
    DIY, Jarbrige,HHSS
    Suspension
    Lashings
    Posts
    1,305
    Images
    27
    Nice - You're hooked and you know you will be building another:>)
    This is the method I use - no whipping required.
    http://www.youtube.com/watch?v=AJlEQpcbM1I
    You might as well get started on an 11 footer:>)
    Enjoying the simple things in life -
    Own less, live more.

  10. #10
    Senior Member JLeephoto's Avatar
    Join Date
    Nov 2013
    Location
    TRIAD, NC
    Hammock
    Wilderness Logics Light Owl
    Tarp
    WL Tadpole
    Insulation
    Down SB, WL UQ
    Suspension
    Whoopies
    Posts
    185
    Quote Originally Posted by oldpappy View Post
    Nice - You're hooked and you know you will be building another:>)
    This is the method I use - no whipping required.
    http://www.youtube.com/watch?v=AJlEQpcbM1I
    You might as well get started on an 11 footer:>)
    I've used both this method ^^^ and a basic "W" fold and whip as shown on JustJeff's Page and both worked well with a slightly different feel.
    I used 8-10 loops of gutted para cord for my whipping and Amsteel continuous loops larks headed inside the whipping and it's solid under tension.

    I do believe that your double whipping is overkill and shortens the body more than might be comfortable. The keys for me are: 1)Using the right components 2) getting plenty of sag and 3) laying diagonal. I think these should cure any of the problems you're having.

    Keep at it and enjoy the experimentation.

  • + New Posts
  • Page 1 of 2 12 LastLast

    Similar Threads

    1. Replies: 37
      Last Post: 08-26-2014, 23:21
    2. Zebra print ripstop nylon for hammock?
      By TNhunter in forum Fabrics
      Replies: 2
      Last Post: 05-14-2014, 17:27
    3. ACU Ripstop Nylon or a Completed Hammock for Sale!
      By breyman in forum [SOLD/WITHDRAWN] Items no longer available
      Replies: 122
      Last Post: 03-05-2013, 09:54
    4. Wanting to trade 1.5 ripstop nylon for 1.1 ripstop nylon
      By Tillamook in forum [SOLD/WITHDRAWN] Items no longer available
      Replies: 8
      Last Post: 01-04-2012, 17:14
    5. PowerGrid Nylon with Spectra. 500 Denier coated Ripstop Nylon?
      By thesleepingcoyote in forum Do-It-Yourself (DIY)
      Replies: 5
      Last Post: 04-02-2007, 06:23

    Bookmarks

    Posting Permissions

    • You may not post new threads
    • You may not post replies
    • You may not post attachments
    • You may not edit your posts
    •