


So here’s the deal…I’ve said before I’m not an impulsive sort of guy. I do, however, have a bit of an impatient streak sometimes and it reared its ugly head over the past couple of weeks. Since getting my ENO hammock for my birthday my thoughts have drifted toward the possibility of going hammock camping, even if it’s just in the woods behind our house once the weather warms a bit. Well, for the past couple of weeks the weather has been steadily warming and the itch to go camping has been getting stronger and stronger. I’ve found myself getting a bit impatient about getting a couple of items that aren’t necessarily necessary for camping but will make it more comfortable, and for me, the most pressing issue has been a tarp. Now it’s not too likely that I’ll be camping in the rain that often but in this area, having a good cover to shield one’s self from the heavy morning dew put a tarp high on my want list. However, at the moment, it’s pretty low on our family budget priorities list.
So the question became ‘How can I get a tarp in the shape and configuration that I want (a cat cut hex) for the least possible cost?’ The obvious answer became make one myself. I began looking at various materials and their cost and for silnylon or even polycoated ripstop with the bits of webbing reinforcing material for the corners and D-rings I was still looking at $40 to $50. Not too bad but I still wanted to try to go cheaper. Being that we’re car campers for the most part and I’m not looking something ultralight for backpacking…well, not yet anyway…I came to the conclusion that I could give it a try with a blue poly tarp and some polypropylene webbing from WallyWorld and come out at about $20 or less. I was close. A 12 ft x 16 ft poly tarp was $20 and change and webbing was less than a buck for a couple of yards.
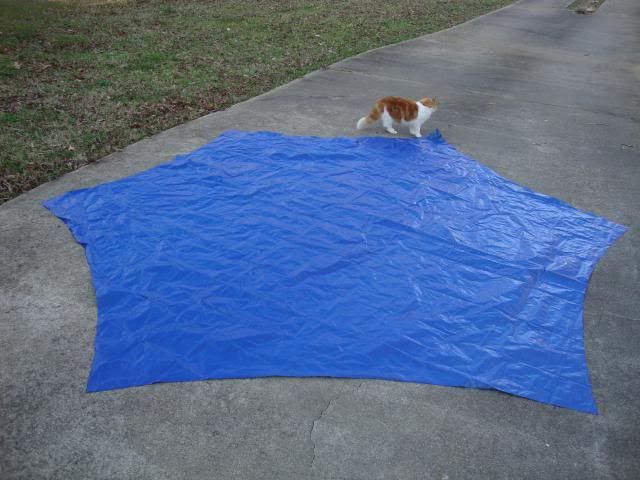
Beginning on Saturday morning, armed with my supplies I began to get the ball rolling. I’d previously downloaded the cat cut calculator that came with Blackbishop351’s BlackCat tarp instructions so the first order of business was to make the cat cut template. A trip down memory lane to middle school math told me that a hexagon is comprised of 6 equilateral triangles and that all I had to do was draw a circle on my tarp with the same radius as the length of my cat cut template, which was 72 inches, lay the template so the ends were touching the circlwe and trace around the edge. A 72 inch radius gave me overall dimensions of 12 ft x 10 ft (at which time I realized I could have used a 12 ft x 10 ft tarp and it would have been about 8 bucks cheaper…dangit!!).
Next I needed to find a suitable space to stretch out my tarp, draw out my circle and mark the sides with my template. My oldest daughter happened to be at a winterguard rehearsal at her high school…a place with wide hallways and other large rooms with nice flat floors – the perfect sort of place. I knew it wouldn’t be a problem if I used some of that floor space for an hour or so, so my younger daughter and partner in crime loaded up our supplies and headed for the school. We stretched the tarp out, taped it to the floor with some duct tape and got to work. It didn’t take long crawling around on the tarp on the hard floor to remind me why I’ve turned to a hammock for camping…it was killing my knees!! Once I had the tarp marked we cut it out then bundled up our scraps and headed out.
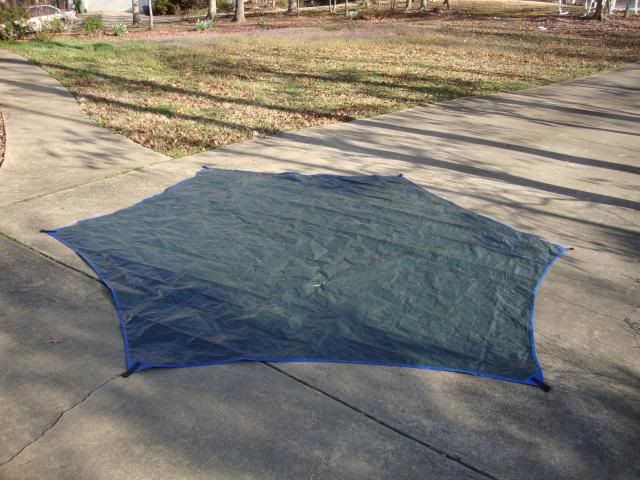
Once home from an afternoon of geocaching we spread the tarp out on the driveway to give it a good look over and begin to formulate a plan for the sewing…
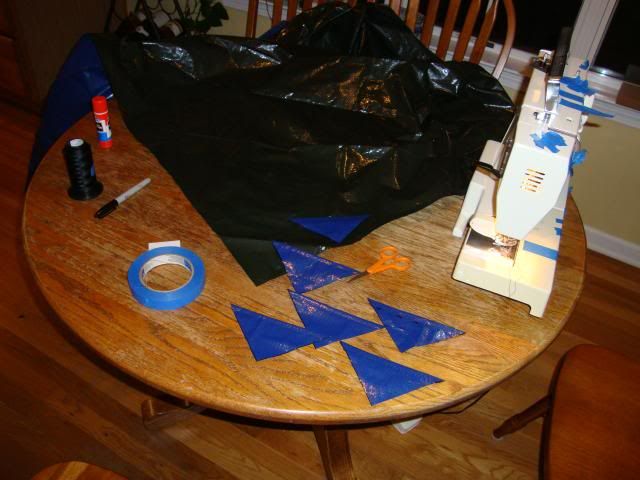
The process turned out to really be pretty simple but was made more difficult by working with large, heavy pieces of material in a relatively small space. Regardless, with a little ingenuity and some help from my daughter we were able to tackle the job without too much trouble.
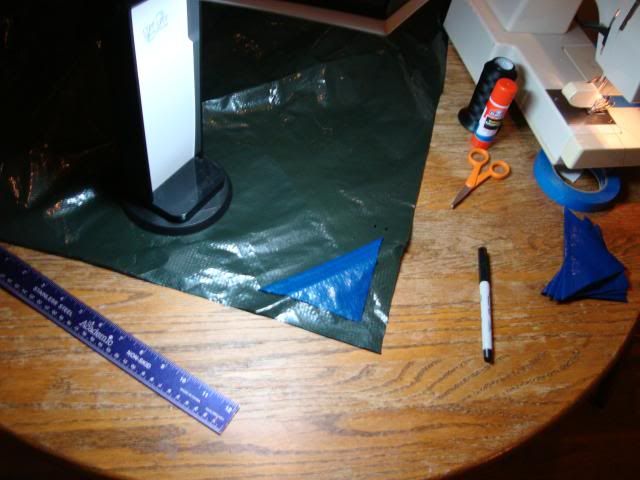
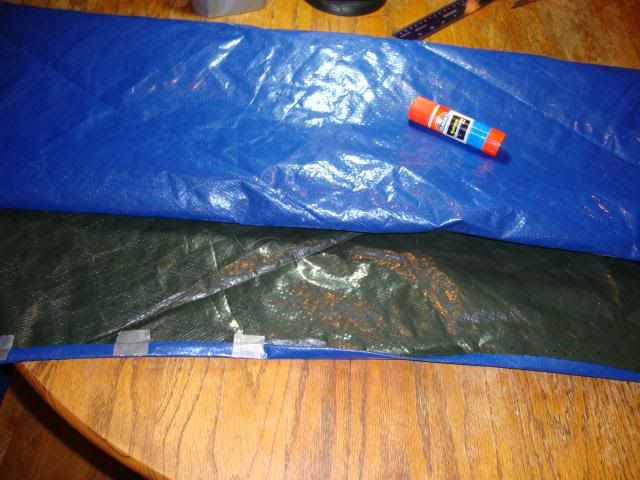
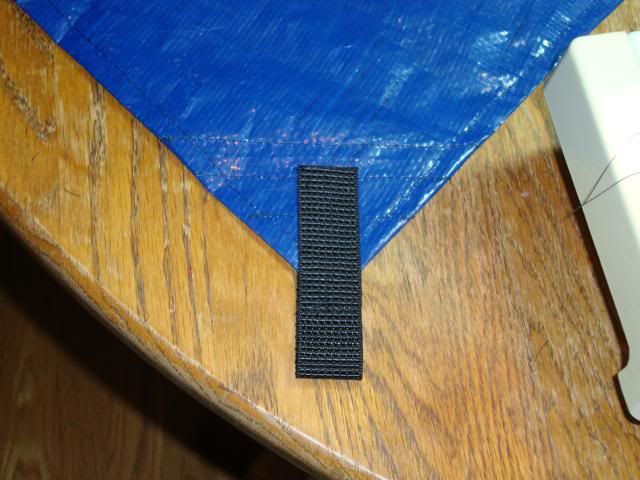
The first step was to make another template then make the corners reinforcement patches, cut out the corners and sew them onto the tarp. Since neatness counts I sewed in a single-fold hem on the top side of each corner piece which would be turned to the inside…
A little glue from a glue stick out of the school supply drawer held the corner pieces in place for sewing…
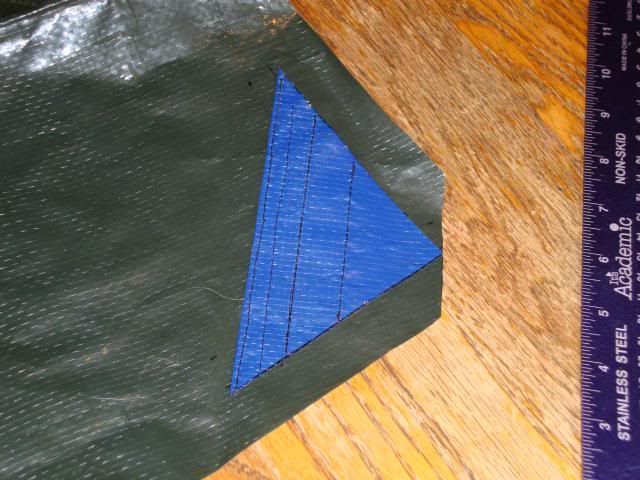
Then the corner pieces were sewn into each corner with three rows of stitching and again, since neatness counts I decided to mitre the corners...even though no one else would ever be able to see it…it just made me feel better to do it right…
The edges were finished with a rolled hem. I knew from building quite a few ripstop nylon kites that crisp folds and some tape would help keep things in place. Normally blue masking tape is sufficient but in this case a combination of glue stick glue and duct tape did the trick…
We started the sewing process around 6:00 in the evening and wrapped up the bulk of the sewing about 2:00 in the morning which included a little time out to cook and eat supper and a bit of distraction from a NCIS marathon.
Once the body of the tarp was finished, adding the corner tabs for the suspension and guy lines the next morning was a breeze…
The finished tarp looked like this…
Now I’ll admit I splurged a bit on the suspension and guy lines and bought a couple of small Figure 9’s for the suspension and a set of 4 Figure 9s with 8 ft reflective guy lines. I figured I could justify that cost since I knew I’d be able to use them on other tarps as well.
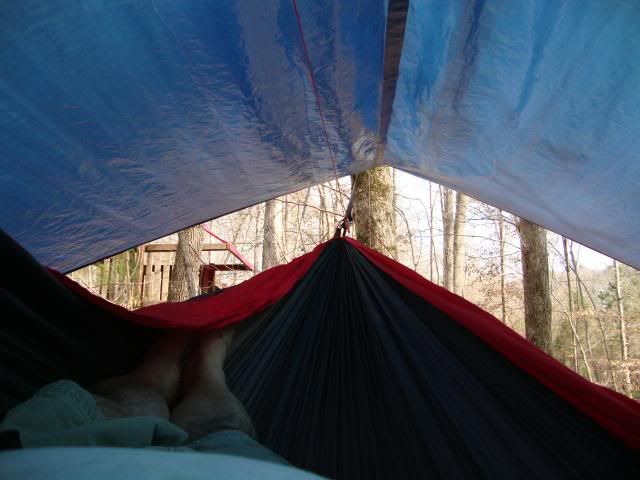
Once home from church and lunch Sunday afternoon I was finally able to hang my hammock and tarp. Didn’t turn out too bad if I do say so myself…
And then it was a time for an afternoon nap…
So what did I learn from this little adventure? First off, making a tarp is not all that hard if you have the space to do it, a decent sewing machine and some experience in using it. Having a large work surface like a sail maker’s table would have helped tremendously. Extra hands are a must. It also gave me a tremendous appreciation for the tallents of the cottage craftsmen that make tarps semi-professionally. I also came to the realization that $130 for a silnylon MacCat Ultra, which is about the same size as my tarp, is really a reasonable price considering the effort and materials that go into them. Can you guess what’s on my Christmas wish list?


 Reply With Quote
Bookmarks