


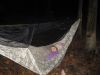
I ordered some the the camo fabric that Breyman was selling, while waiting for it to arrive, I was planning how to use it. I decided on a channel end, like the ENOs use, and to add a bug net with zippers on both sides. I am one that likes to switch the way I lay, sometimes head left, sometimes right. Having zippers on both side, means I can exit or enter from either side, and if I needed to adjust my UQ, I can do so with ease. Ordered noseeum and the zippers from DIY Gear Supply. These arrived either Thursday or Friday, not sure which, as I was in Nashville. Finally got time Sunday afternoon to start. Hemmed the hammock body, cut the noseeum, using DIY GSs tutorial, and got the zipper sewed to the noseeum. Didn't have much time yesterday, but was able to get the noseeum sewed to the hammock. Had it done, except for the very ends, I didn't stitch them, yet. Today I made the zing-it ridge line, and finished sewing the zipper ends to the hammock. Used two short continiuos loops on the ends to pull the hammock together. The total weight, without whoopies or straps is 20.7oz. So far I am pretty happy with the set up. Never thought I would make a hammock with the integrated bug net, and now I have one.. This project sure makes me appreciate all the cottage guys and gals that do this for a living. It was a lot of fabric trying to keep it seperated while going through the machine. I was pretty amazed that I didn't have to pull out "Jack the Ripper" and pull any seams apart. The last time I made something with this much fabric, some got caught underneath and I had to rip it apart and restitch. Going out now to see if I can get a few pics, before it gets to dark......RR


 Reply With Quote


 sorry
sorry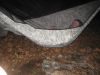


Bookmarks