


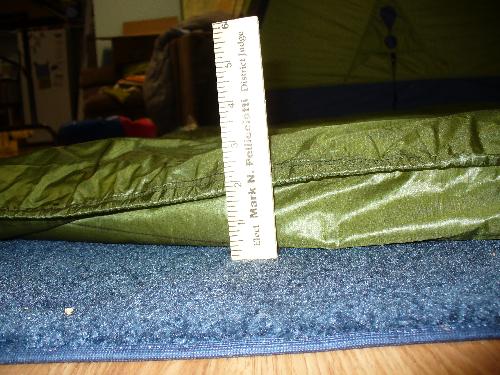
My DIY Top Quilt is now completed (all I need now is some cool weather). I started with a basic plan of a straight taper and decided on 50" at the shoulders and 38" at the foot box with a 72" length and a 2" baffle height.I used the spread sheet found here http://www.hammockforums.net/forum/s...ad.php?t=48444 but made my own modifications and fill plans. I didn't know my down fill power due to the fact that most of my down was being scavenged from an old coat and vest that have been taking up space in my closet for far too long. So I made a test channel and filled it with a sample of the down and determined my fill weights from there.
Next came the shipment from Scott at DIY Gear Supply of my Forest Green ripstop and necessary supplies. No photos of cutting out the fabric, but I wish I had laid out the pattern first with tape since I drew one bad line and it was some added confusion that I didn't need. After the fabric was cut out I added a roll hem to all sides of both pieces. I hadn't seen any mention of making corners on a quilt, but it seemed like the right thing to do, so I injected a little thread and formed a large tub out of the bottom piece before starting on the baffles.
The baffles were cut out and I placed a 2" wide piece of masking tape marked with the baffle length on each piece of mesh. On to attaching the first baffle. I taped it into place and then thread injected it, running my stitches along the edge of the masking tape.
Moving on to the next one.
As you progress into the middle you need to keep everything neat so nothing accidentally gets stitched.
This gets even more important as you start to attach the top to the baffles. Here is a shot of one of the mid-quilt baffles being attached to the top.The far left roll of fabric is the finished section of quilt. Masking tape has been removed from this section so it doesn't have a forced width to the roll. The next roll of fabric is the bottom layer with baffles attached still with the masking tape. The roll of fabric to the right is the top that has not yet been attached to the baffles.
When the baffles were completed I closed up one side and hung it up to fill. I decided to use a large cone made out of a sheet of thin plastic. I already had bags filled with the measured amount of down for each chamber.
Done with the filling and ready for closure.


 Reply With Quote
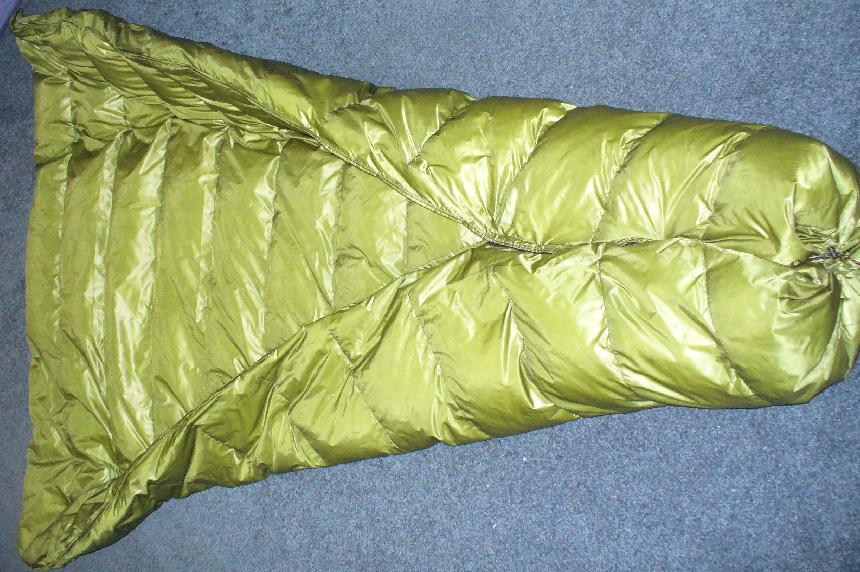


 H.Y.O.H.


Bookmarks